¶ 1. Tools:
S2.5 Allen key
Flathead Screwdriver
¶ 2. Disassembly Steps:
¶ Step 1: Turn off the Device
Before replacing the hotbed adapter board, make sure the device is turned off and the power is disconnected for safety.
¶ Step 2: Lay Down the Printer
Lay the printer down with its bottom facing you.
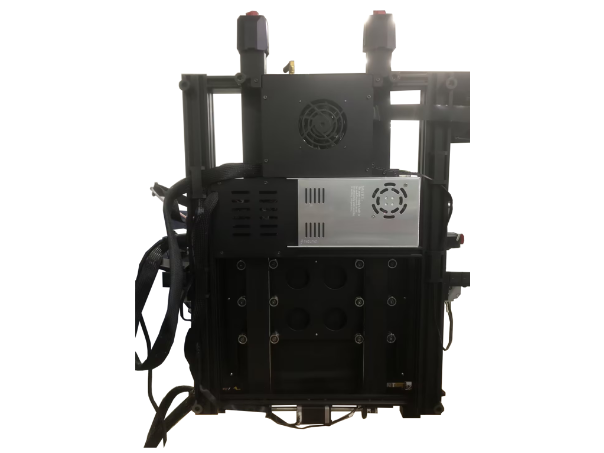
¶ Step 3: Remove the Cover of the Hot Bed Adapter Board
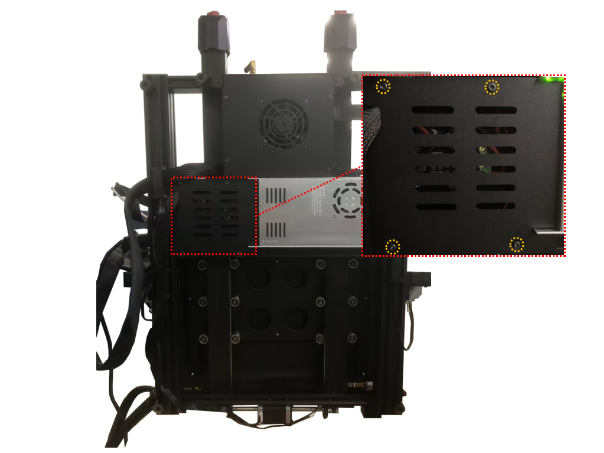
Use the S2.5 Allen key to unscrew the 4 screws fixing the cover of the hotbed control board. Place the cover aside.
¶ Step 4: Disconnect Wires
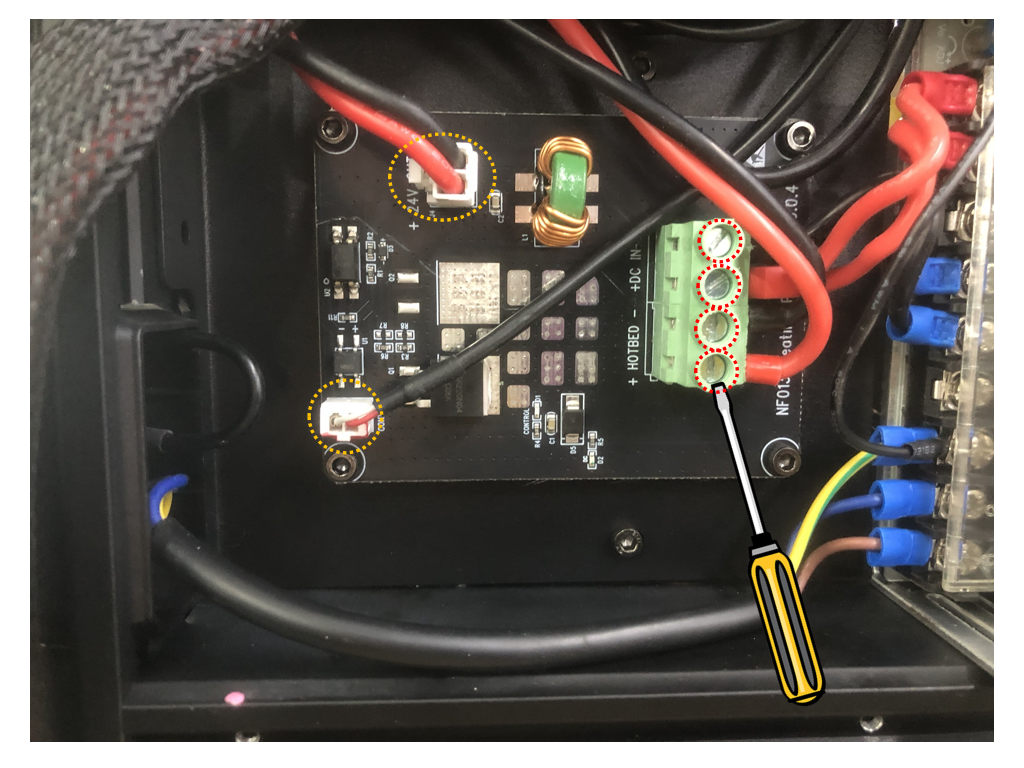
Use a Flathead Screwdriver to loosen the "HOTBED" port (hotbed end) and "DC IN" port (power end) on the hotbed adapter board.
Remove the wires. Then, unplug the "24V OUT" wire (outputting 24V voltage wire to the mainboard) and the "CONTROL" wire (hotbed control board wire).
¶ Step 5: Remove the Hot Bed Adapter Board
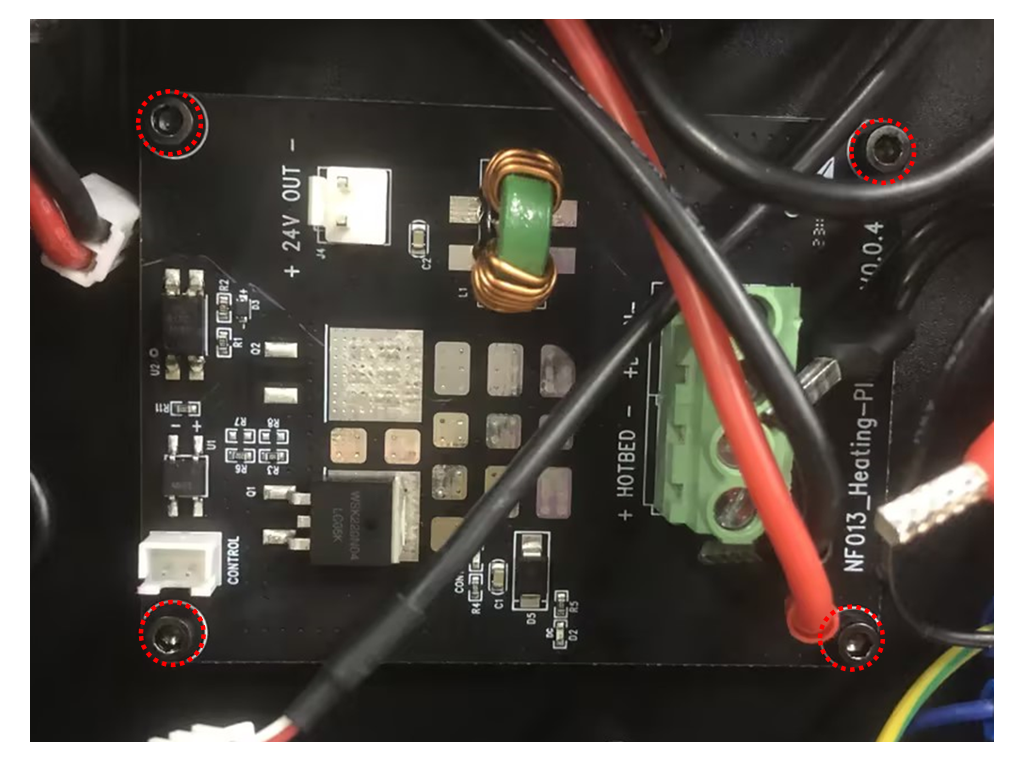
Use the S2.5 Allen key to loosen the 4 screws fixing the hotbed adapter board. Take the board down.
 |
 |
¶ 3. Installation Steps:
¶ Step 1: Install the Hot Bed Adapter Board
Take out the new hotbed adapter board and screws. Align the hotbed adapter board with the screw holes
on the sheet metal and use the S2.5 Allen key to tighten the screws to secure it.
 |
 |
¶ Step 2: Install Wires
From the red-black wires coming out of the power switch, insert the red wire into the "DC IN+" port and the black wire into the "DC IN-" port. Use a Flathead Screwdriver to tighten the wires to ensure a secure connection.
For the hotbed heating cable, insert the red wire into the "HOTBED+" port and the black wire into the "HOTBED-" port. Similarly, use a Flathead Screwdriver to tighten the wires to ensure a tight connection. Then, plug in the "24V OUT" wire (outputting 24V voltage wire to the mainboard)
and the "CONTROL" wire (hotbed control board wire). Ensure the plugs are fully inserted into the respective ports,
and use a screwdriver to tighten the wires to maintain a secure connection.

¶ Step 3: Install the Cover of the Hot Bed Adapter Board
Take out the previously removed cover and screws. Place the cover of the hotbed control board on the base,
ensuring that the reserved path for the hotbed wire aligns with the groove.
After guiding the wires through the reserved position, align the cover with the groove on the sheet metal.
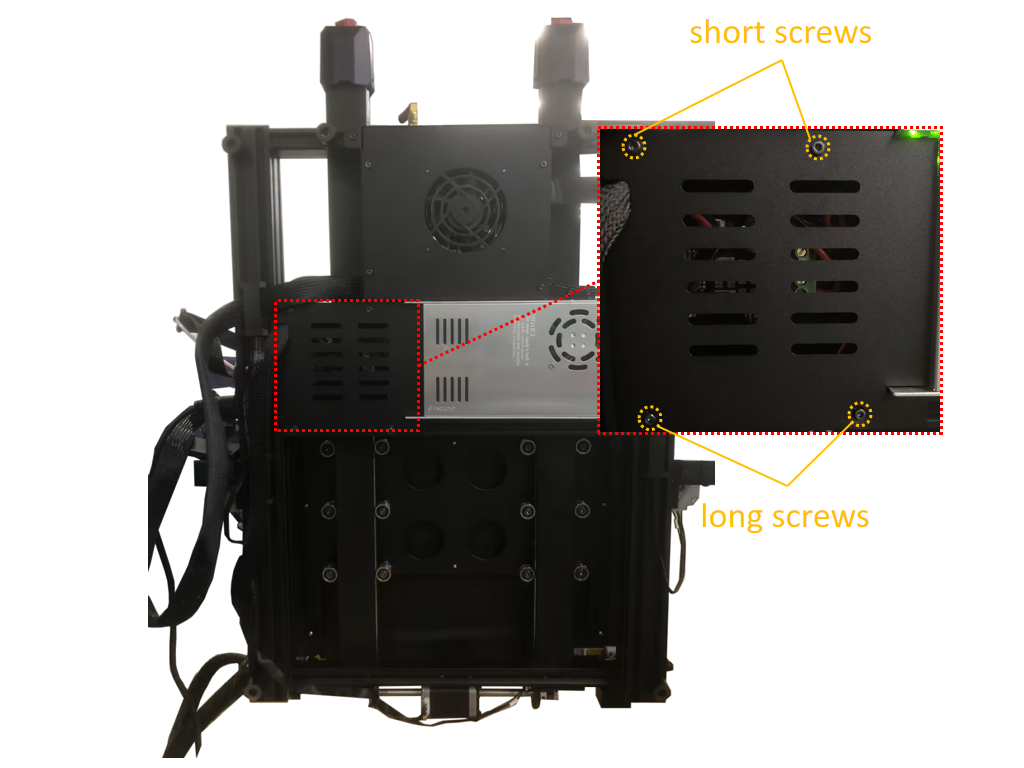
Use the S2.5 Allen key to tighten the 4 screws (2 long, 2 short) of the cover.
Ensure that the long screws are installed in the lower position, and the short screws in the upper position.
Make sure all screws are securely tightened for stable installation.
 |
 |
¶ 4. Test Functions:
Place the device upright, plug in the power cord, and turn on the power switch. Wait for the device to start and enter the main interface.
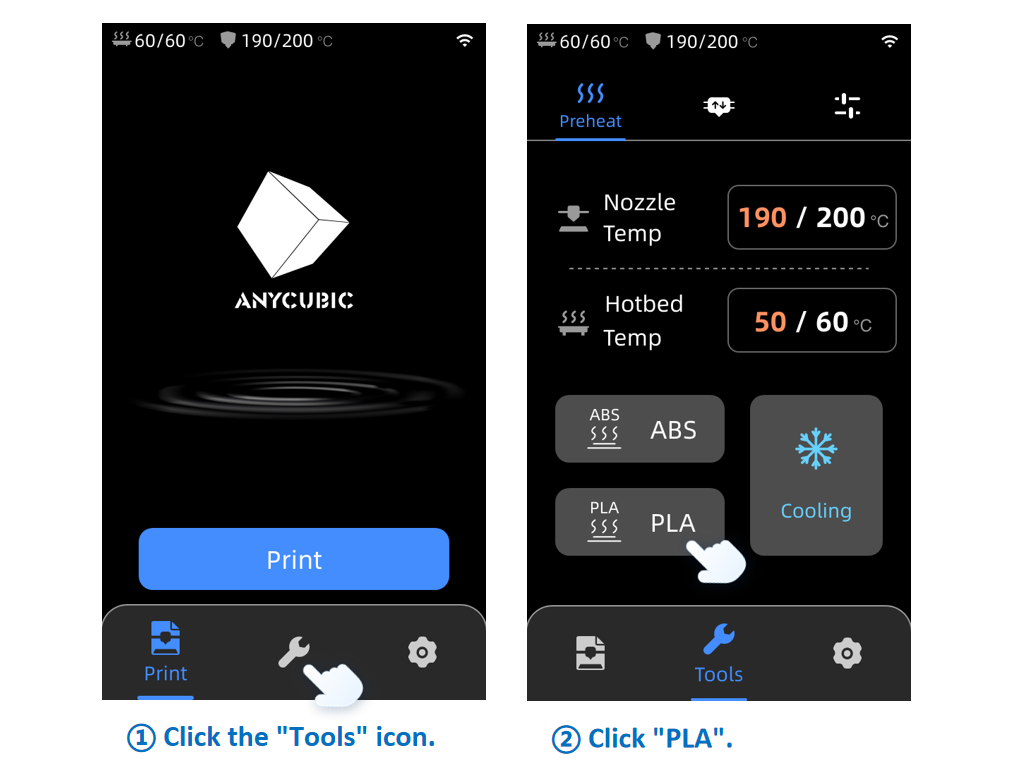
Click the "Tools" icon, then in the preheating interface, click "PLA." Observe carefully to ensure that the heating is normal.
If the above steps do not provide assistance or if you encounter any other issues during subsequent use, we recommend that you create a support ticket.
The after-sales engineers will assist you in finding a solution to the problem(Reply time :1 working day)
Please click this link to submit your ticket: