Please stop the printing process and follow the steps below to check your printer.
¶ 1.Adjust X/Y Axis Belts
Turn the X/Y axis tensioner knobs clockwise to tighten them fully, and then turn them counterclockwise in one full rotation.
¶ 2.Adjustment of Pulley Tightness
If you encounter layer shifting issues, it may be due to the pulleys being adjusted too tightly.
Please try loosening the pulleys slightly to ensure smooth movement of the corresponding modules and no noticeable wobbling when shaken.
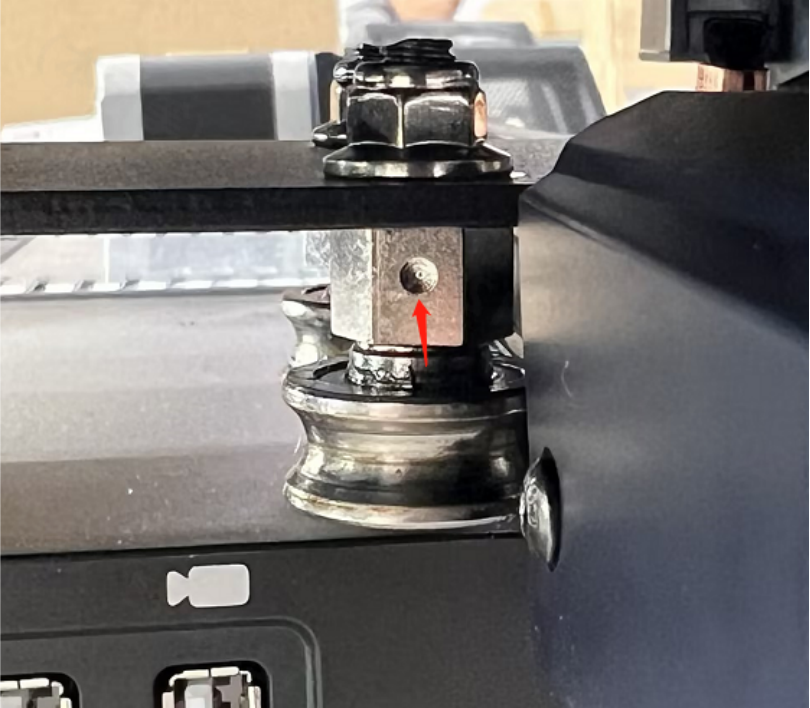
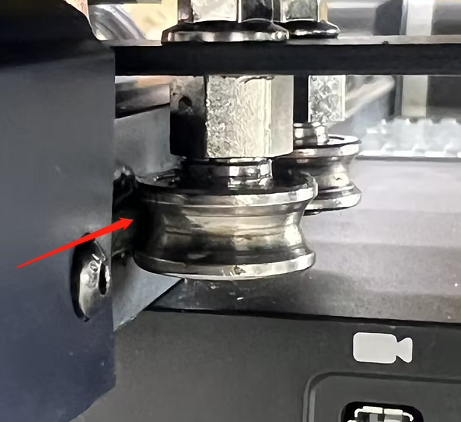
① Use an open-end wrench to adjust the hex eccentric spacers located beneath the print head until it moves smoothly without wobbling.
② Use an open-end wrench to adjust the hex eccentric spacers located beneath the hotbed until it moves smoothly without wobbling.
Adjust Steps:
- Please confirm that the concave mark on the nut is aligned with oneself at first, clockwise for tightening and counterclockwise for loosening

- Then loosen the bearings until you see a gap between the guide rail and the bearings

- Please tighten the bearing until it just fits snugly with the guide rail, there is no need to adjust it to a tighter state

¶ 3.Check for Looseness in Synchronous Pulleys on the Motors
If you notice layer shifting occurring in the left-right direction, you can skip this step.
The Y-axis drive of the Kobra 2 Max uses a combination of motors and synchronous pulleys.
During transportation, if the screws on the synchronous pulleys become loose, it may lead to Layer Shift.
It is recommended to check if the screws align with the cut plane of the Y-axis motor shaft and if they are loose.
Please refer to the image below, move the heated bed, and confirm that there is at least one screw on each side aligned in a straight line.
If they are not aligned in a straight line, use an M2.0 hex wrench to slightly loosen the two screws on the synchronous pulley.
Move the synchronous pulley outward a bit until you can see the cut plane of the Y-axis motor shaft.
Align the screw holes with the cut plane of the Y-axis motor shaft and then tighten the screws.
¶ 4.Check if the Y-axis motor is parallel
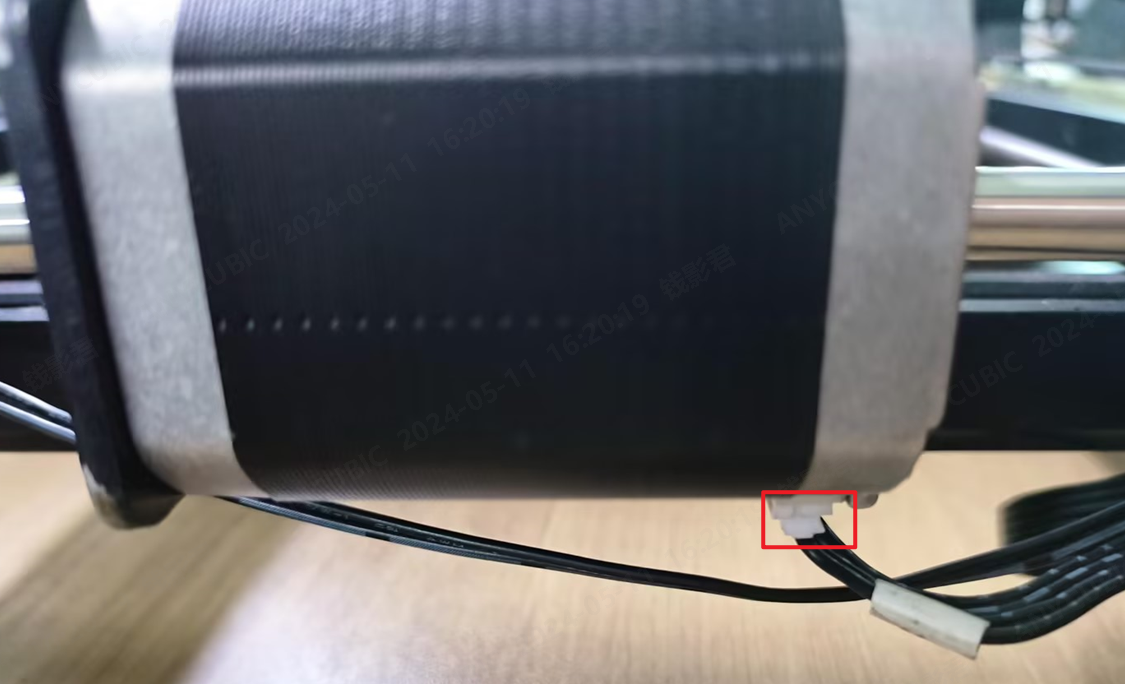
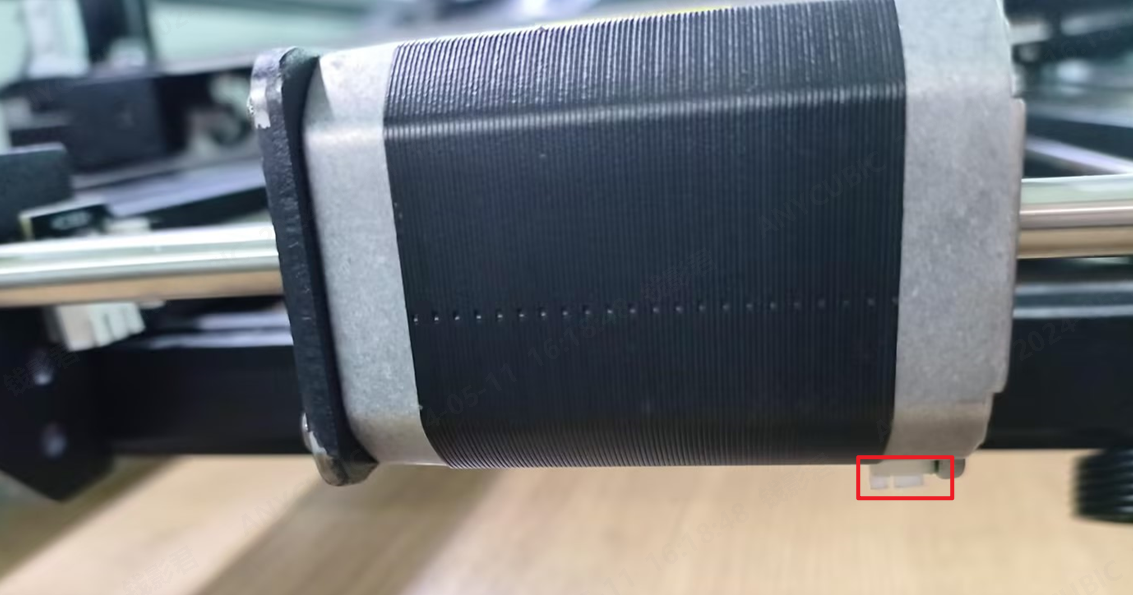
If the Y-axis motor is skewed below, it may cause the model to split-layer.

Adjust Steps:
- First turn off the printer and unplug the motor connecting wire.

- Use S2.5 allen key to remove the four screws securing the motor.

- Adjust the motor position according to the figure below so that the motor is parallel.

- Use S2.5 allen key to tighten the four screws securing the motor.

- Finally, please insert the motor connection wire back into the interface, then the adjustment is completed.

¶ 5.Vibration Compensation
Place the machine on a stable surface or table that is not prone to vibrations, and then perform the vibration compensation operation.
(Do not place the machine on a smooth surface to prevent it from moving due to vibrations during the testing phase.
Also, avoid touching the machine during the machine's resonance detection.)
¶ 6.Parameter Settings
You could try setting the printing speed to a Stable mode during printing.
Or use official test files to verify if the issue is caused by improper printing parameter settings.
The above troubleshooting methods did not resolve the issue.We recommend that you create an after-sales ticket provide the after-sales engineer
with feedback on the previous inspection process and results.
The after-sales engineers will assist you in finding a solution to the problem(Reply time :1 working day)
Please click this link to submit your ticket: