¶ Required Tools for Inspection:
● M2.5 Allen Key
● Multimeter
● “Slotted ” Screwdriver
¶ 1.Poor Wiring Connection
Troubleshooting Steps:
¶ Step 1: Turn off the printer
Before performing the following troubleshooting steps, please ensure that the printer is turned off and the power is disconnected for safety.
¶ Step 2: Disassemble the printer's bottom cover
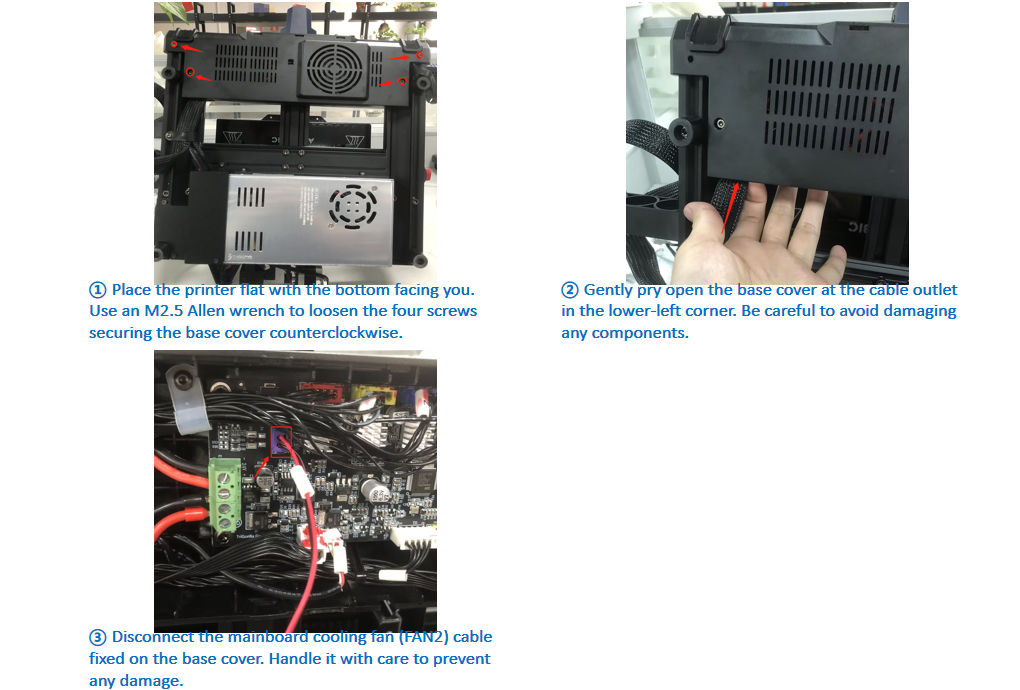
① Place the printer flat with the bottom facing you. Use an M2.5 Allen wrench to loosen the four screws securing the base cover counterclockwise.
② Gently pry open the base cover at the cable outlet in the lower-left corner. Be careful to avoid damaging any components.
③ Disconnect the mainboard cooling fan (FAN2) cable fixed on the base cover. Handle it with care to prevent any damage.
¶ Step 3: Reconnect the heated bed heating wire
Loosen the screw that secures the heated bed heating wire terminal with a “Slotted ” Screwdriver, then reconnect it and tighten the screw with the same tool. Finally, gently pull the heating wire to ensure a secure connection without loosening.
¶ 2.Hardware Inspection
¶ Notes:
Hardware inspection requires some electrical knowledge, and safety must be ensured during the operation. Please follow the steps below for inspection:
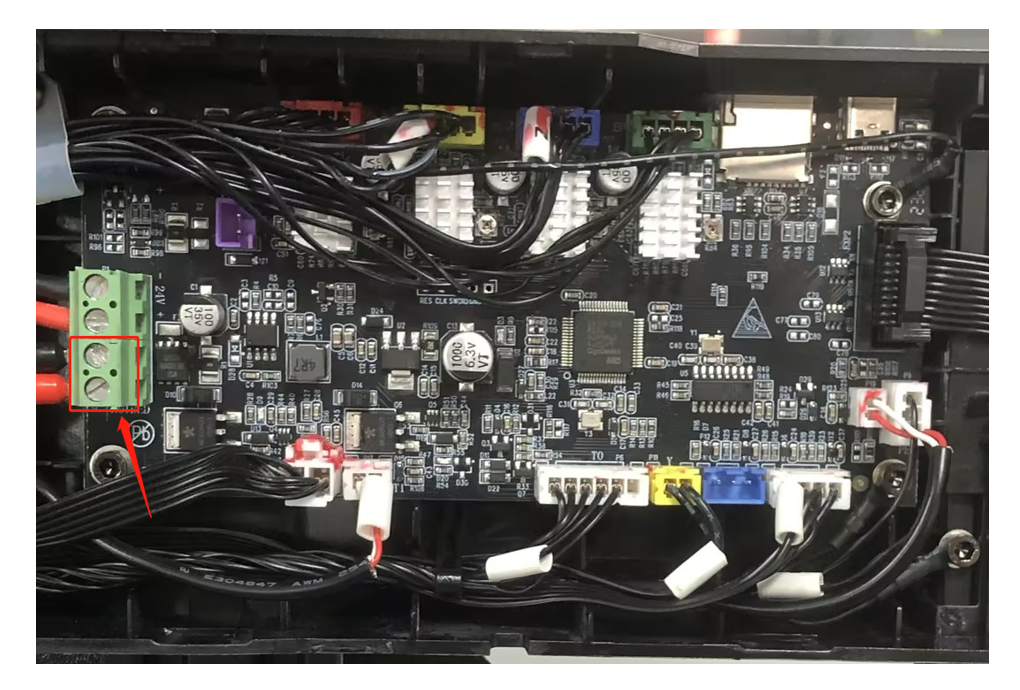
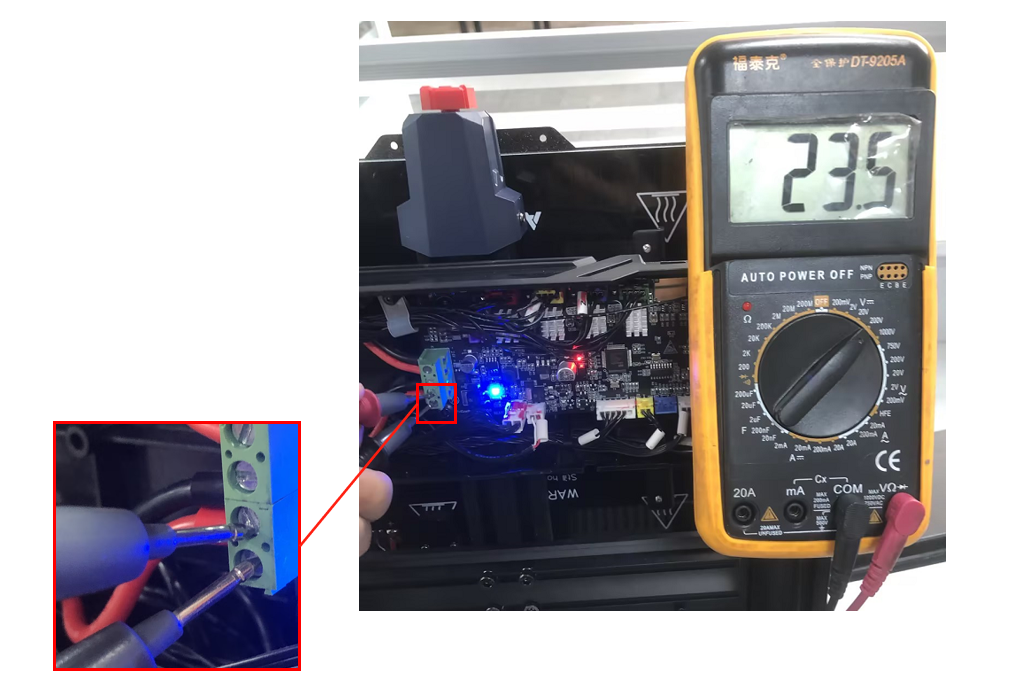
¶ Step 1: Measure the voltage at the mainboard end
Connect the printer to the power supply and turn it on. Manually adjust the heated bed temperature to 50°C. Then, set the multimeter to the 200V DC voltage range. Place the black probe (negative) on the third screw from the top to the bottom of the heated bed heating port on the mainboard. Place the red probe (positive) on the fourth screw from the top to the bottom of the heated bed heating port on the mainboard. Measure whether the heated bed heating on the mainboard has a voltage of 24±2V. If the measured voltage is within the normal range (24±2V), then the mainboard is normal. Otherwise, if the measured voltage is not within the range, first measure whether the power input voltage has a voltage of 24±2V. If the power input voltage is within the range, it indicates that the mainboard may be faulty, and you can try replacing the mainboard. If the power input voltage is not within the range and the measured value is the same as the measured value of the hotend heating, it indicates that the power supply may be faulty. Please try contacting the customer service of the online store where the equipment was purchased, provide a detailed description of the troubleshooting process, and make a final judgment and resolution.
For the steps corresponding to the disassembly of components mentioned above, simply follow the opposite sequence when assembling.