¶ 1.Tools Required:
M2.5 Allen wrench
¶ 2.Disassembly Steps:
¶ Step 1: Turn off the Machine
Before replacing the Y-axis motor, make sure to turn off the machine and disconnect the power for safety.
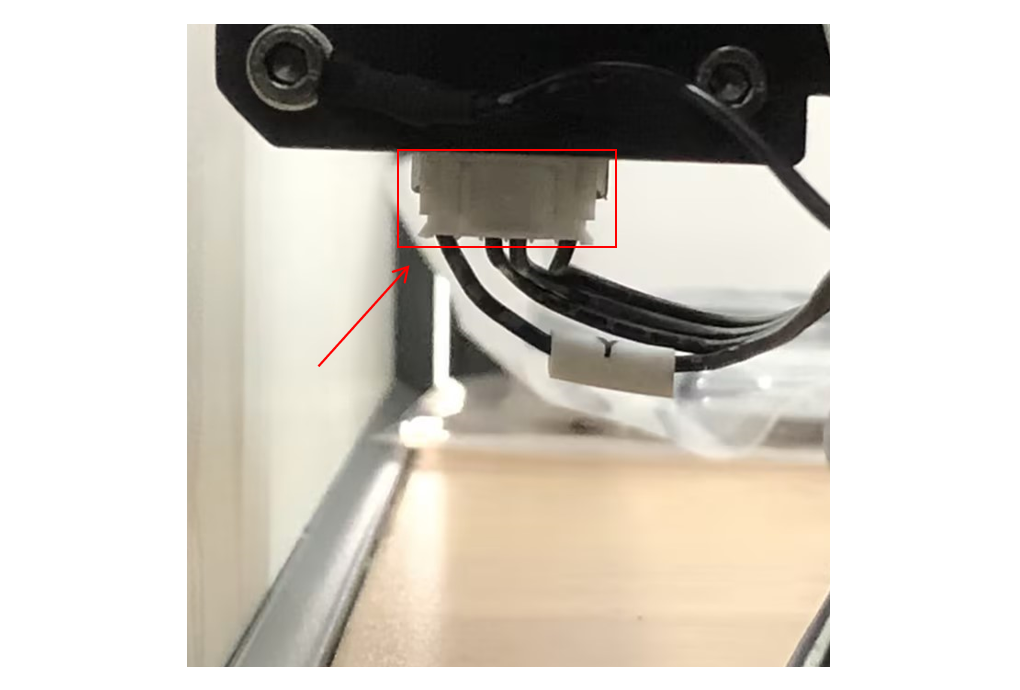
¶ Step 2: Disconnect the Y-Axis Motor Cable
Refer to the image below and unplug the Y-axis motor cable.
¶ Step 3: Loosen the Y-Axis Tensioner
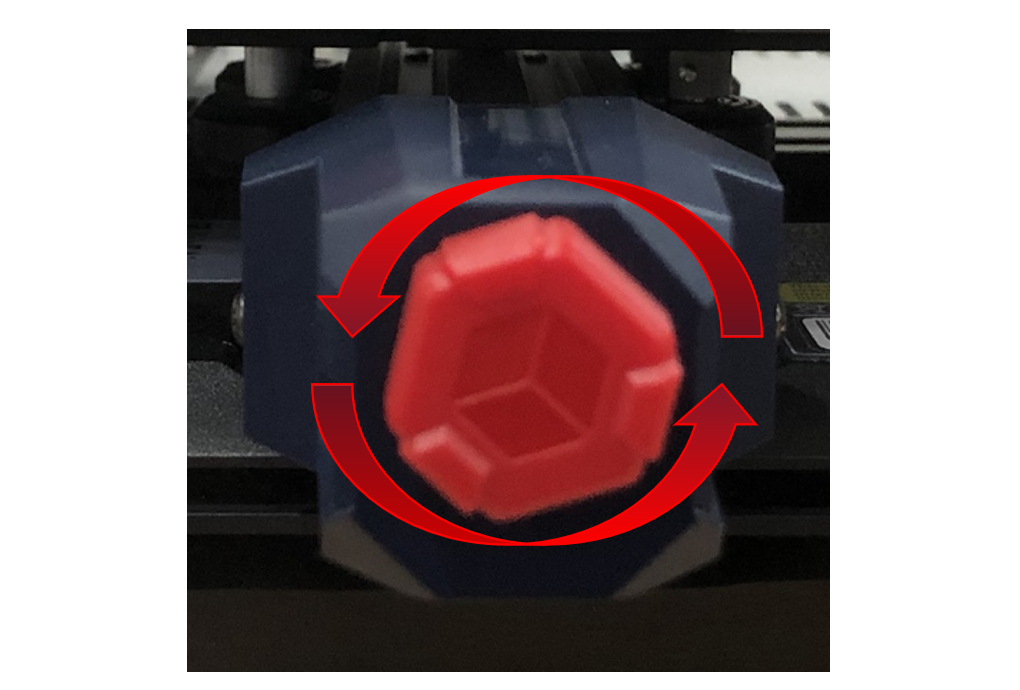
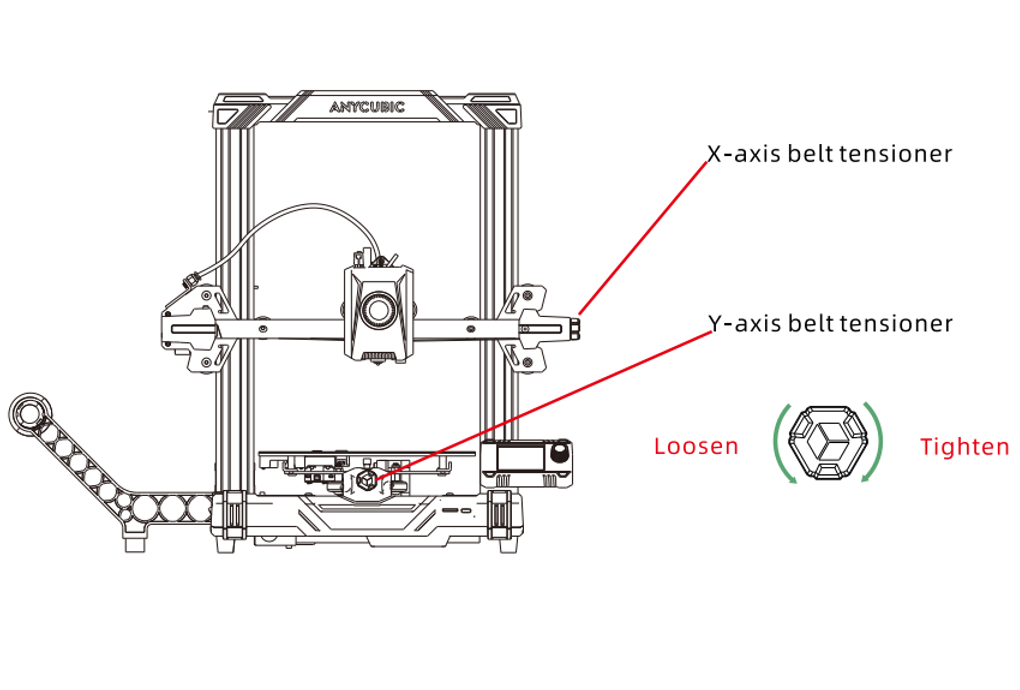
Rotate the red knob on the Y-axis belt tensioner counterclockwise to loosen it. This will facilitate the installation of the new Y-axis motor.
¶ Step 4: Remove the Y-Axis Motor
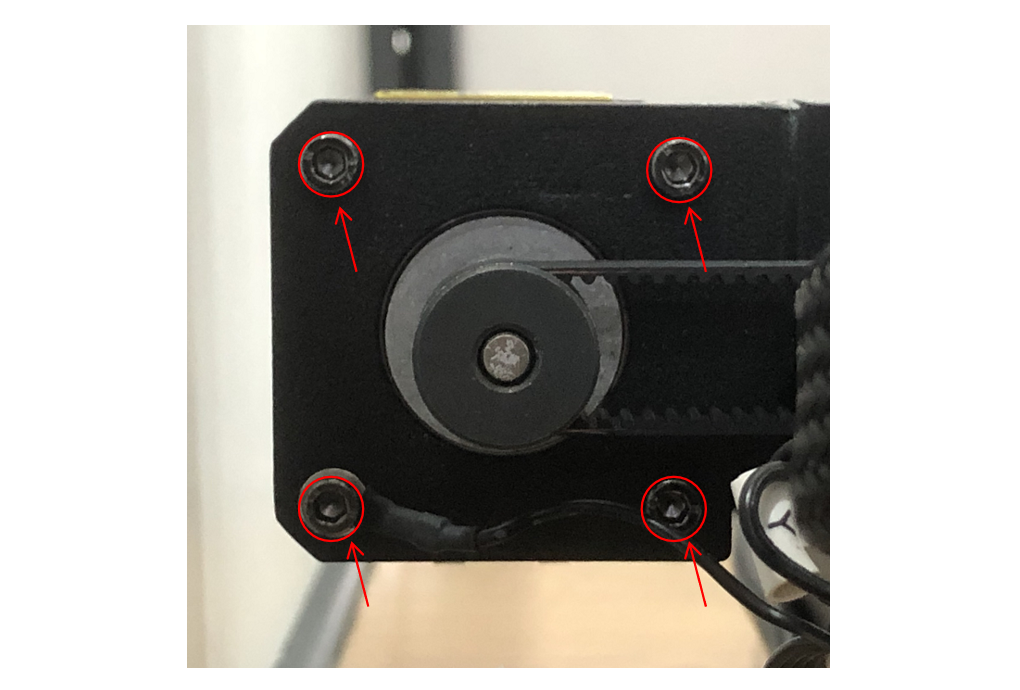
Use the M2.5 Allen wrench to unscrew the 4 screws holding the Y-axis motor, then remove the Y-axis motor.
¶ 3.Testing the Motor:
Remove the new Y-axis motor and plug the Y-axis motor cable into the motor connector. Connect the machine's power cable and turn it on. On the main interface, select the "Settings" icon - "Move Axis" - "Home Y."
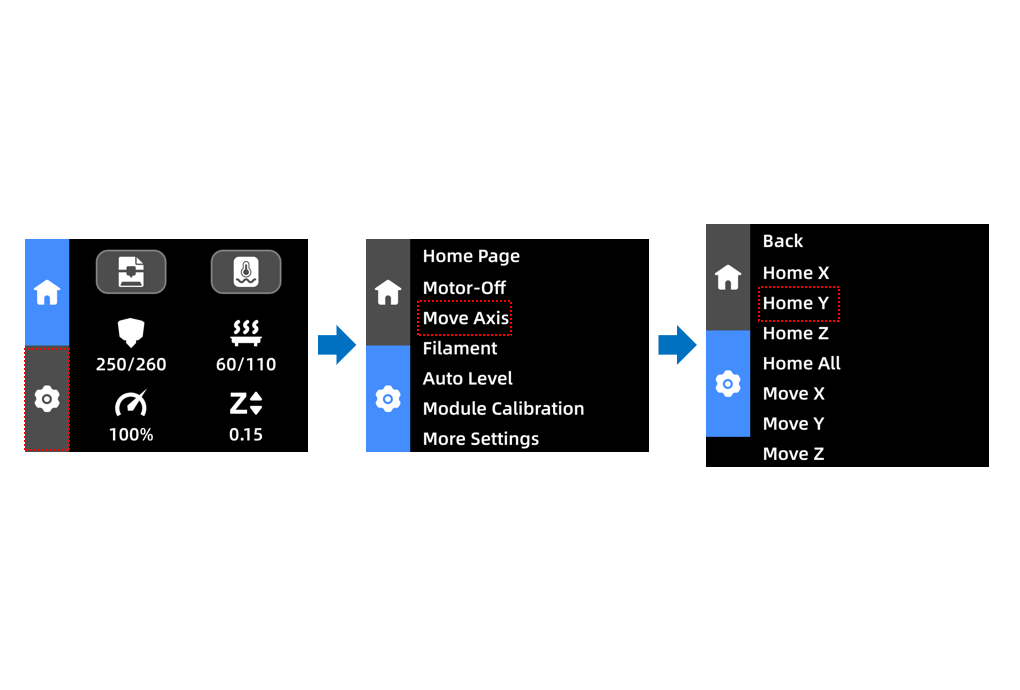
Observe if the new Y-axis motor rotates correctly. After a brief moment, the machine control screen will display the error message "Homeing Failed: Y," which is a normal occurrence.
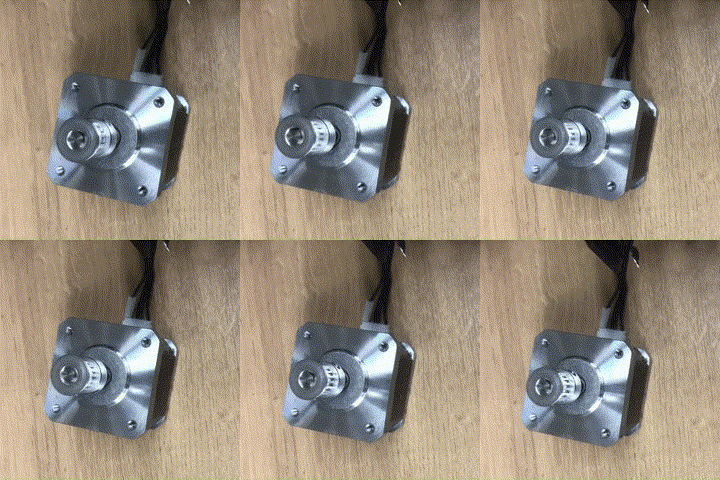
If there is no problem, safely shut down the machine and disconnect the power cord and Y-axis motor cable.
¶ 4.Installation Steps:
¶ Step 1: Install the Y-Axis Motor
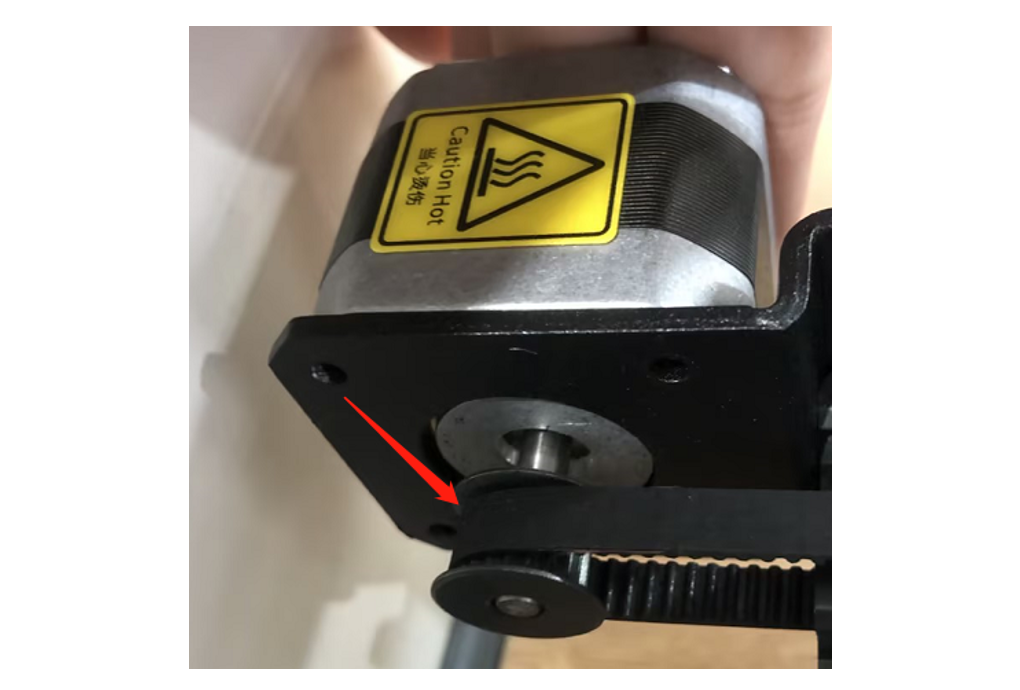
① Install the new Y-axis motor onto the Y-axis metal plate (Note: Ensure that the belt is fully engaged with the Y-axis motor's timing pulley, and the Y-axis motor connector is facing downward).
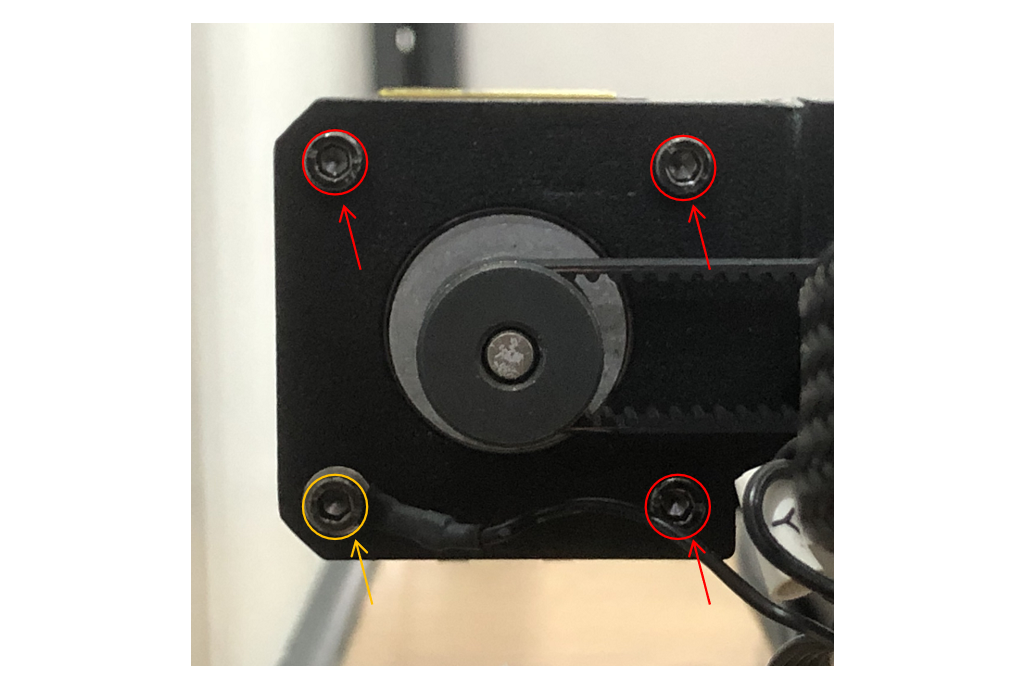
② Take the 4 screws that were removed when disassembling the old Y-axis motor and use the M2.5 Allen wrench to pre-lock each screw one by one. Once all 4 screws are pre-locked, tighten them. Note: For the yellow-marked position, you must place the ground wire over the screw before securing it to the Y-axis motor.
¶ Step 2: Install the Cable
Plug the Y-axis motor cable into the Y-axis motor connector.

¶ 5.Adjusting Belt Tension:
Rotate the Y-axis tensioner knob clockwise until it is tightened to the maximum, then rotate it counterclockwise one turn.
After replacement, please level your printer.