¶ 1. Tools:
S2.5 Allen key
S2.0 Allen key
¶ 2. Disassembly Steps:
¶ Step 1: Turn Off the Device
Before replacing the X-axis pulley, ensure that the device is turned off, and disconnect the power for safe operation.
¶ Step 2: Remove the Extruder
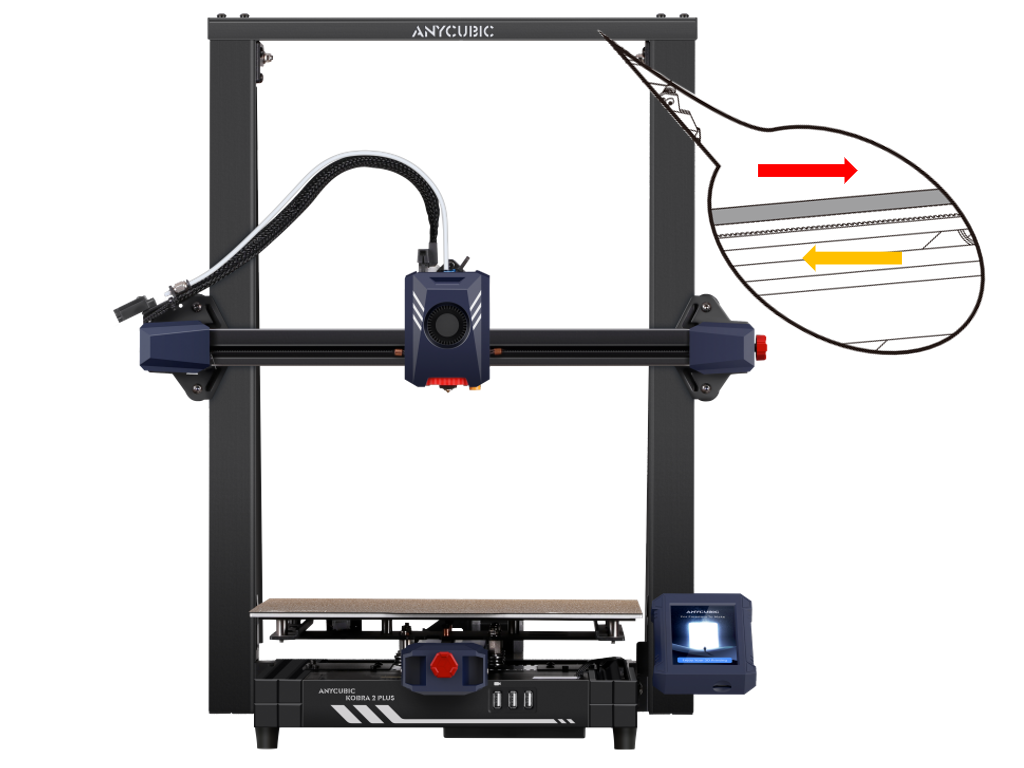
① Pull the Z-axis timing belt to raise or lower the print head to the middle position of the Z-axis for subsequent disassembly.
Note: Pulling to the right will lift the print head (direction of the red arrow), pulling to the left will lower the print head (direction of the yellow arrow).
② Use an S2.5 Allen key to unscrew the 4 screws securing the extruder module, and place the extruder aside.
Since the wires and PTFE tube on the extruder are not disconnected, the range of movement will be limited; just make sure it is within the active range.

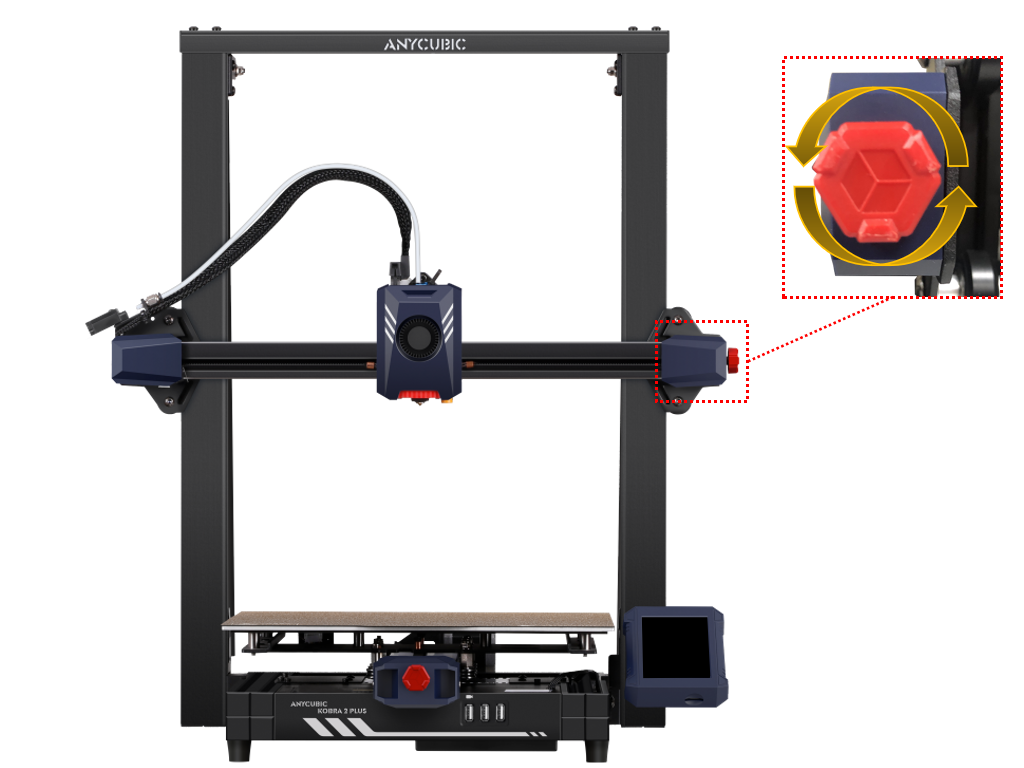
¶ Step 3: Remove the X-axis Belt Tensioner
① Rotate the red knob on the X-axis belt tensioner counterclockwise and remove it, placing it aside for later installation.
② Use an S2.0 Allen key to unscrew the front and rear 2 screws securing the X-axis belt tensioner and remove the outer shell.
 |
 |
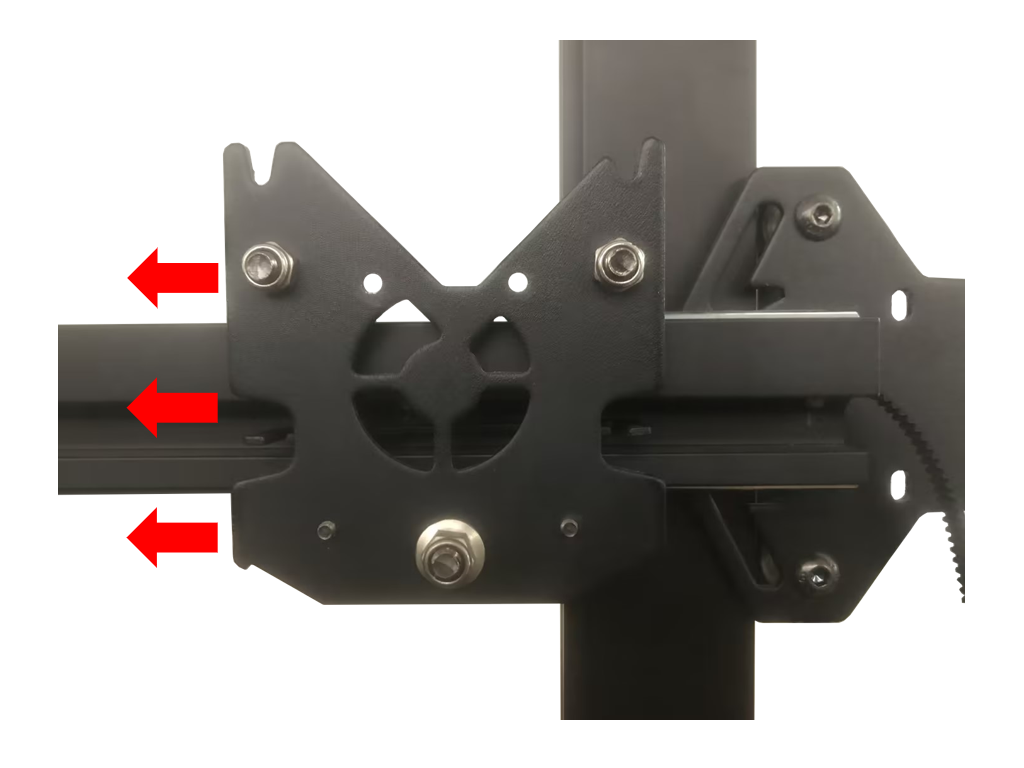
¶ Step 4: Take off the X-axis Sheet Metal
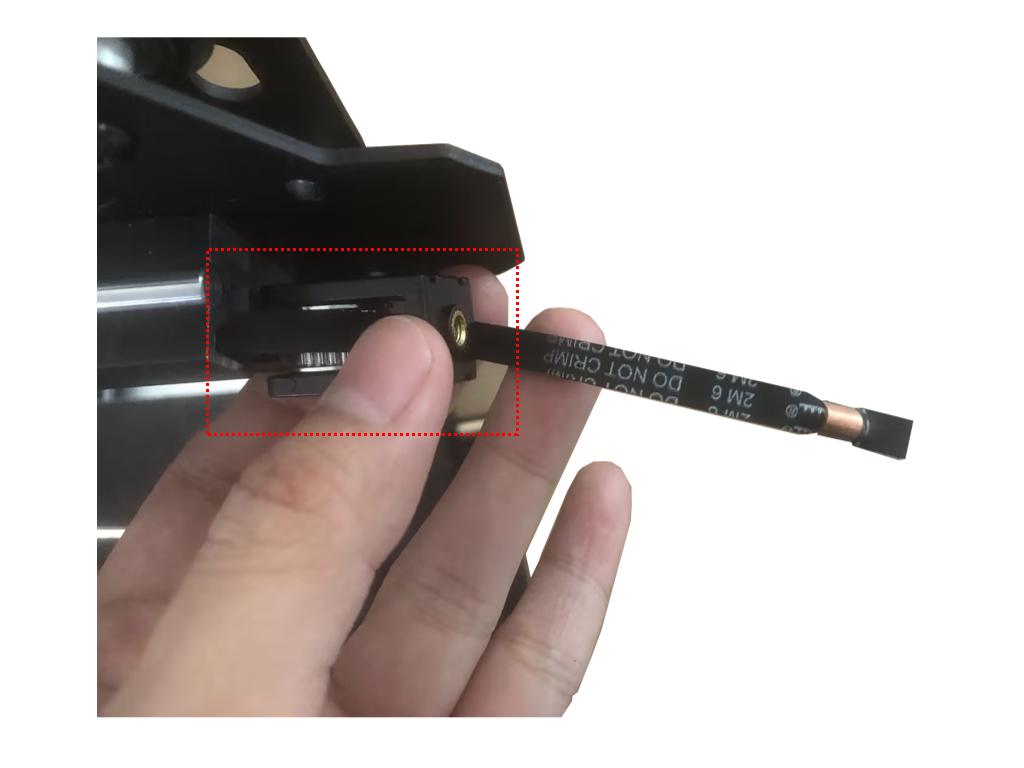
① Use a tool to remove the belt copper buckle at the front of the X-axis sheet metal, take off the pulley assembly surrounded by the belt, and place it aside.
 |
 |
 |
② Slide out the X-axis sheet metal from the direction of the X-axis tensioner and take out the X-axis sheet metal.
 |
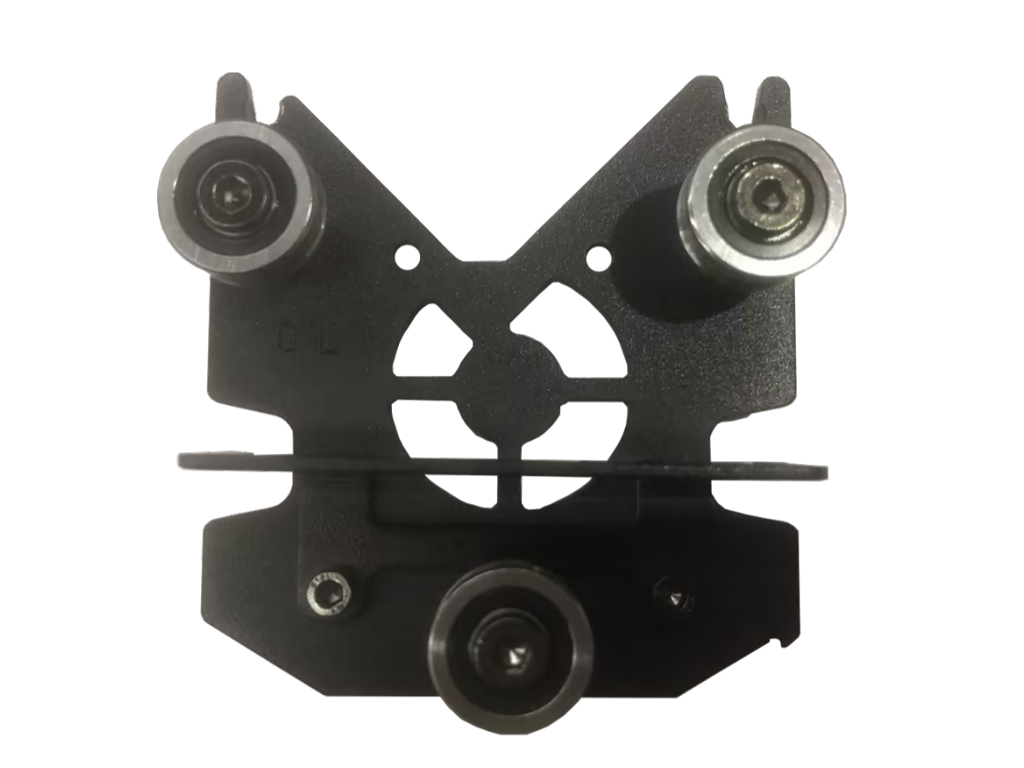 |
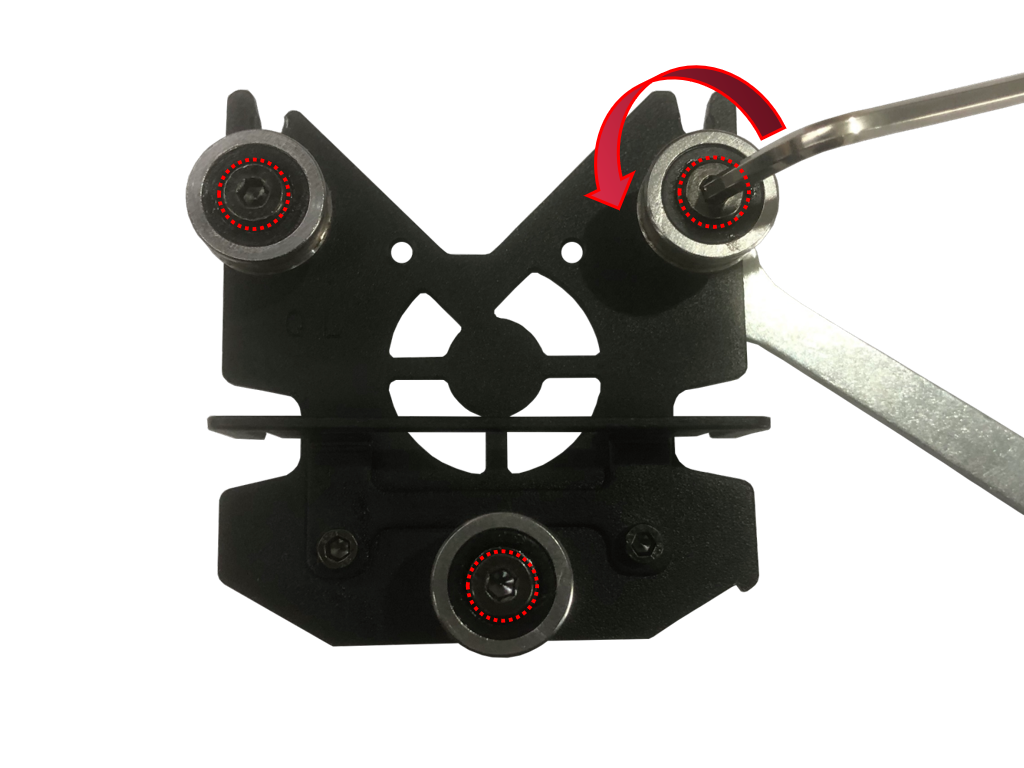
¶ Step 5: Disassemble the X-axis Pulley
Use an open-end wrench to secure the nut, then use an S3.0 Allen key to counterclockwise unscrew the 3 spacer screws, and remove the pulley, screws, spacers, and nut.
¶ 3. Installation Steps:
¶ Step 1: Install the X-axis Pulley
① Take the new X-axis pulley and assemble it with the previously removed screws and spacers.
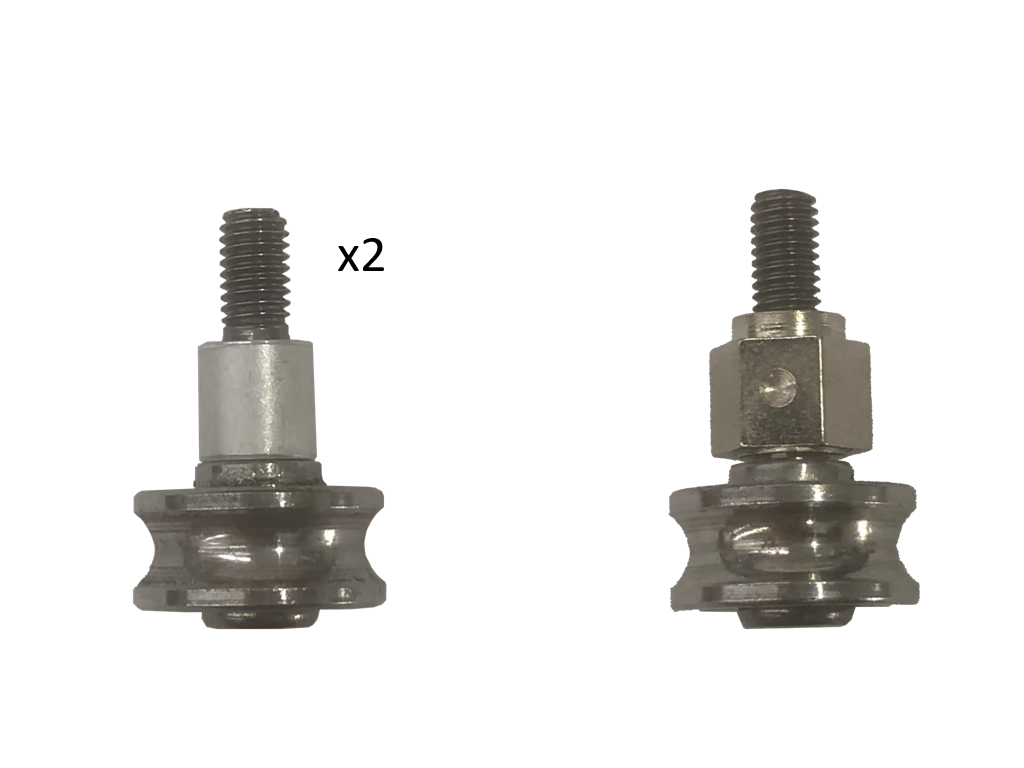
② Install the newly assembled pulley onto the X-axis sheet metal.
Take the previously removed nut, screw it onto the screw, secure the nut with an open-end wrench, then use an S3.0 Allen key to clockwise tighten each screw one by one.
 |
 |
 |
|
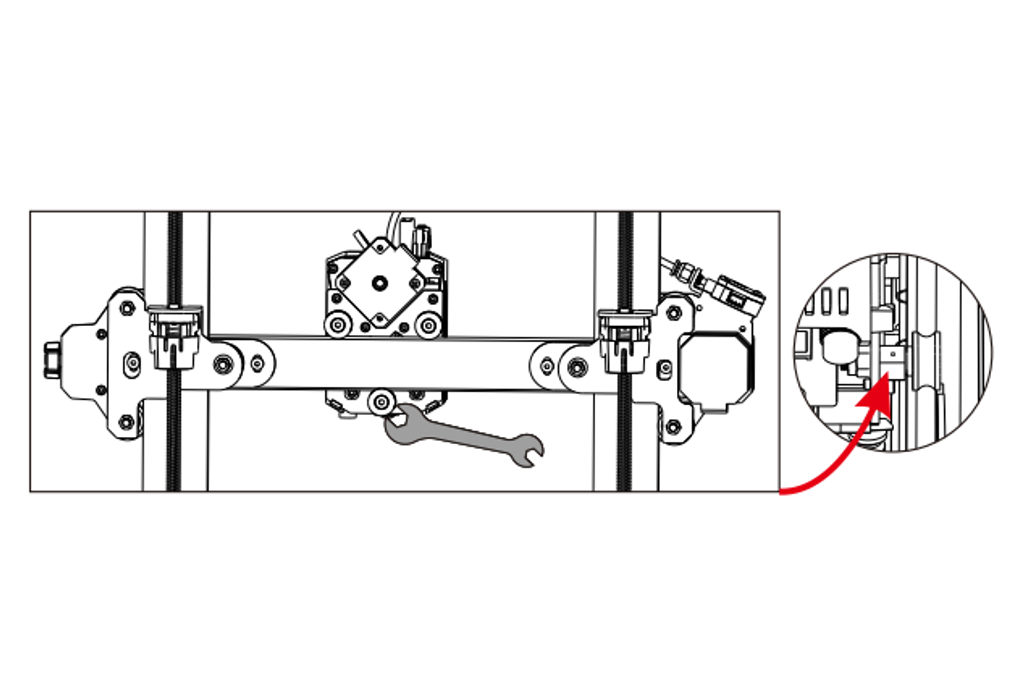
¶ Step 2: Install the X-axis Sheet Metal
① Slide the X-axis sheet metal in from the X-axis tensioner.
When sliding in, make sure that the bottom of the sheet metal has one side with 2 adjustable hexagonal eccentric spacers, and the pulley should face towards the direction of the touch screen.
② Take out the previously removed pulley assembly, pass the belt through the pulley assembly, and install the copper buckles at both ends of the belt onto the X-axis sheet metal.
|
|
|
 |
¶ Step 3: Install the X-axis Tensioner
Take out the previously removed X-axis tensioner shell and screws. Align them with the screw holes and install them on the device using an S2.5 Allen key to pre-lock the screws.
 |
 |
¶ Step 4: Install the Extruder
① Take out the previously removed extruder and screws, align them with the screw holes on the X-axis sheet metal, and use an S2.5 Allen key to tighten the screws one by one.
② Check if the extruder is loose. If it is, adjust the hexagonal eccentric spacer below the extruder until it moves smoothly and does not wobble.
¶ Step 5: Adjust the X-axis Belt:
Take out the previously removed X-axis tensioner knob. Clockwise rotate the X-axis tensioner knob until it is tight, then counterclockwise rotate it once.

¶ 4. Calibration Steps:
After replacing the X-axis pulley, it is recommended to recalibrate the device according to the following instructions.
¶ Step 1: Power On the Device
Connect the device's power cord, press the power switch on the side of the device to start it.
Note:
When inserting the power cord, please avoid crossing it with the print head cable to prevent interference.

¶ Step 2: Calibrate the nozzle position
In the main interface, click on the "Tools" icon ➜ "Control" icon ➜ "Module Calibration" ➜ "Position Calibration."
The machine will automatically perform detection and pause near the top the calibration module.
You could adjust the nozzle to the center position of the calibration module using the distance units and X/Y axis movement direction on the interface.
Once done, click "Save," and finally, perform the automatic leveling again.


¶ Step 3: Automatic Leveling Calibration
On the device's main interface, click the "Tools" icon - "Control" icon - "Auto- Level" - "Confirm" to start the leveling process.
Follow the set process, and after leveling is complete, click "Finish." This process takes approximately 15 minutes.
Note:
① Please check whether the PEI board is installed before leveling.
② The leveling sensor is only used for platforms with metal surfaces.
If you replace the printing platform by yourself, please choose a platform with a metal surface to ensure the normal use of the automatic leveling function.


¶ Step 4: Vibration Compensation Calibration
On the device's main interface, click the "Tools" icon - "Control" icon - "Vibration Compensation" - "Confirm" for resonance detection.
Follow the sequence to detect the X and Y axes. Click "Finish" after the Y-axis detection. This process takes approximately 15 minutes.
Note:
① Place the printer in a spacious and stable area during vibration compensation to avoid interference from other resonance sources.
② There may be significant noise during the vibration compensation process, which is normal.


If the above steps do not provide assistance or if you encounter any other issues during subsequent use, we recommend that you create a support ticket.
The after-sales engineers will assist you in finding a solution to the problem(Reply time :1 working day)
Please click this link to submit your ticket: