¶ 1、Poor contact of cable or wiring harness
Troubleshooting method:
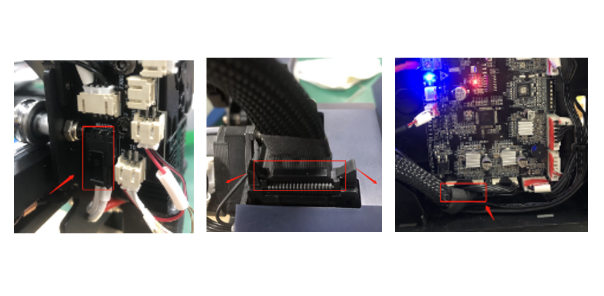
1) Refer to the figure below, use an M2.5 hexagonal wrench to unscrew the two screws that fix the shell, and take off the print head shell; use an M2.0 hexagonal wrench to unscrew the two screws that fix the bottom plastic part, and use a "slotted" screwdriver Pry along the plastic part, remove the FAN2 fan interface on the motherboard, and put the plastic part aside.

2) Reconnect the printhead NTC wire and printhead harness connector one by one.

¶ 2、Large or abnormal temperature reading deviations
This step is performed when the device is not heated up.
Troubleshooting method:
1) Power on the machine and observe whether the temperature displayed in the upper right corner of the main interface is normal. The normal room temperature is generally around 25°C and is related to the ambient temperature. If the ambient temperature is low, the displayed temperature will also decrease. When the temperature is lower than 10°C, this prompt may appear. Please move the device to a warmer area for use.
2) If the temperature displayed in the upper right corner of the main interface is 0°C and deviates significantly from the actual ambient temperature, try to re-plug the printer head NTC wiring and printer head harness. If the problem is not solved, it indicates a hardware issue.
3) If the temperature displayed in the upper right corner of the main interface is a higher temperature, such as 1XX°, 2XX°, etc., try unplugging the printer head connection line at the motherboard end and observe whether the temperature becomes 0°C. If it becomes 0°C, it indicates that the motherboard is not the problem and there is an issue with other hardware. If the temperature does not change, it indicates a motherboard issue.
¶ 3、Hardware malfunction
This step of troubleshooting requires some electrical knowledge and measuring equipment. Troubleshooting method:
1) With the machine powered off, use a multimeter to measure the resistance value of the printing head NTC cable (T0) terminal at room temperature (25℃) to see if it is around 100±10KΩ. If not, it may be a problem with the printing head. Try replacing the printing head.

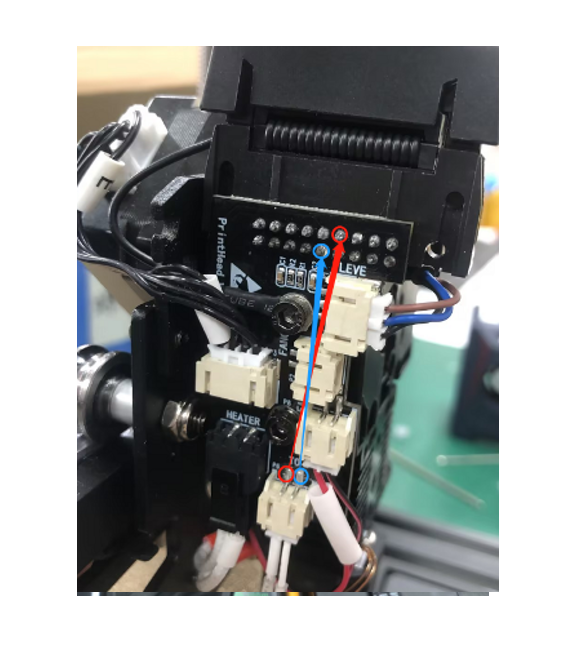
2) With the machine powered off, adjust the multimeter to the beep mode and test whether the printing head adapter board NTC PIN pin is normal. If the multimeter beeps(Measure at the corresponding positions with the same color as shown in the diagram.), the printing head adapter board is normal and can conduct electricity properly. Otherwise, if there is no sound, the printing head adapter board may have a connectivity issue. Try replacing the printing head adapter board.

3) With the machine powered on, adjust the multimeter to the 20V DC voltage range, and place the black meter probe (negative pole) on the "negative pole" position of the mainboard input voltage. Then, place the red meter probe (positive pole) on the 5th PIN pin from the left of the first row of the printing head adapter wire port, and measure whether the NTC PIN pin on the mainboard has a voltage of 3.3±0.3V. If the measured voltage is within the normal range, the mainboard is normal. Otherwise, if the measured voltage is not within the normal range, the mainboard may have an issue. Try replacing the mainboard. (Note: This method requires live working. Please pay attention to your own safety and follow the corresponding positions in the figure for measurement.)

4) If the above troubleshooting methods cannot solve the problem, it may be an issue with the printing head adapter wire. The above troubleshooting methods did not resolve the issue.
It is recommended that you create an after-sales work order to feed back the process and results of the previous inspection to the after-sales engineer. After-sales engineers will help you solve the problem. (Reply time :1 working day)
Please click this link to submit your ticket: