¶ 1.Tools Required:
M2.0 Allen wrench
M2.5 Allen wrench
¶ 2.Disassembly Steps:
¶ Step 1: Power Off the Machine
Before replacing the X-axis motor, turn off the machine and disconnect the power for safety.
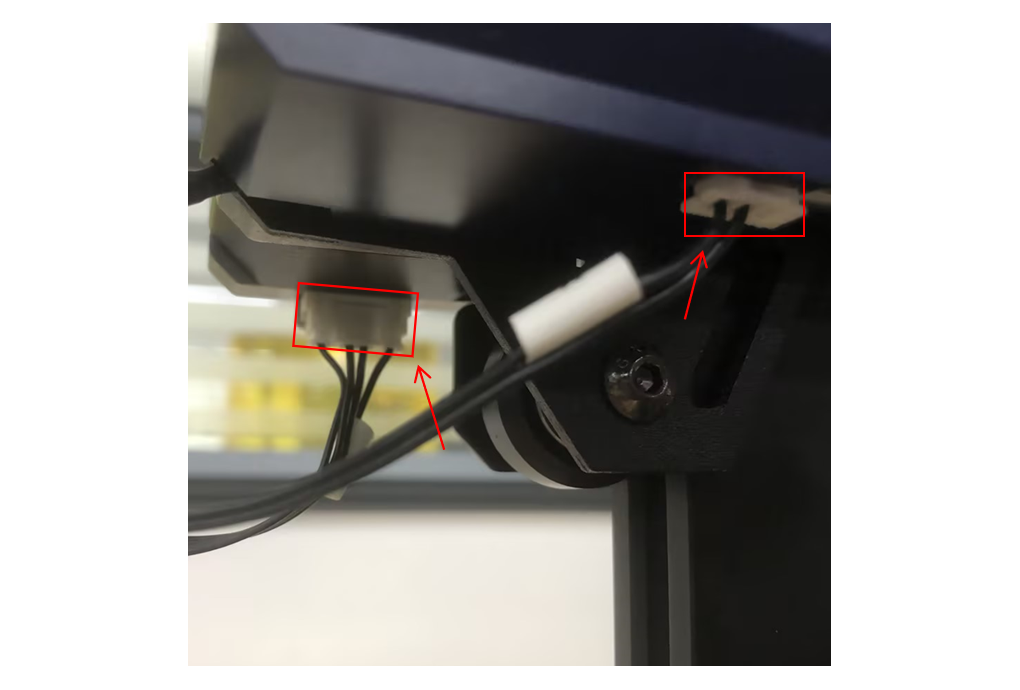
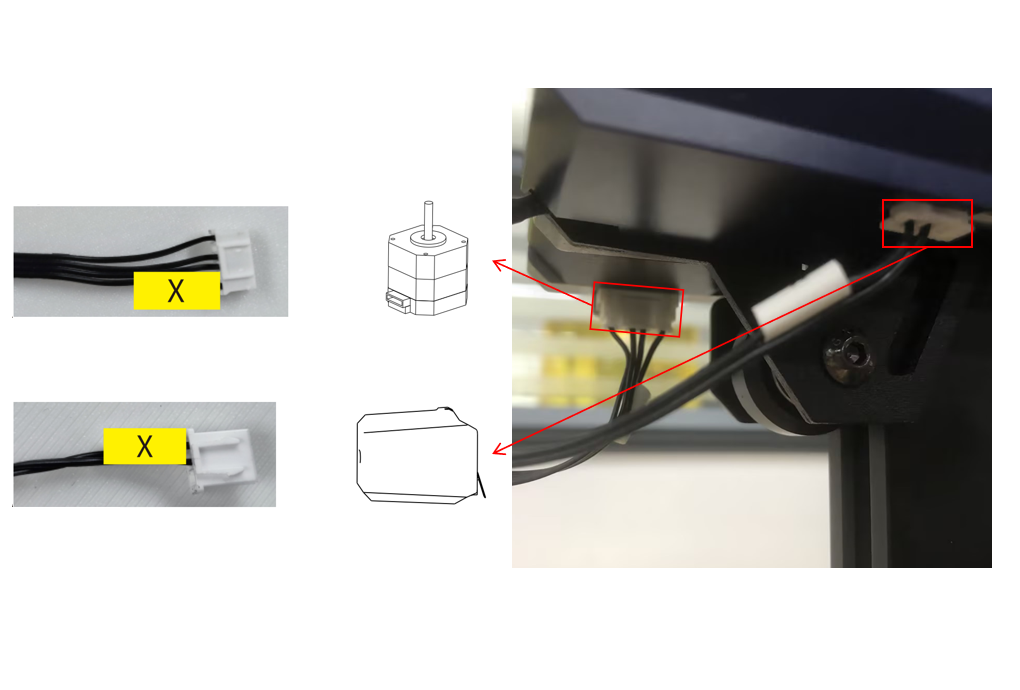
¶ Step 2: Disconnect X-Axis Motor Cable and X-endstop Cable
Refer to the diagram below and disconnect the X-axis motor and X-endstop cables.
¶ Step 3: Loosen the X-Axis Tensioner and Remove the X endstop Cover
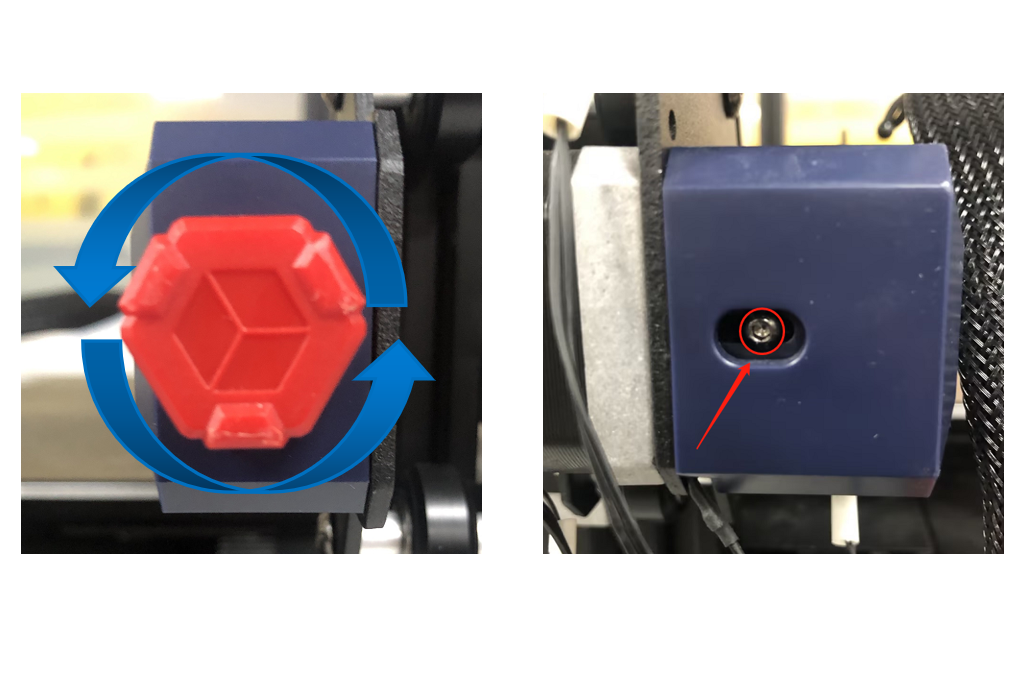
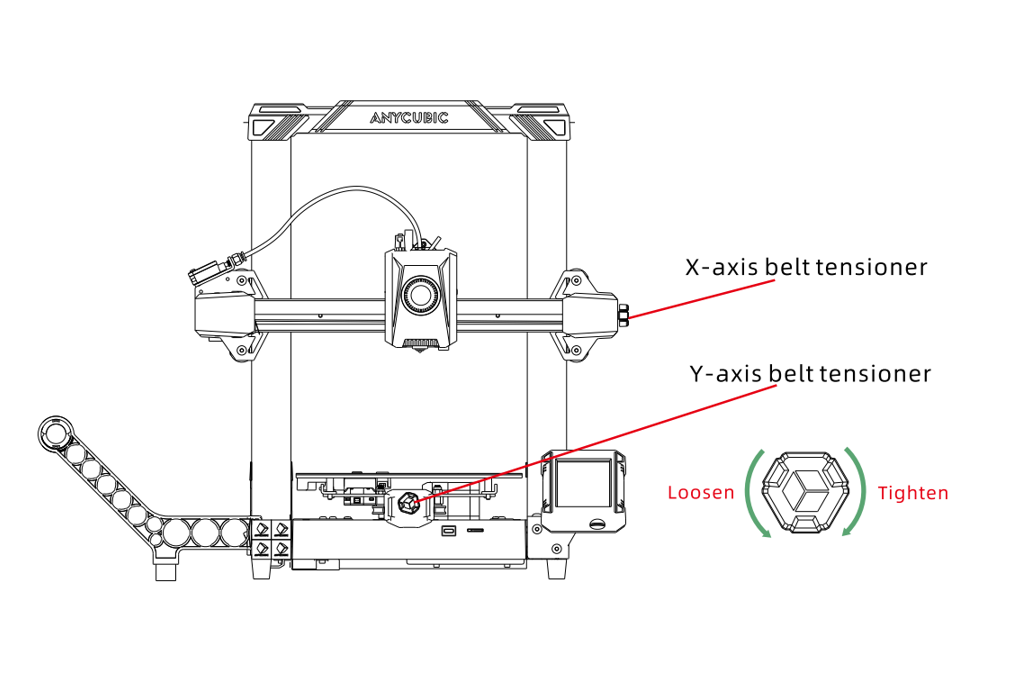
①Rotate the red knob on the X-axis belt tensioner counterclockwise to loosen it, making it easier to install the new X-axis motor.
②Use an M2.0 Allen wrench to remove the 1 screw securing the X end stop cover and take off the cover.
¶ Step 4: Remove the X-Axis Motor
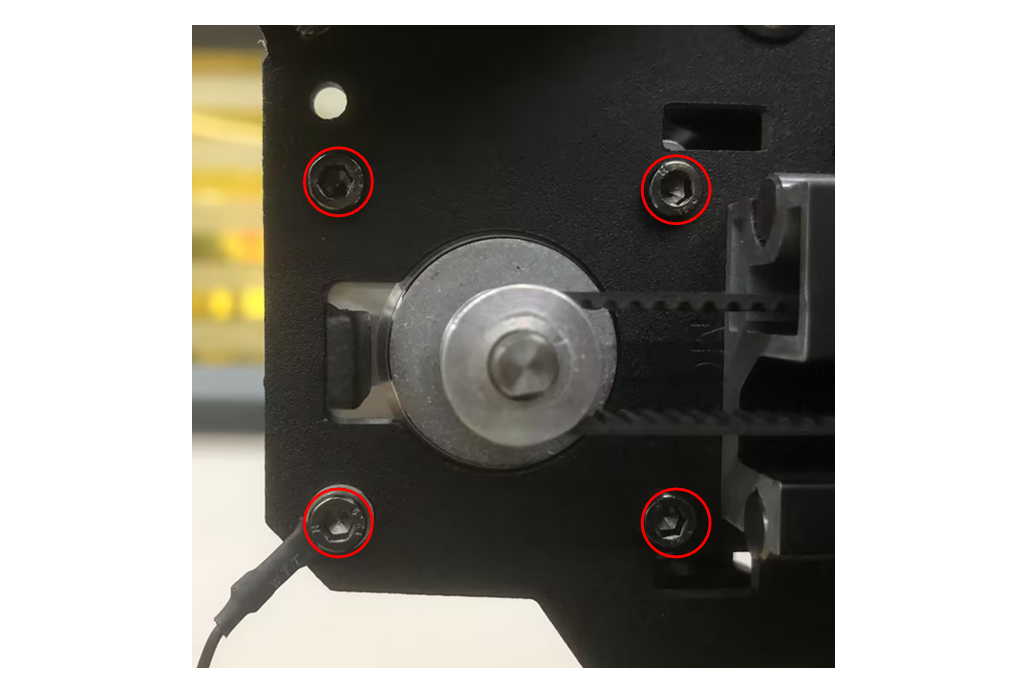
Use an M2.5 Allen wrench to remove the 4 screws securing the X-axis motor and remove the X-axis motor.
¶ 3.Motor Testing:
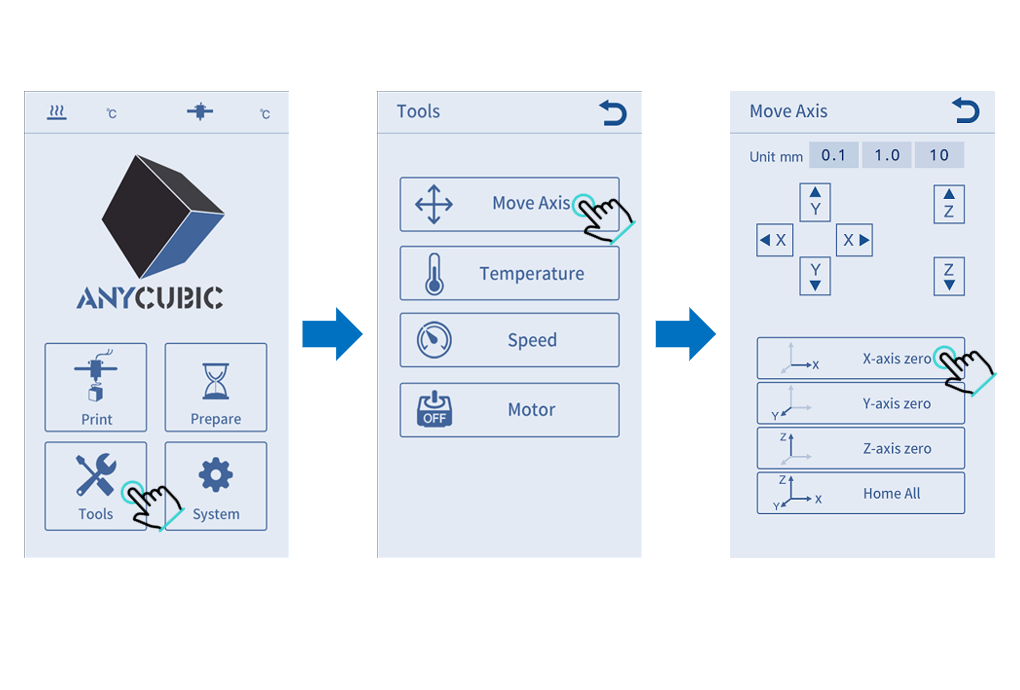
Take out the new X-axis motor, connect the X-axis motor cable to the motor connector, plug in the machine's power cable, and turn it on. On the main screen, click "Tools" -> "Move Axis" -> "X-axis zero."
Observe if the new X-axis motor rotates correctly. The machine control screen may display an error message:
"X homing failed, please check X endstop and wiring!" This is normal.
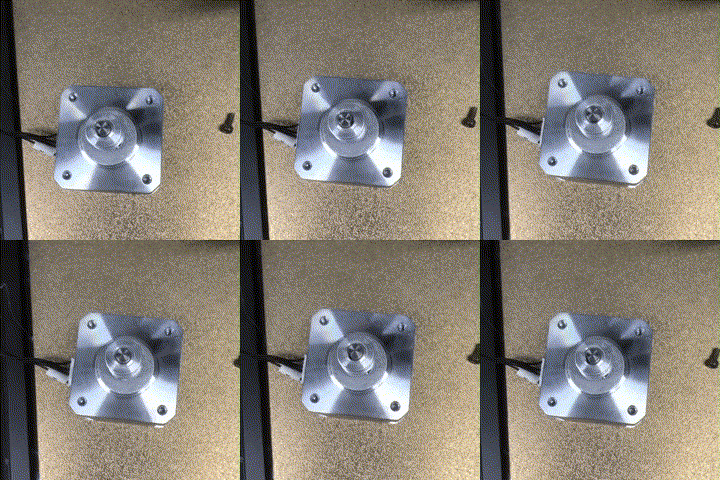
If there is no problem, safely shut down the machine and disconnect the power cord and X-axis motor cable.
¶ 4.Installation Steps:
¶ Step 1: Install the X-Axis Motor
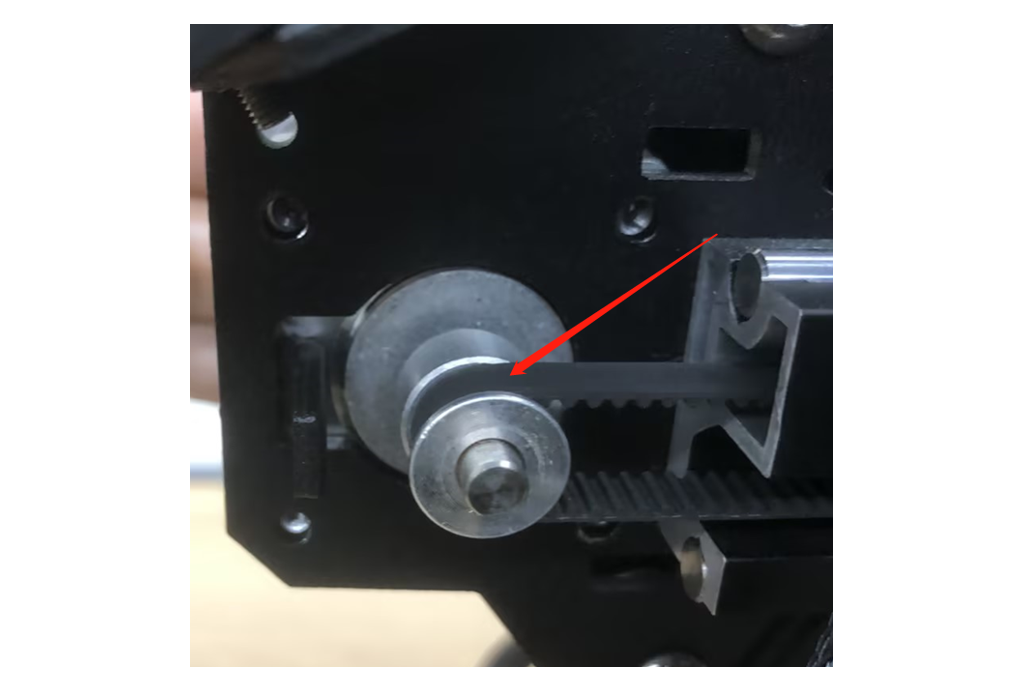
①Place the tested and functional X-axis motor onto the left Z-axis bracket (Note: Ensure that the belt is completely engaged with the X-axis motor's synchronous pulley gear, and the X-axis motor connector is facing downward).
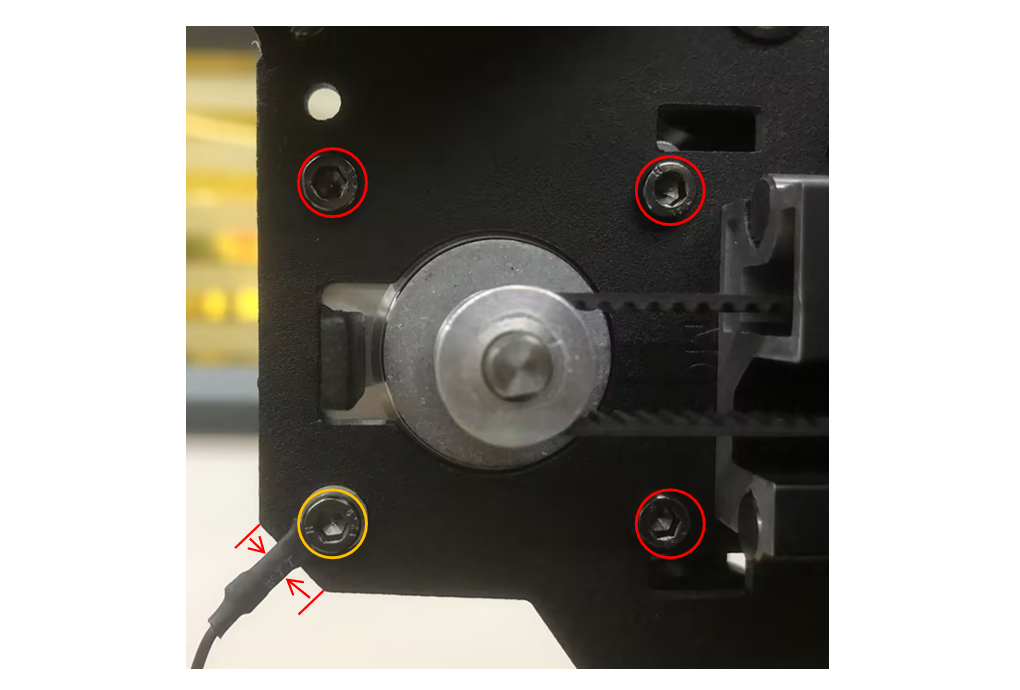
②Take the 4 screws previously removed from the X-axis motor, and using an M2.5 Allen wrench, first pre-tighten them sequentially. Once all 4 screws are pre-tightened, finally tighten them. Note: The yellow-marked position should have the ground wire attached to the screw before securing it to the X-axis motor. The ground wire's location should be within the recessed area of the bracket; otherwise, it may obstruct the installation of the X-end stop cover.
¶ Step 2: Install the X-endstop Cover
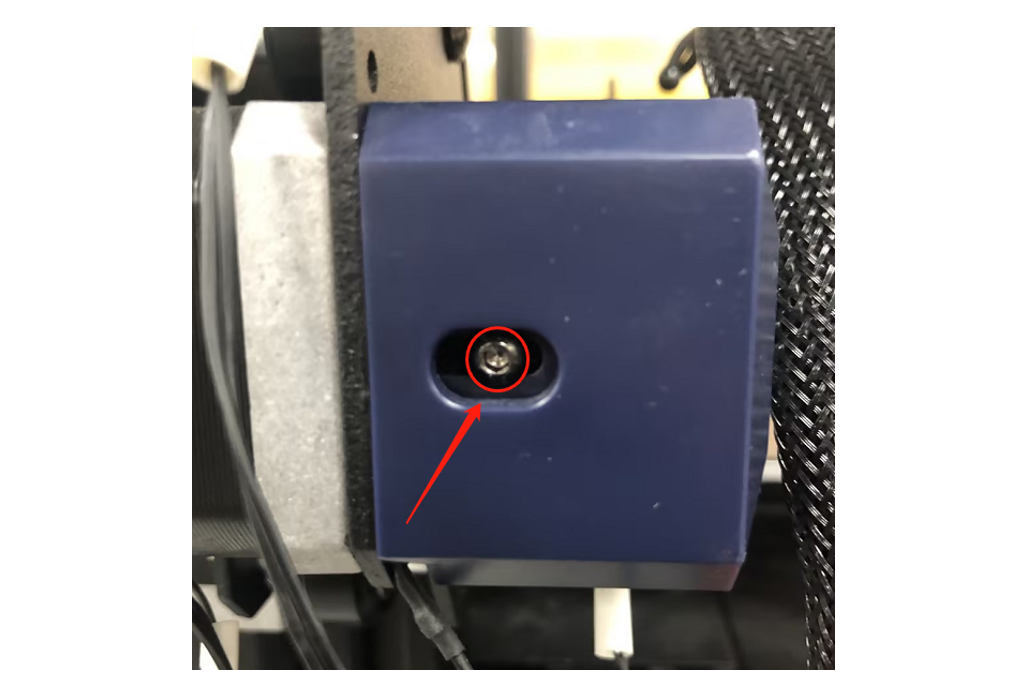
Take the X-end stop cover and the screws previously removed, and use an M2.0 Allen wrench to secure the cover to the left Z-axis bracket.
¶ Step 3: Connect the Cables
Plug in the X-axis motor cable and X-endstop cable into their respective connectors.
¶ 5.Adjust Belt Tension:
Turn the X-axis tensioner knob clockwise until it is tight, and then turn it counterclockwise one full turn.
After replacement, please re-level your printer.