¶ 1. Required Tools
● Phillips screwdriver
● M2.5 hex wrench
¶ 2. Disassembly Steps
¶ Step 1: Turn off the printer
Before replacing the power supply, make sure to turn off the printer and disconnect the power source for safety.
¶ Step 2: Remove the top screws of the power supply
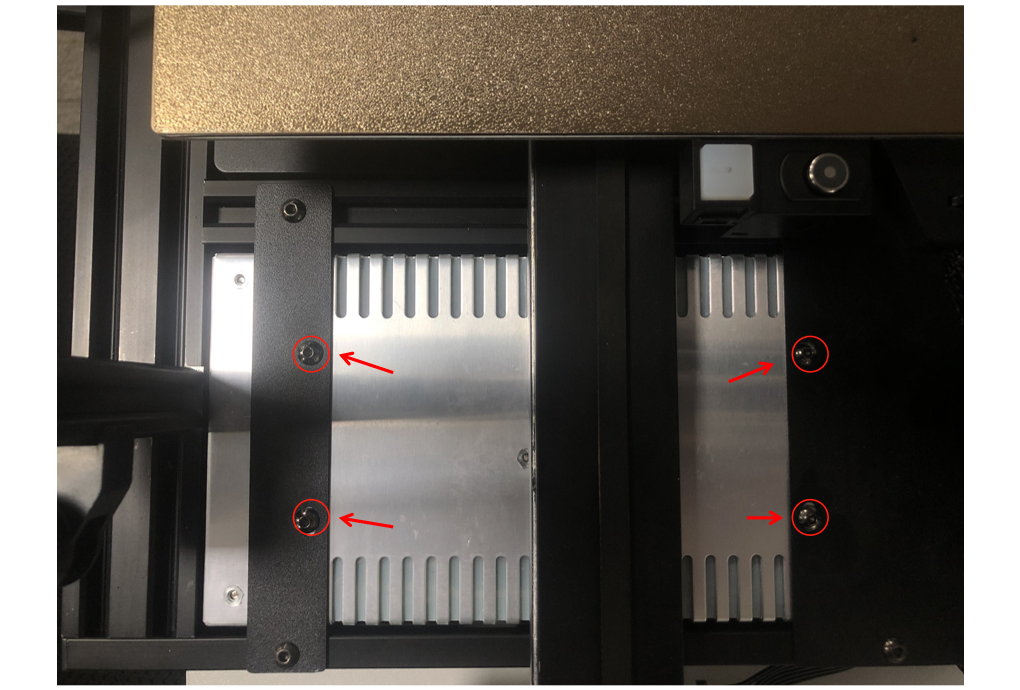
Move the heated bed forward to expose the screws that secure the power supply. Use an M2.5 hex wrench to loosen and remove the 4 screws that hold the power supply in place.

¶ Step 3: Remove the bottom screws of the power supply mounting plate
Invert the printer.
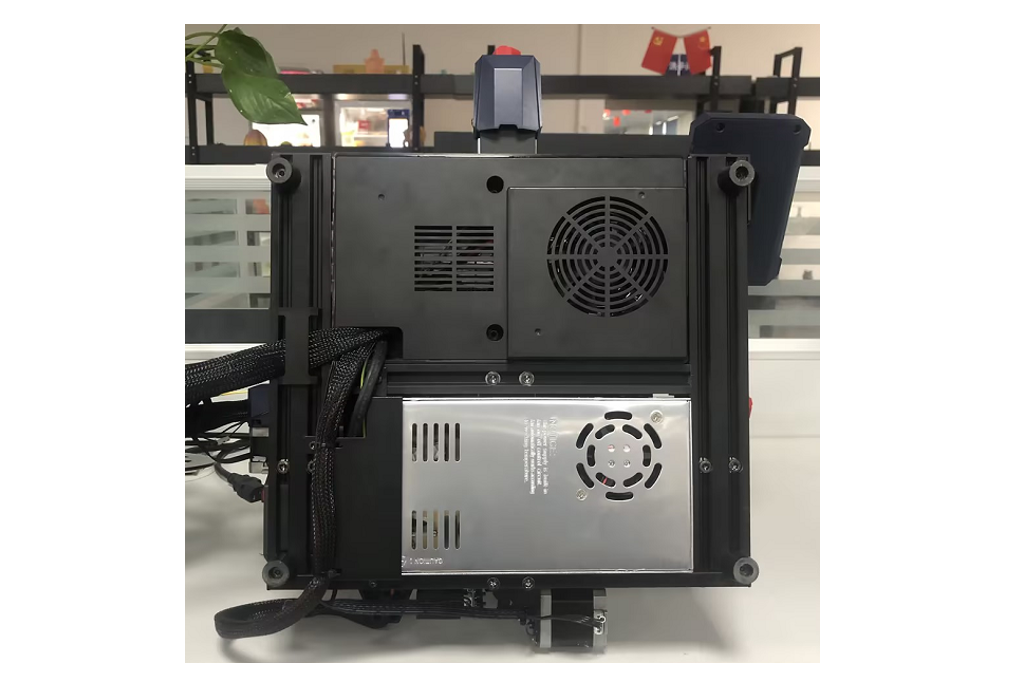
Use an M2.5 hex wrench to loosen and remove the 3 screws that secure the bottom of the power supply mounting plate. (Since the power supply mounting plate is secured with zip ties to other cables,We suggest you rotate the bottom plate to the left to avoid interfering with the subsequent power supply replacement process.)
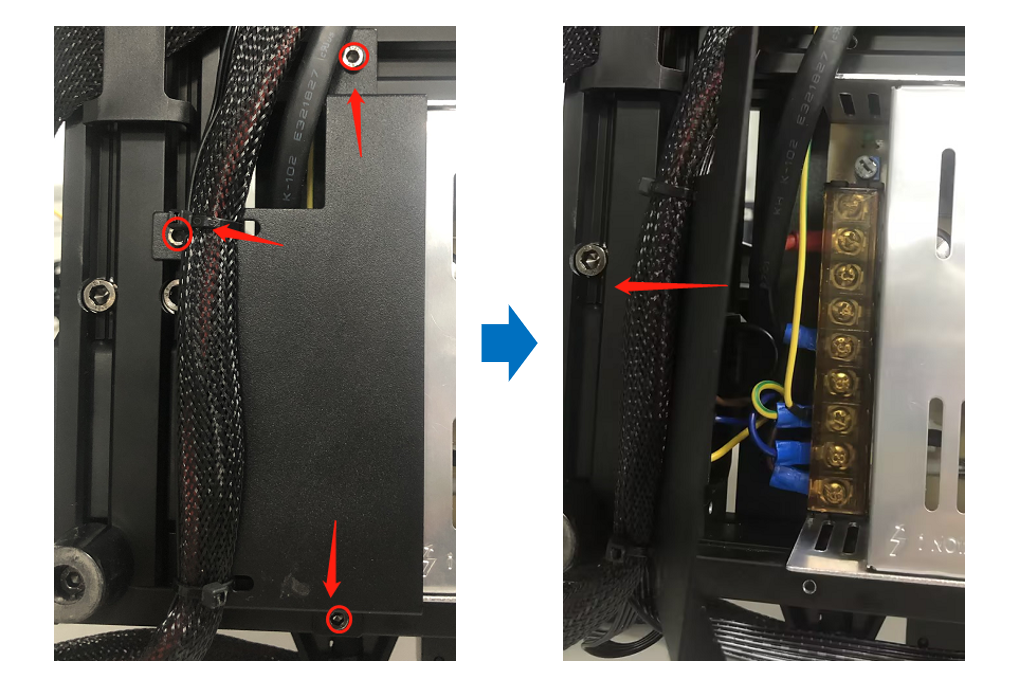
¶ Step 4: Remove the screws securing the power supply cables
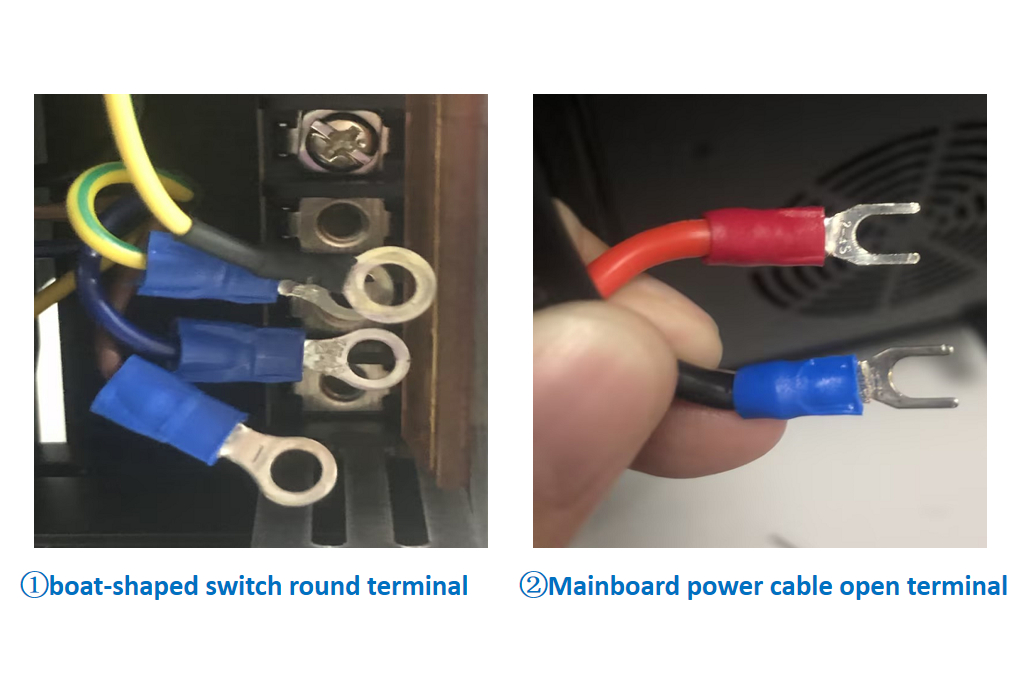
Kobra 2 uses two types of terminals to secure the wires to the power supply.
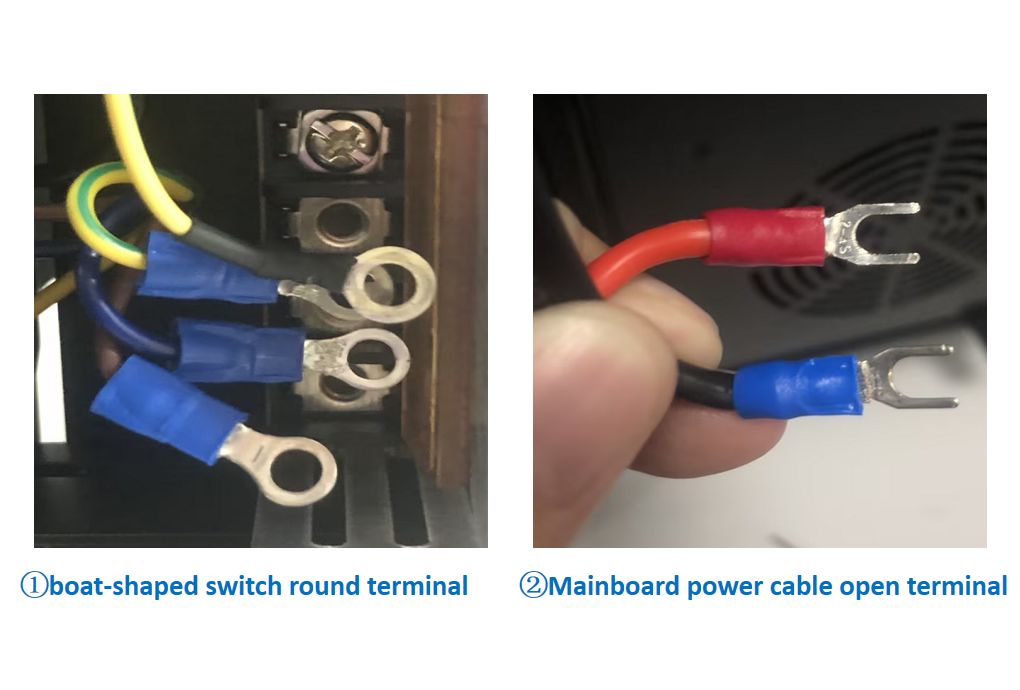
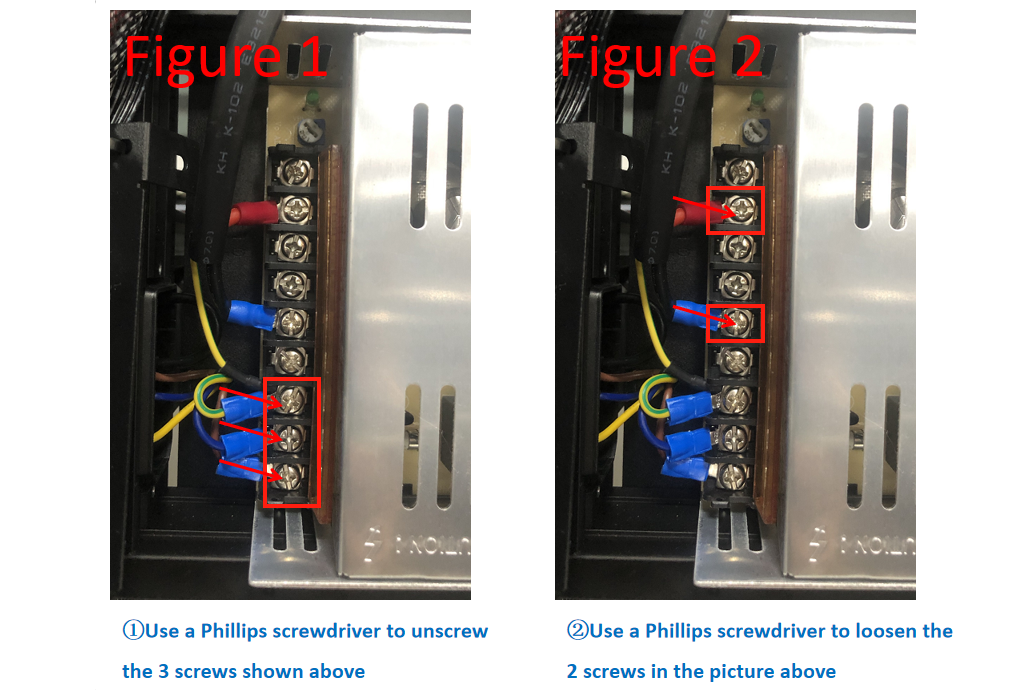
Open the transparent cover and refer to Figure 1. Use a Phillips screwdriver to remove the 3 screws that secure the boat-shaped switch cable and ground wire. Remove the boat-shaped switch cable and ground wire. Refer to Figure 2, use a Phillips screwdriver to loosen the 2 screws that secure the mainboard power cable. Remove the mainboard power cable.
¶ Step 5: Remove the old power supply
Remove the old power supply.
¶ 3. Installation Steps
¶ Step 1: Install the new power supply
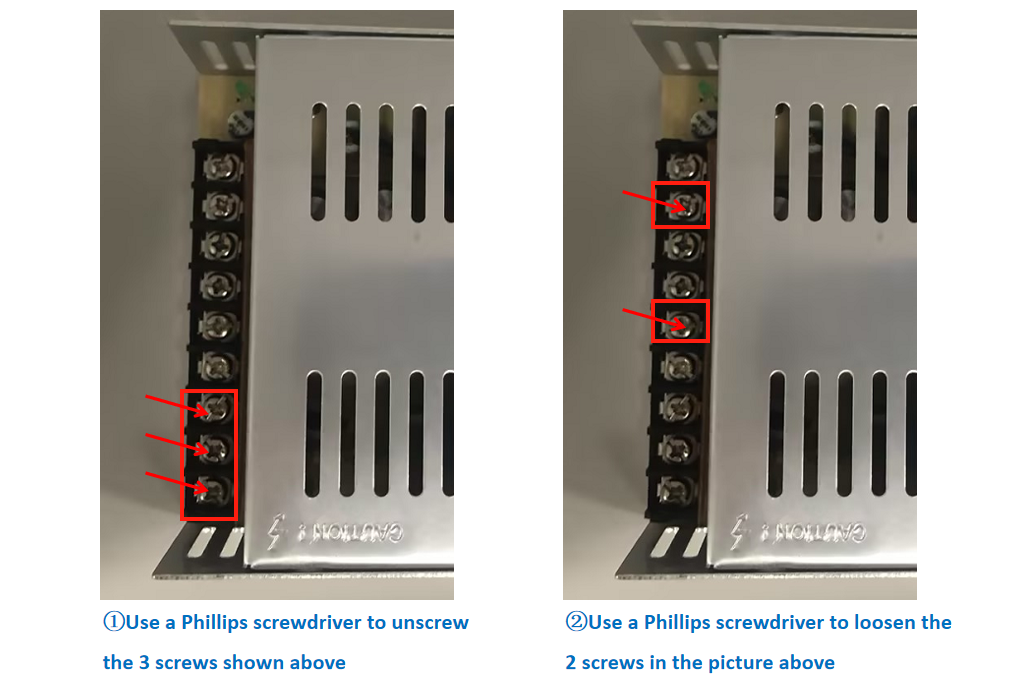
First, open the cover of the new power supply. Use a Phillips screwdriver to remove the 3 screws at the boat-shaped switch cable and ground wire position (left image). Then, loosen the 2 screws at the mainboard power cable position (right image).
¶ Step 2: Connect the cables
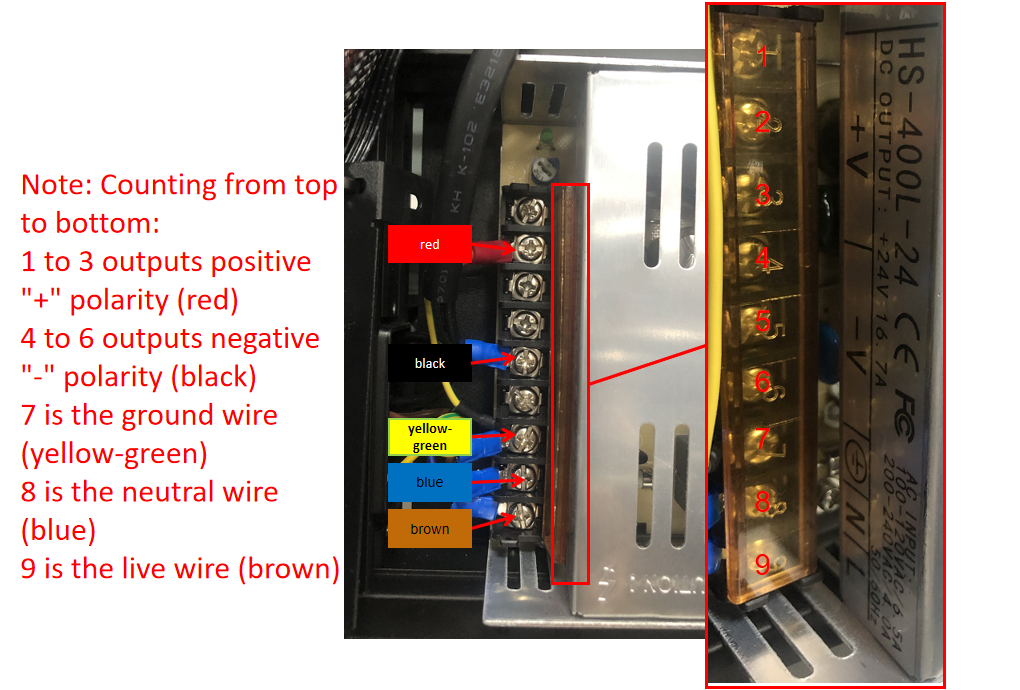
When installing the boat-shaped switch cable and ground wire, thread the screws through the circular terminals of the cable and align them with the screw holes on the power supply, then tighten the screws. For the mainboard power cable, since the cable terminal has an open shape, after loosening the corresponding power screws, you can directly insert the cable and then tighten the screws.
After installation, gently pull each wire to ensure it is properly installed and check for any loose wires. If there are any, reinstall them.
¶ Step 3: Install the bottom plate of the power supply
Align the power supply bottom plate in position. Use an M2.5 hex wrench to loosely secure the 3 screws in the screw holes, and then tighten them one by one. (To avoid misalignment of the screw holes, do not tighten one screw completely before aligning the other holes.)

¶ Step 4: Install the screws securing the power supply
Move the heated bed forward to expose the screw holes for the power supply. Use an M2.5 hex wrench to loosely secure the 4 screws in the screw holes, and then tighten them one by one. (To avoid obstruction of the screw holes, do not tighten one screw completely before aligning the other positions.)
¶ 4.Voltage adjustment
Please confirm whether the input mode ofthe voltage of the power box is correct, and adjust to the appropriate voltage level according to the local voltage usage.
¶ 5. Power-On Test
Plug in the power cable to the printer and turn on the power switch. Verify that the control screen displays normally.
If the control screen remains blank, go back to the cable installation steps and check if the wires are installed in the correct positions.
The above troubleshooting methods did not resolve the issue. It is recommended that you create an after-sales work order to feed back the process and results of the previous inspection to the after-sales engineer. After-sales engineers will help you solve the problem.
Create link: