¶ 1.Tools:
- M2.5 hex key
¶ 2.Replacement Steps:
¶ Step 1: Turn off the printer
Before proceeding with the replacement, make sure to turn off the printer and disconnect the power to ensure safe
operations.
¶ Step 2: Raise the Z-axis to the middle position
Rotate the left Z-axis motor coupler clockwise to lift the Z-axis to the middle position as shown in the figure.
¶ Step 3: Remove the print head casing
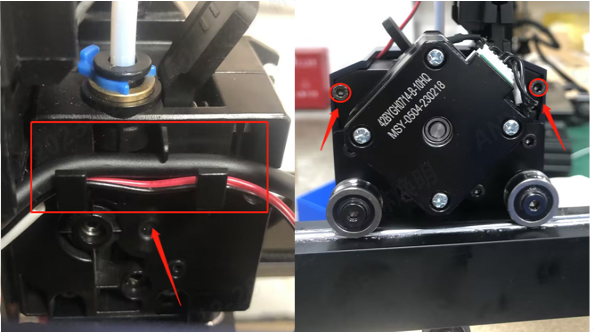
① Use an M2.5 hex key to unscrew the 2 screws that secure the print head casing and place them in a suitable position.
② Push the latch gently in the direction indicated by the blue arrow.
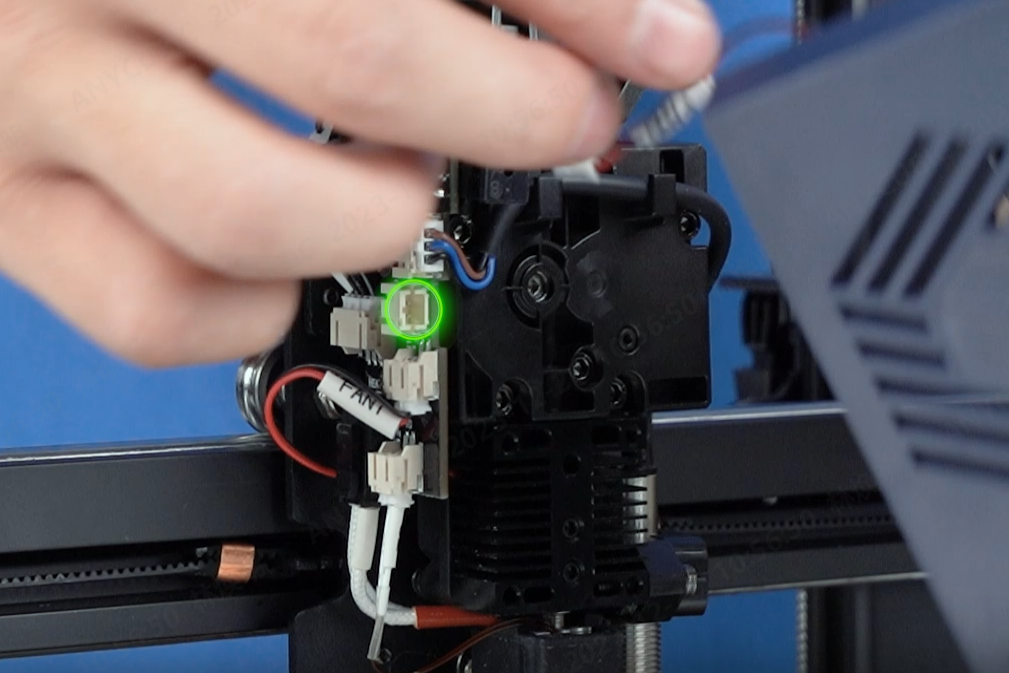
③ Finally, hold the white terminal of FAN0 by hand, unplug the FAN0 cable, remove the print head casing, and set it aside.
¶ Step 4: Remove the Adapter Board
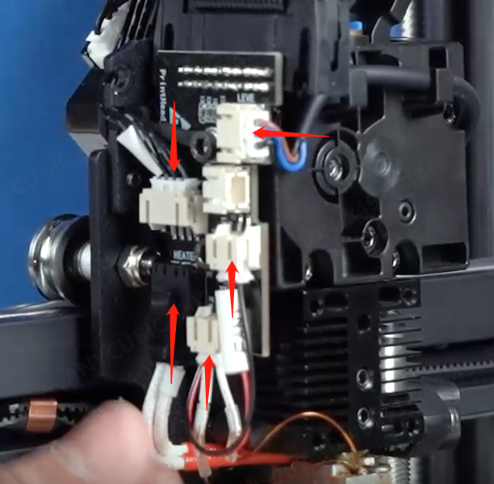
Disconnect the wires on the adapter board one by one.
Note: The adapter board for Kobra 2 and Kobra 2 Neo models is different from that of other models.
Use an M2.5 hex key to remove the screws securing the adapter board and take off the ground wire.
¶ Step 5: Replace the Adapter Board
Install the new adapter board and secure the ground wire and screws using an M2.5 hex key.
Reconnect each wire to its respective port on the adapter board.

¶ Step 6:Install the Print Head Casing
Connect the cooling fan cable, insert it into the cable groove, and snap on the print head casing.
Finally, use an M2.5 hex key to tighten and secure the 2 screws on the print head casing.


After that,please leveling your printer.