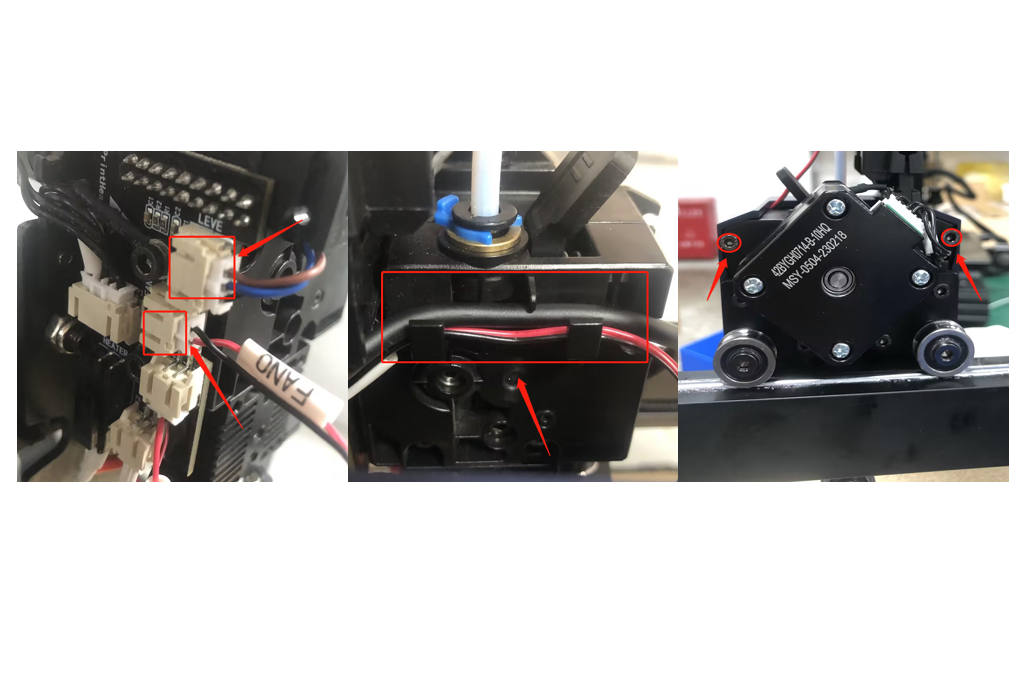
¶ 1. Tips
After replacing the proximity switch, perform auto leveling again. If the printed result shows nozzle pressure on the hotbed or excessive gap, please manually compensate for the Z-axis offset value.
¶ 2. Tools Required
● Open-end wrench
● M2.5 hex wrench
¶ 3. Disassembly Steps
¶ Step 1: Turn off the printer
Before proceeding with the replacement, make sure to turn off the printer and disconnect the power to ensure safe operation.
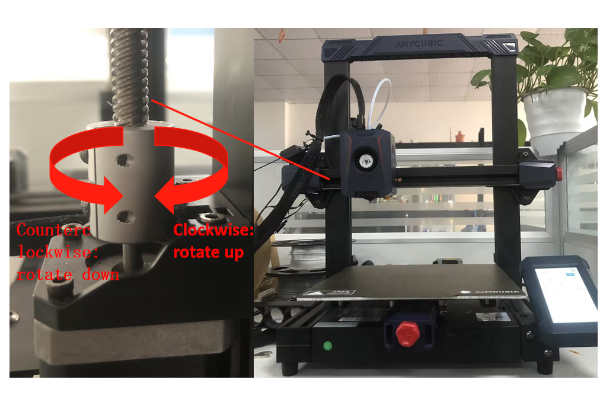
¶ Step 2: Raise the Z-axis to the middle position
Rotate the left Z-axis motor coupler clockwise to lift the Z-axis to the middle position as shown in the figure.
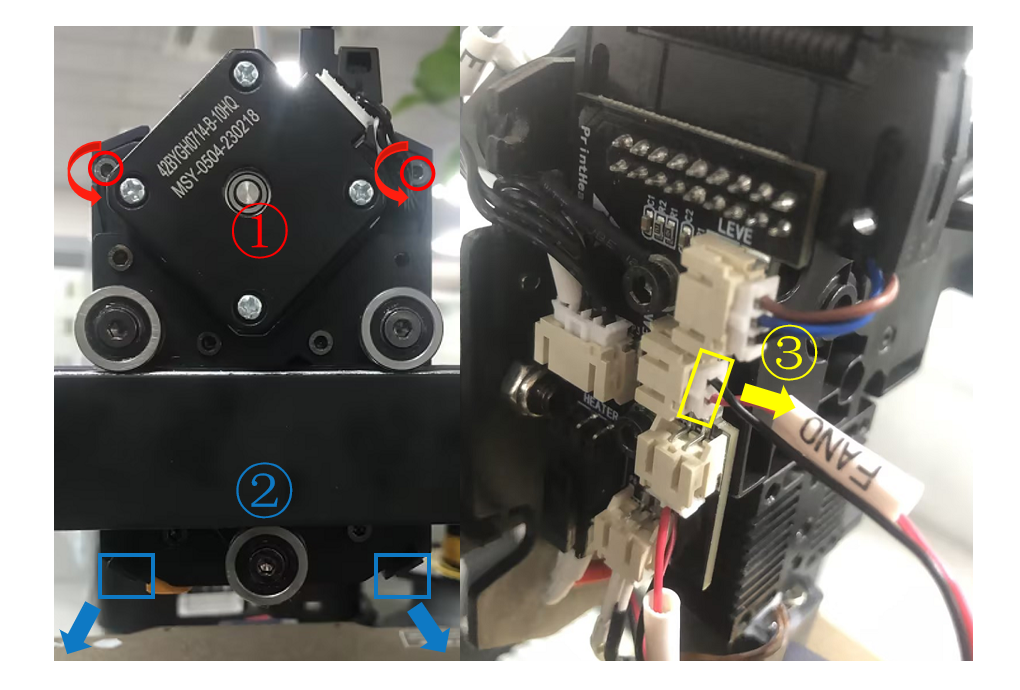
¶ Step 3: Remove the print head casing
① Use an M2.5 hex wrench to unscrew the 2 screws that secure the print head casing and place them in a suitable position.
② Push the latch gently in the direction indicated by the blue arrow.
③ Finally, hold the white terminal of FAN0 by hand, unplug the FAN0 cable, remove the print head casing, and set it aside.
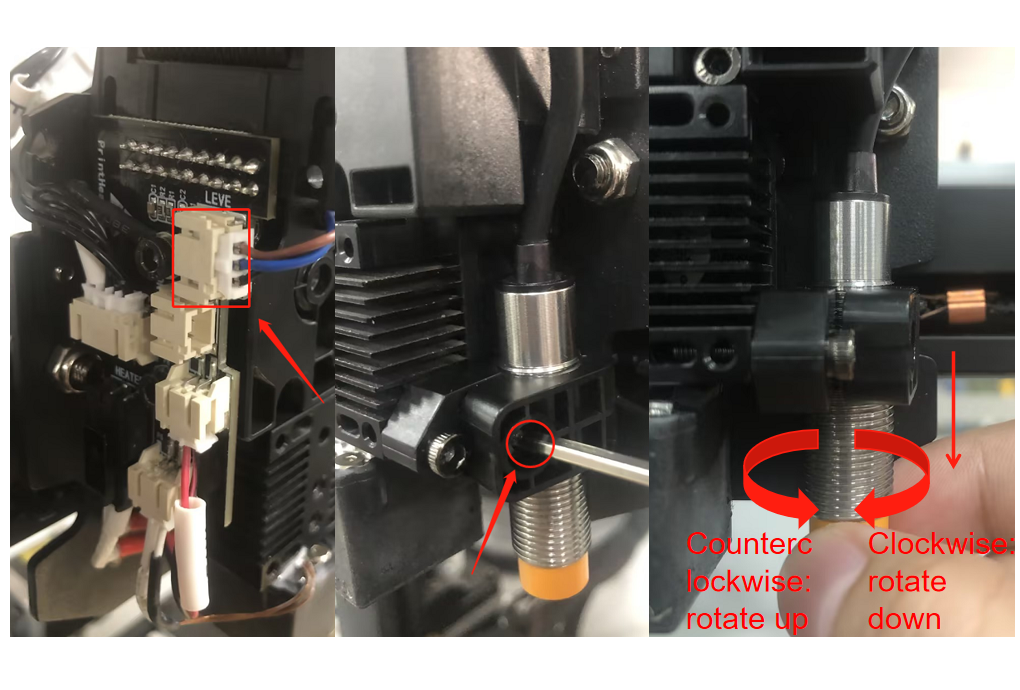
¶ Step 4: Remove the proximity switch
Unplug the proximity switch cable, use an M2.5 hex wrench to loosen the screw securing the proximity switch, and then rotate the proximity switch clockwise to remove it from below.
¶ 4. Testing the new proximity switch
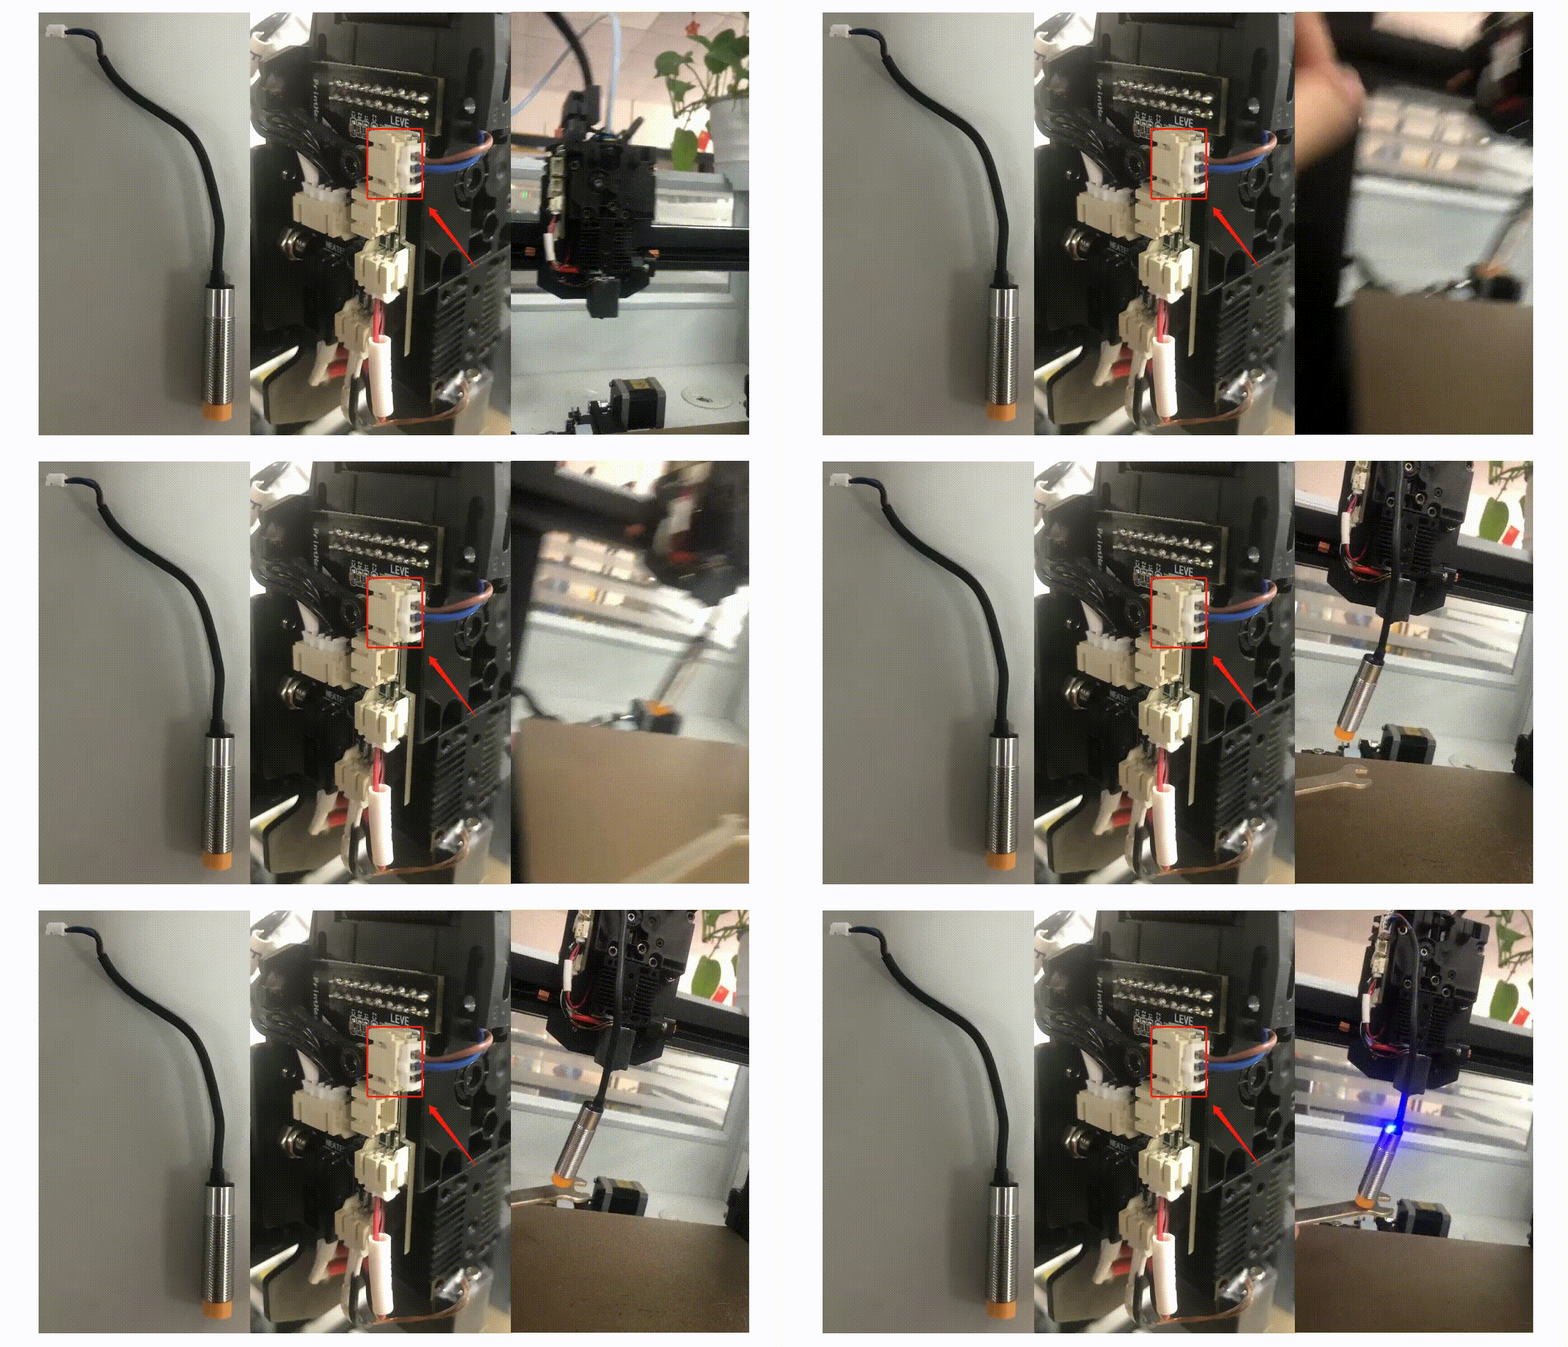
Take out the new proximity switch, insert the cable, and turn on the printer. After the printer starts up, use an open-end wrench to touch under the orange area on the bottom of the proximity switch and observe if the blue LED lights up. If the LED does not light up。
¶ 5. Installation Steps
¶ Step 1: Turn off the printer
Before starting the installation, make sure to turn off the printer and disconnect the power to ensure safe operation.
¶ Step 2: Install the proximity switch
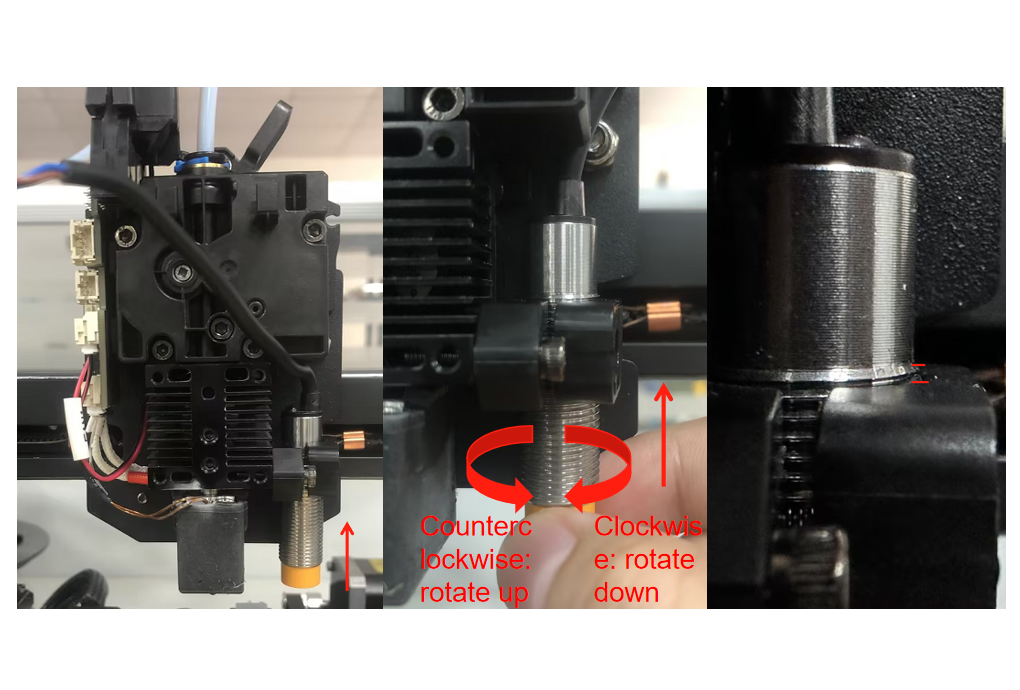
Before that, insert the previously unplugged proximity switch cable. Insert the cable from below the fixing block and then rotate the proximity switch counterclockwise until its thread extends beyond the fixing block by one turn.
¶ Step 3: Adjust the proximity switch distance
Rotate the left Z-axis motor coupler counterclockwise, and then place an open-end wrench on the hotbed at the drop point of the proximity switch. Adjust it to the state shown in the figure, and finally tighten the screw on the fixing block.
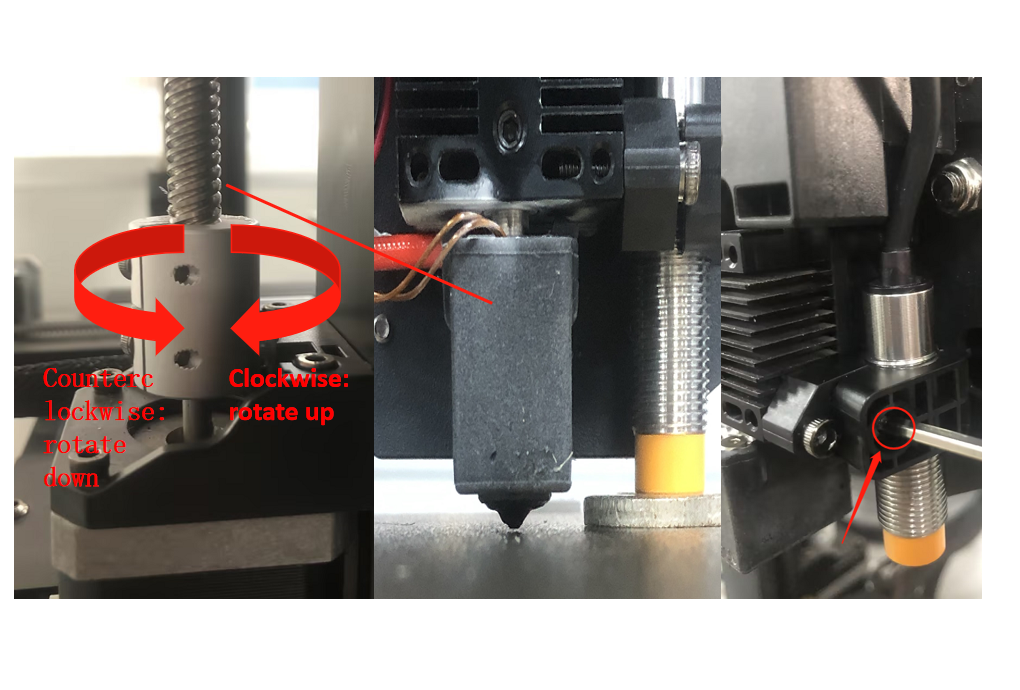
Note: When the proximity switch is close to the open-end wrench, if you find that the nozzle is pressuring the hotbed or there is excessive gap, repeat step 2 to adjust the height of the proximity switch and step 3 to adjust the distance.
¶ Step 4: Install the print head casing
Plug in the proximity switch cable and the print head cooling fan cable, insert them into the cable slot, attach the print head casing, and finally use an M2.5 hex wrench to tighten the 2 screws that secure the print head casing.
