¶ 1.Tips:
After replacing the X-axis belt, it is necessary to perform auto-leveling again. If there is too much nozzle pressure on the heated bed or excessive gap, please manually compensate for the Z-axis offset.
¶ 2.Required Tools:
● M2.0 Allen wrench
● M2.5 Allen wrench
¶ 3.Disassembly Steps:
¶ Step 1: Power off the printer
Before replacing the X-axis belt, make sure to turn off the printer and disconnect the power cable to ensure safe operations.
¶ Step 2: Disassemble the Print Head Module
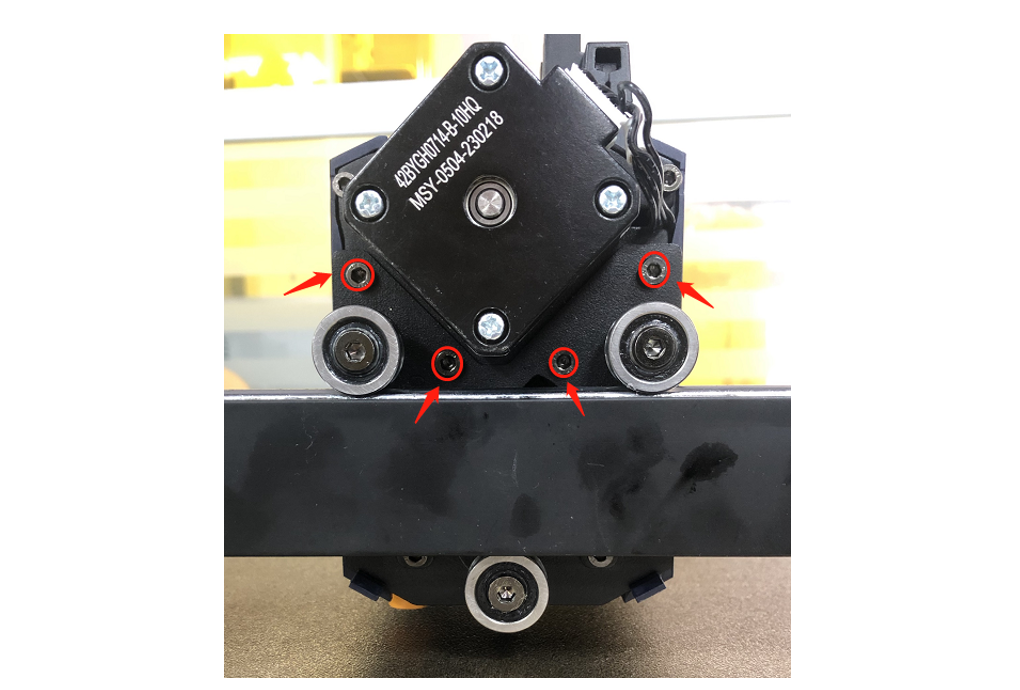
Use an M2.5 Allen wrench to loosen the 4 screws securing the print head module and set aside the module.

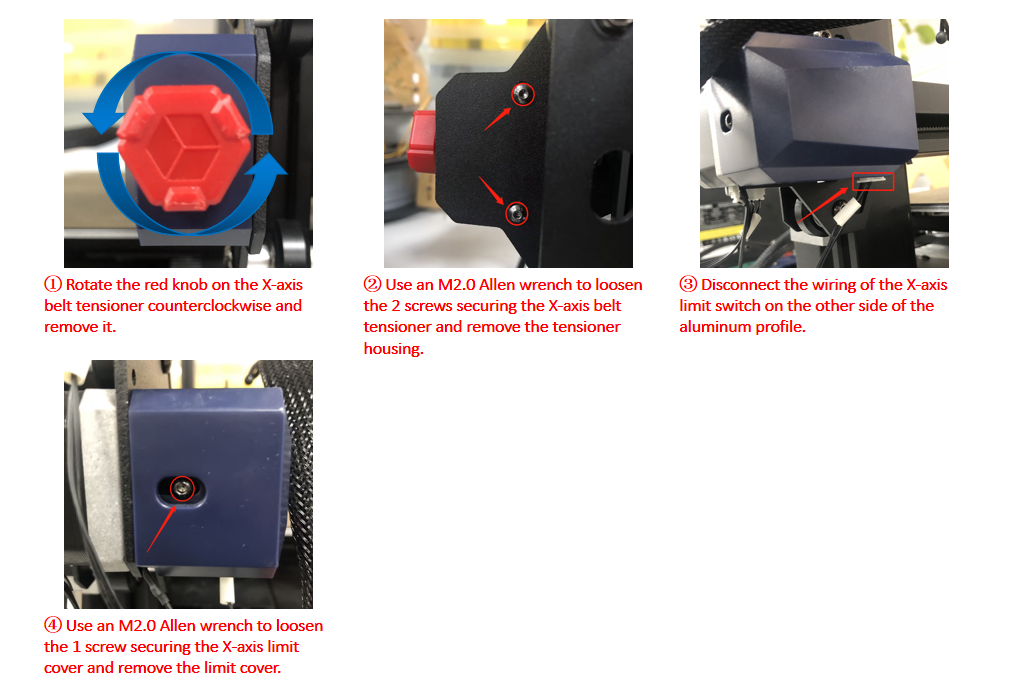
¶ Step 3: Disassemble the X-Axis Belt Tensioner and X-Axis Limit Cover
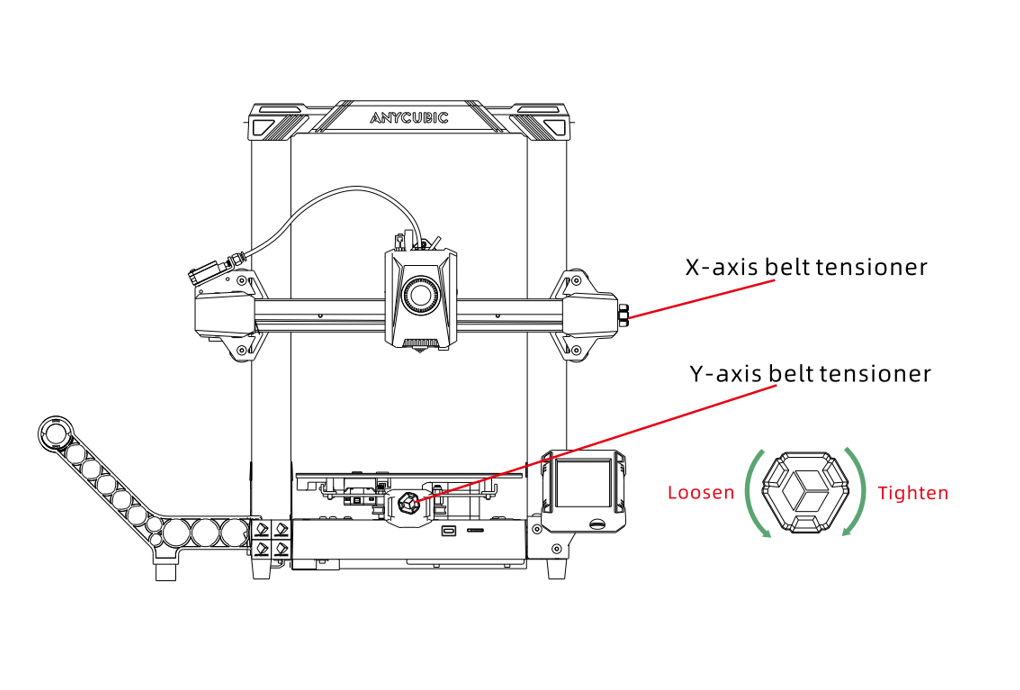
① Rotate the red knob on the X-axis belt tensioner counterclockwise and remove it.
② Use an M2.0 Allen wrench to loosen the 2 screws securing the X-axis belt tensioner and remove the tensioner housing.
③ Disconnect the wiring of the X-axis limit switch on the other side of the aluminum profile.
④ Use an M2.0 Allen wrench to loosen the 1 screw securing the X-axis limit cover and remove the limit cover.
¶ Step 4: Disassemble the Belt
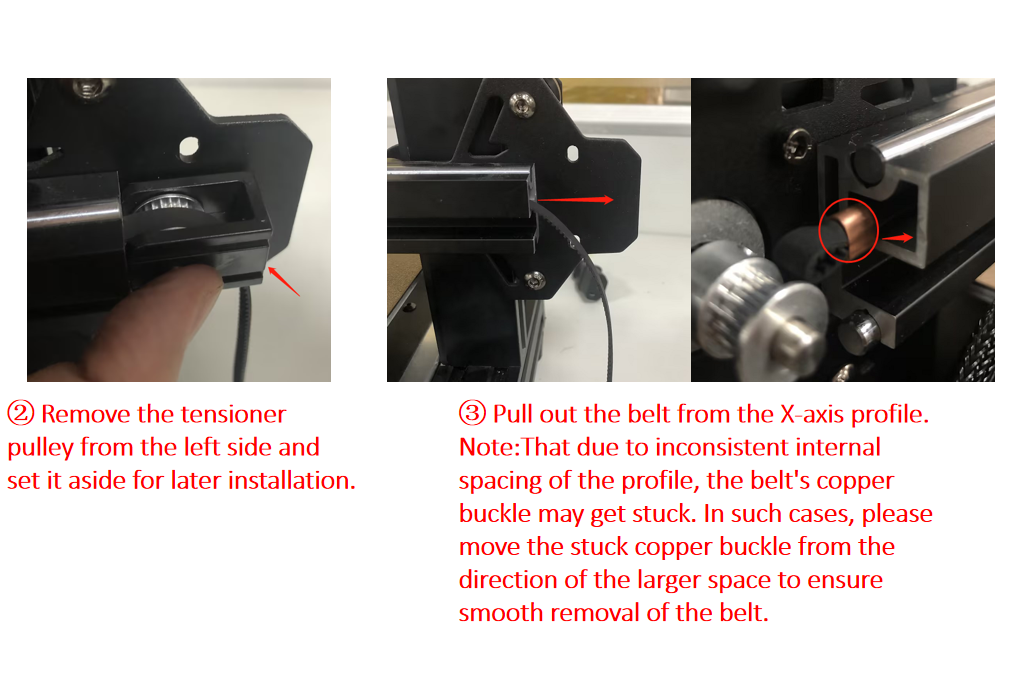
① With your hand, follow the belt from the loose part to the sheet metal fixing point, and then remove it.
② Remove the tensioner pulley from the left side and set it aside for later installation.
③ Pull out the belt from the X-axis profile.Note:That due to inconsistent internal spacing of the profile, the belt's copper buckle may get stuck. In such cases, please move the stuck copper buckle from the direction of the larger space to ensure smooth removal of the belt.

¶ 4.Installation Steps:
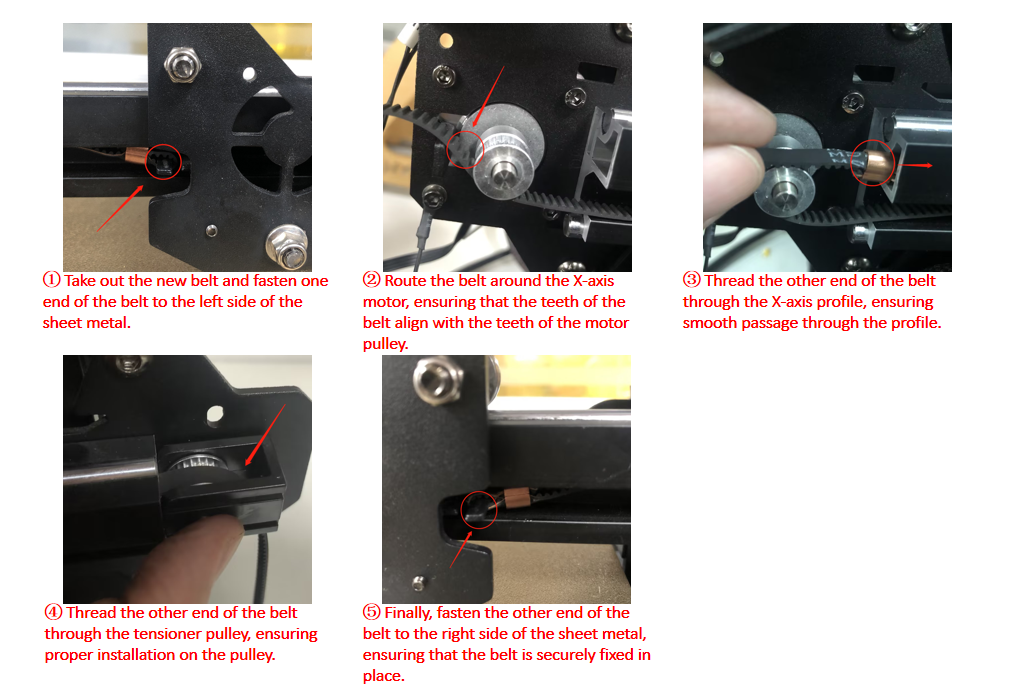
¶ Step 1: Install the Belt
① Take out the new belt and fasten one end of the belt to the left side of the sheet metal.
② Route the belt around the X-axis motor, ensuring that the teeth of the belt align with the teeth of the motor pulley.
③ Thread the other end of the belt through the X-axis profile, ensuring smooth passage through the profile.
④ Thread the other end of the belt through the tensioner pulley, ensuring proper installation on the pulley.
⑤ Finally, fasten the other end of the belt to the right side of the sheet metal, ensuring that the belt is securely fixed in place.
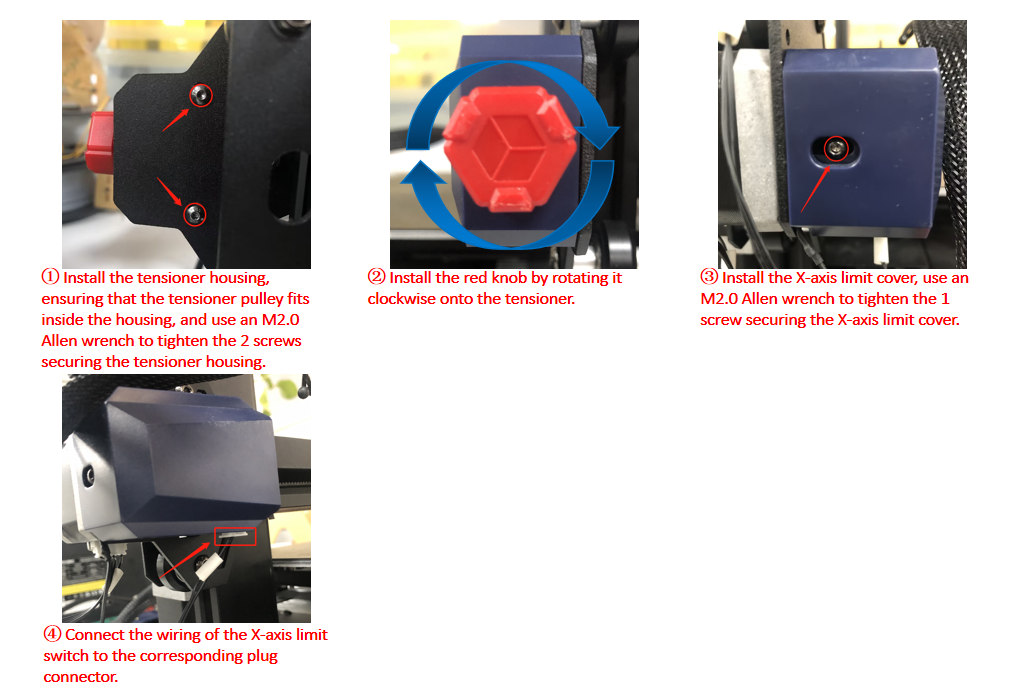
¶ Step 2: Install the X-Axis Belt Tensioner and X-Axis Limit Cover
① Install the tensioner housing, ensuring that the tensioner pulley fits inside the housing, and use an M2.0 Allen wrench to tighten the 2 screws securing the tensioner housing.
② Install the red knob by rotating it clockwise onto the tensioner.
③ Install the X-axis limit cover, use an M2.0 Allen wrench to tighten the 1 screw securing the X-axis limit cover.
④ Connect the wiring of the X-axis limit switch to the corresponding plug connector.
¶ Step 3: Install the Print Head Module
Use an M2.5 Allen wrench to tighten the 4 screws securing the print head module.
¶ 5.Adjusting the Belt Tension:
Rotate the X-axis tensioner knob clockwise until it is tightened, then rotate it counterclockwise one full turn.
If you have further questions, we suggest you create an after-sales ticket and our After-sales engineers will help you solve the problem. (Reply time :1 working day)
Please click this link to submit your ticket: