¶ 1. Before start printing:
¶ Item 1: Select the appropriate hardness of TPU
The hardness of common TPU is more, and the order from large to small is: 77D > 70D > 55D > 95A > 85A > 83A > 80A > 75A > 70A. TPU with a hardness of 95A or higher can be printed by Kobra 3 Combo, in addition, the higher the hardness, the lower the risk of printing failure, but do not use ACE Pro feed, it is easy to bend in the ACE Pro channel, resulting in material failure. Tpus with a hardness of 85A or less cannot be printed with Kobra 3 Combo and are prone to being flattened by the extrusion wheel resulting in plugs.
¶ Item 2: drying consumables
Before printing the TPU, please use ACE Pro to dry the consumables to prevent the model from leaking and drawing due to moisture on the TPU.

¶ 2. Printing steps:
¶ Step 1: Adjust slice parameters
(1) Please open the "Anycubic Slicer Next" official slicing software, and then import the model slicing. When printing models with Kobra 3, 0.4mm nozzle and Generic TPU presets are recommended. In addition, TPU is prone to material failure or plug problems when the printing speed is high, please try to use lower printing speed.

(2) Because TPU is prone to wire drawing, more empty driving should be avoided when the model is placed. It is recommended to put only one model or a few models in a disk and choose the way of printing by object, try to avoid placing multiple models in a disk and choose the way of printing by layer.

¶ Step 2: Switch to monochrome printing
(1) After the consumables are returned to ACE Pro, pull out the ACE Pro signal cable, then press the buckle of the buffer mechanism, and pull out four teflon tubes respectively.

(2) Pull out more than three teflon tubes on the four inlet and one outlet, and insert the other end of the remaining teflon tube into the wire card. Then clamp the teflon tube and print head connection wire into the hub.

(3) Take out the unassembled holder, first put the cylindrical handle into the hole of the holder, and then rotate it at a certain Angle to fix it. Then press the assembled holder down into the slot behind the printer base.

¶ Step 3: Print the TPU
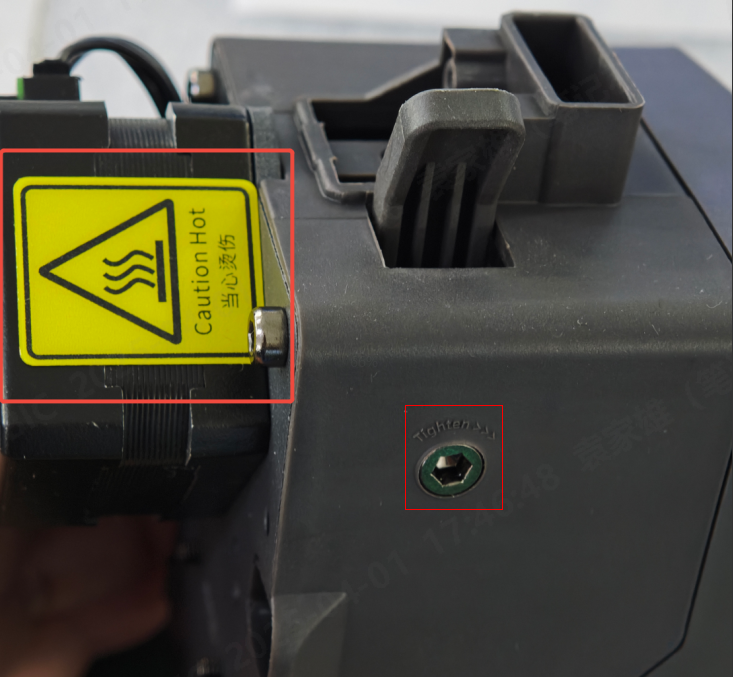
(1) Before inserting the TPU into the extruder, please first loosen the screw that fixes the extruder handle counterclockwise by half a turn to prevent the TPU from getting stuck in the extruder gears.

(2) Place the TPU on the material holder and then insert it into the extruder until a certain resistance is felt. During this process, press and hold the button at the top of the extruder.

(3) Then click "Holder" - "TPU"-"Extruder" from the display. Wait for the nozzle to heat to preset temperature, and the consumables are extruded from the nozzle. Finally, the slicing file is saved to the USB flash drive, inserted into the printer and printed.

¶ 3. After printing:
¶ Item 1: Remove the model
Generally, the adhesive force of TPU on the printing board is strong, and the model with a large bottom area is difficult to remove. Do not remove it violently to avoid damaging the model or the printing board. At this time, it is recommended that you pull up a gap at the corner of the model, spray alcohol into the gap, and then gradually force the model and the printing board to separate.
¶ Item 2: Processing model drawing
Drying the TPU before printing can only reduce wire drawing on the print, but not completely avoid it. Especially for the model with more jumps, if you want to remove the wire drawing on the model, you need to use the hot air of the electric hair dryer to blow the model, and you can also use the flame of the printer to quickly burn the wire drawing part, paying attention to avoid damage to the model.