¶ 1.Exposure time
Exposure time refers to the duration in which each layer of resin is cured by UV light.
Insufficient exposure time can lead to incomplete curing of the model, resulting in soft surfaces, missing details, and noticeable layer lines.
Excessive exposure time can cause the model to expand and lose dimensional accuracy due to resin's incomplete transparency, which causes UV light to diffuse into the surrounding area.
Therefore, to determine the best exposure time for the resin, it is necessary to conduct exposure tests using appropriate test files.
¶ 2.Precautions for "R_E_R_F" file
The exposure test file for Anycubic printers is named "R_E_R_F," which stands for Resin Exposure Range Finder. This file is used to determine the optimal exposure time for different types of resin. Anycubic printers recognize this file name to enable the exposure time testing feature.
1)Do not change the file name "R_E_R_F".
2)The "R_E_R_F" file is different for each printer model, and do not use the same file for different printer models.
3)Do not rename other files as "R_E_R_F".
4)The exposure time and time increment in the test file vary according to the machine. For specific parameters, please refer to the corresponding machine manual:
Firmware & Software | ANYCUBIC 3D Printing
5)The exposure time for model 1 in the test file can be modified according to personal needs in the slicing software or on the printer.
¶ 3.Instructions for using the "R_E_R_F" file
There are 8 models in the test file, each with a numerical identifier.
The numerical identifier on the model indicates its sequence, and the model with identifier 1 has an exposure time equal to the "normal exposure time" setting in the slice configuration, not the "bottom exposure time".
The exposure times of the other models increase automatically in sequence based on the exposure time of model 1, with an increment of "Ts" (no additional setting required). The specific time increments vary depending on the printer model and can be found in the corresponding model manual.
Firmware & Software | ANYCUBIC 3D Printing
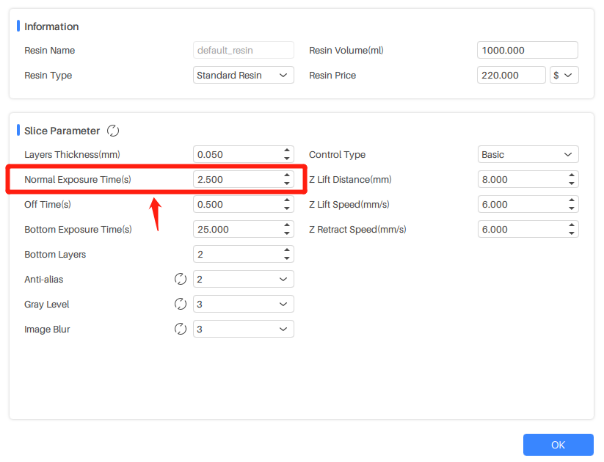
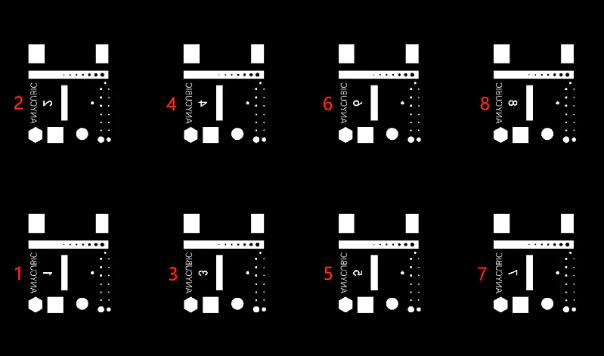
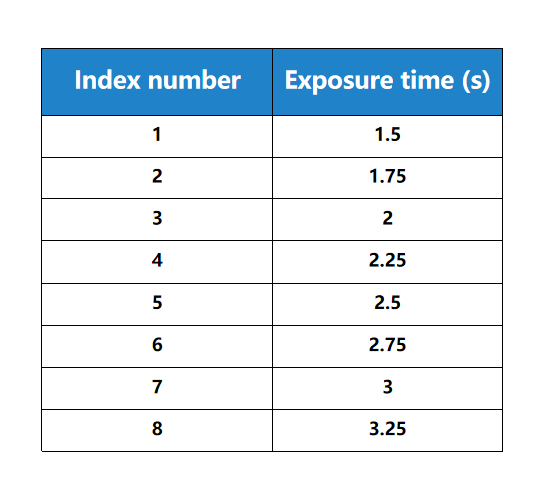
For example, when the normal exposure time is set to 1.5s and the time increment is 0.25s, the exposure times for models 1-8 are shown in the figure below.
¶ 4.Operational steps
¶ Step 1:Download
Download the test file based on your printer model:
Firmware & Software | ANYCUBIC 3D Printing
¶ Step 2:Import
Import the R_E_R_F file into a USB flash drive.
¶ Step 3:Print
Insert the USB flash drive into the printer, confirm or reset the exposure parameters of the R_E_R_F file, and print the file.
For example, when the recommended exposure time is 2s with a time increment of 0.25s, set the exposure time to 1s, and the exposure times of models 1-8 are: 1s, 1.25s, 1.5s, 1.75s, 2s, 2.25s, 2.5s, 2.7s.
¶ Step 4:Cleannig
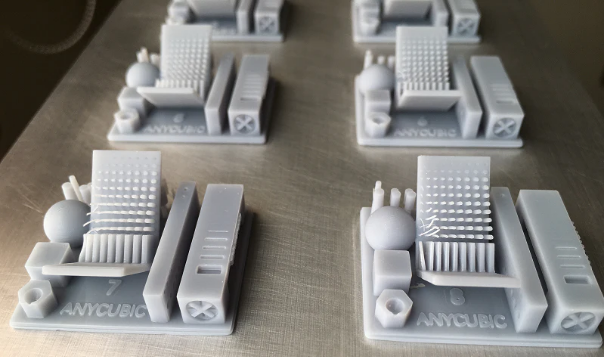
Clean the test models after printing and determine the exposure time based on the model identifier.
¶ Step 5:
Examine the print quality of each model, such as whether each part is successfully printed and whether the details are clear. Confirm the best exposure time through comprehensive comparison.
Please refer to the following common scenarios:
When printing curved models, pay attention to the smoothness of the spherical and italicized surfaces, which should be as smooth as possible when the print quality is similar.
When printing models with holes and small cylindrical shapes, pay attention to the number of holes and the forming effect of cylindrical shapes, with more holes and cylindrical shapes being better when the print quality is similar.
When printing normal models, choose the one with the best overall forming effect.
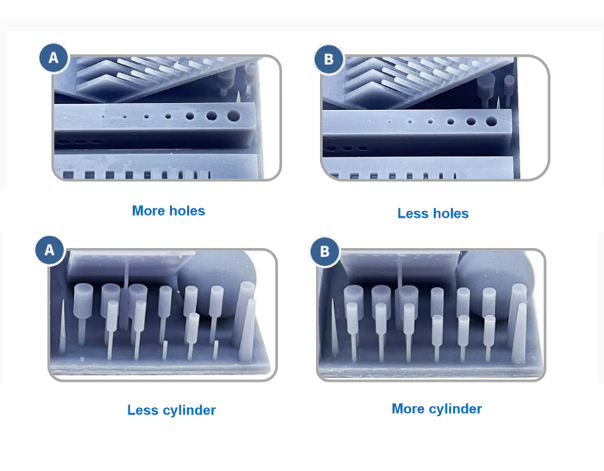
Taking the comparison between models A and B as an example:
Model A: has many holes and few cylinders (The exposure parameters fall between the optimal and print-failure range of parameters).
If printed with the parameters of Model A, more details of the model can be printed, but the probability of printing failure is higher.
Model B: has few holes and many cylinders (The excessive exposure time resulted in model bloating and expansion).
If printed with the parameters of Model B, the success rate of printing the model is higher, but some details will be missing.
You can choose the desired exposure time based on personal preferences, but if none of the exposure times for the 8 models produce good results, you can adjust the exposure time of the test file and perform a second test until the optimal exposure time is determined.