If you find that the cured model does not adhere to the print platform after the printing is completed, please refer to the following video to clean your printer.Code:1204
For the issue you encountered, there could be three possible reasons:
¶ 1.Screen Issue
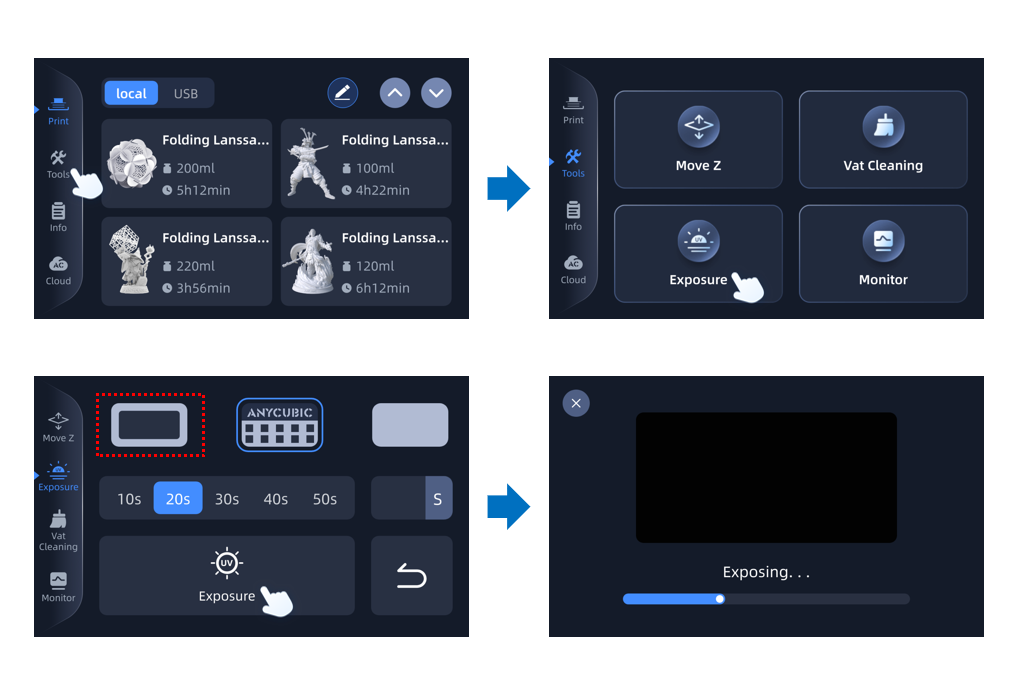
Remove the resin vat and print platform. Turn on the device and click on Tools on the main screen, then select Exposure Check and choose the first exposure image. Click Exposure.
Confirm if the images on the control screen (Touch Screen) and the LCD screen exposure match.

¶ 2.Resin Issue
Troubleshooting Method:
If you are using other brand of resin, try using Anycubic official resin for a test print.
① If Anycubic official resin prints successfully, we recommend consulting the resin seller for appropriate printing parameters or using our official test resin file "R_E_R_F" for testing.
This file is stored on the USB drive.
Here is the file download link:
https://drive.google.com/file/d/12wDWG45GiNwnqGknJUvnF5vIvRtK9Zs6/view

② If the same issue occurs even with official resin, try printing the USB test file first to eliminate the possibility of improper model support settings.
¶ 3.Parameter Issue
Troubleshooting Method:
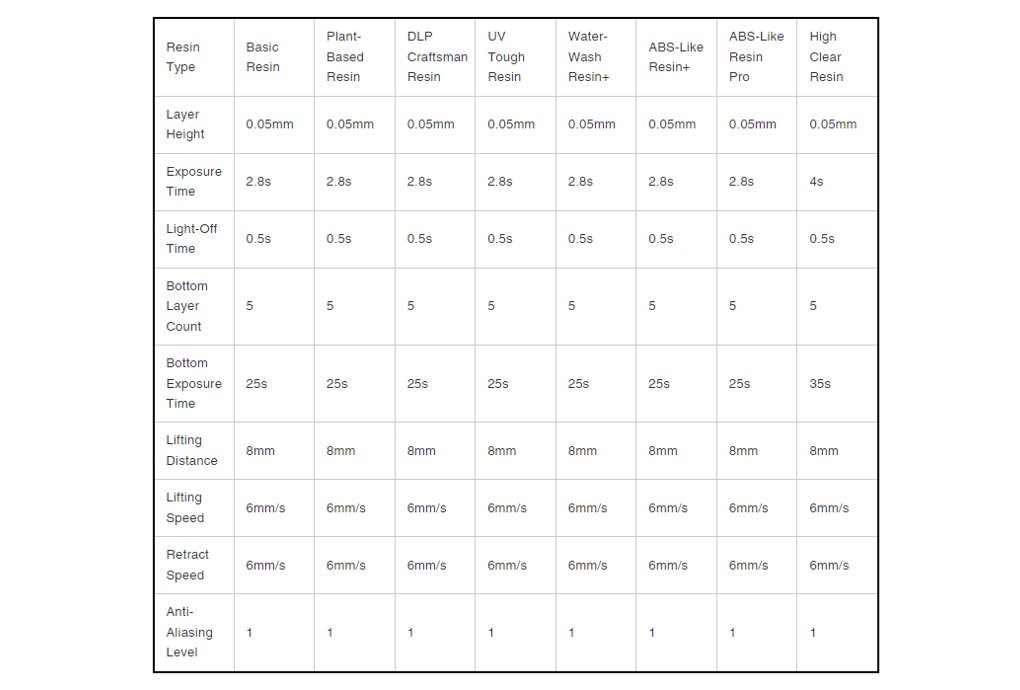
We suggest using Anycubic official resin and setting the print parameters based on the official recommendations. You could also directly print the official test file "R_E_R_F.pm5s" to test the printing effect under different exposure times at the current temperature.
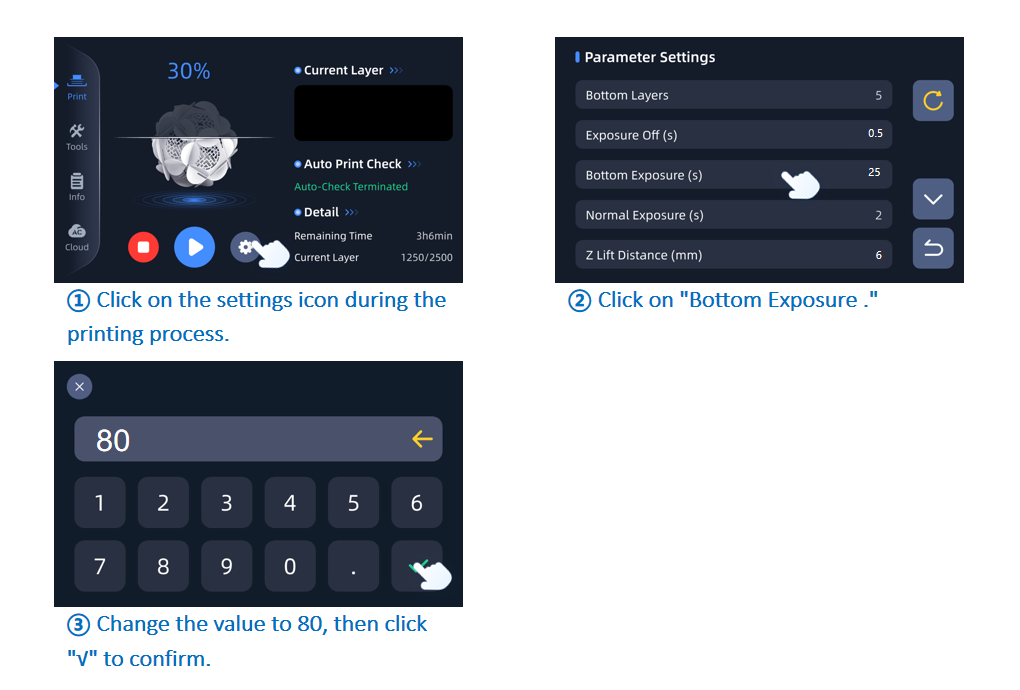
If the bottom is still not sticking to the platform after printing the official test file, try adjusting the bottom exposure time to 80 seconds.
¶ 4.Other Issues
Troubleshooting Method:
1)Ensure that the printing environment temperature is around 20 degrees Celsius, as temperature may affect the resin forming effect.
2)Check the model's support structure to ensure there are no overhangs or unsupported areas.
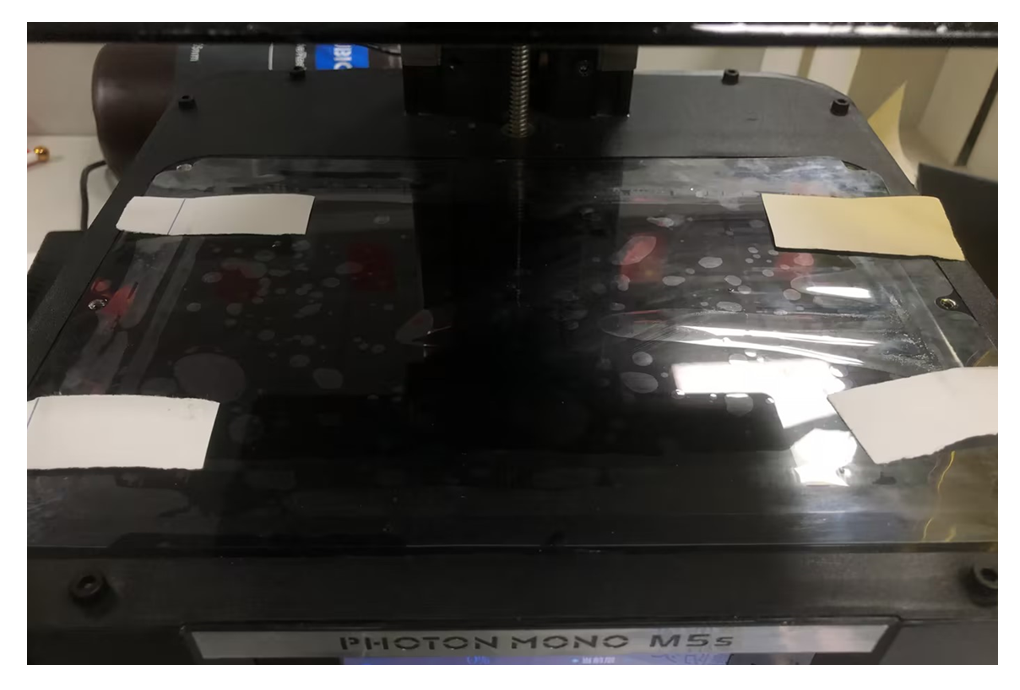
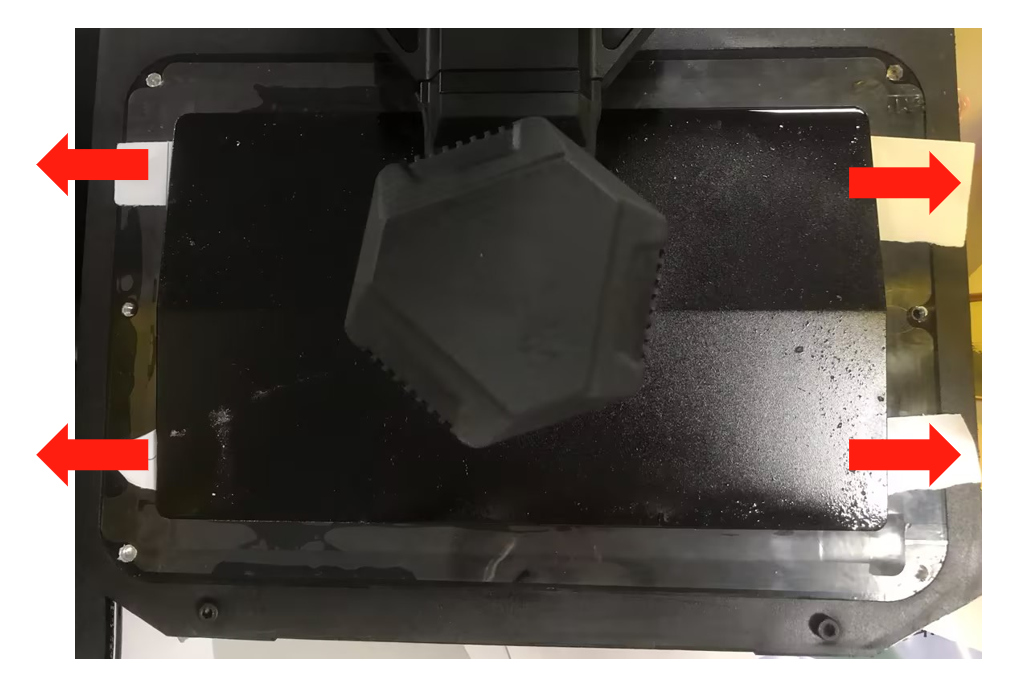
3)Clean the printing platform and perform calibration: Remove the resin vat, clean the printing platform, tear an A4 paper into strips, and place them at the four corners under the printing platform. Connect the printer to the power supply and turn it on, then insert the USB drive.
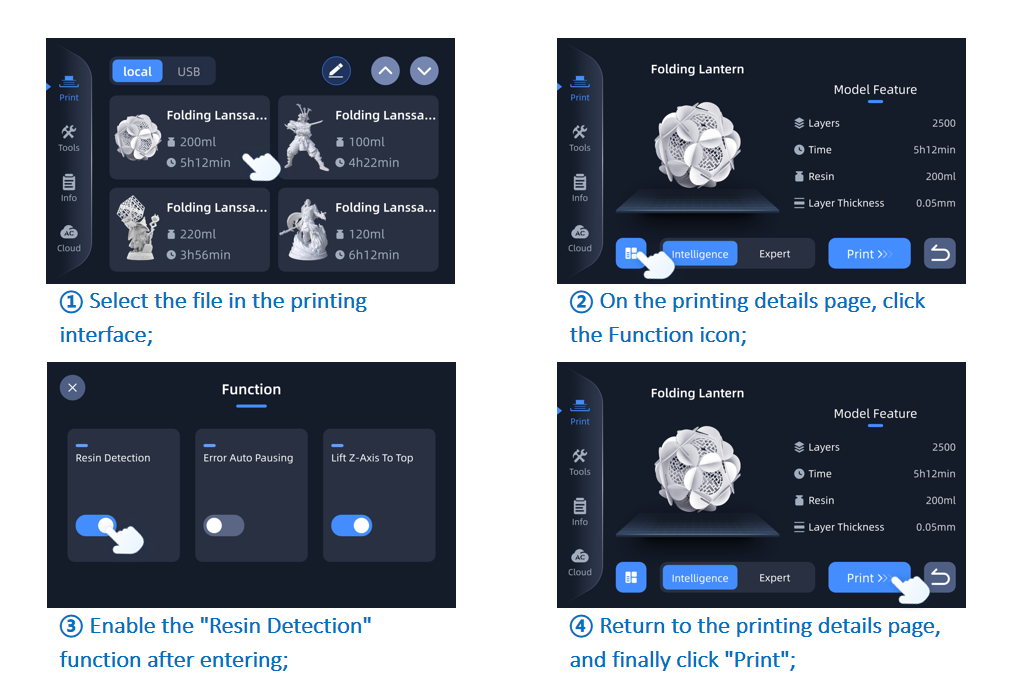
① Select the file in the printing interface;
② On the printing details page, click the Function icon;
③ Enable the "Resin Detection" function after entering;
④ Return to the printing details page, and finally click "Print";
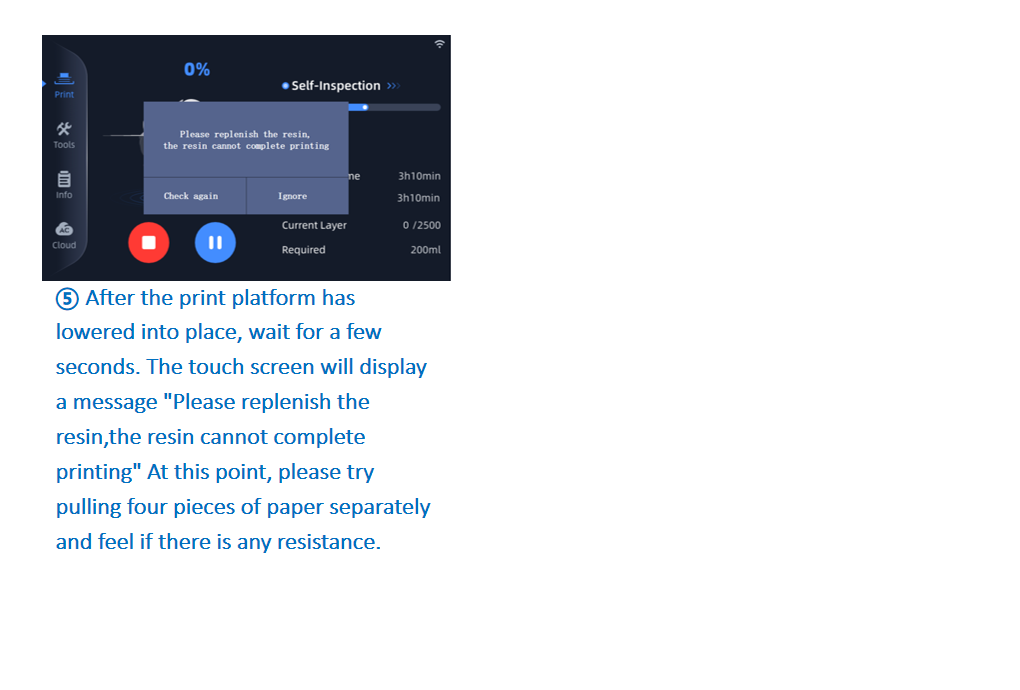
⑤ After the print platform has lowered into place, wait for a few seconds. The touch screen will display a message "Please replenish the resin, the resin couldnot complete printing" At this point, please try pulling four pieces of paper separately and feel if there is any resistance. If it could be easily pulled, please create a support ticket and provide the test results to the after-sales engineer, who will assist you in resolving the issue.
