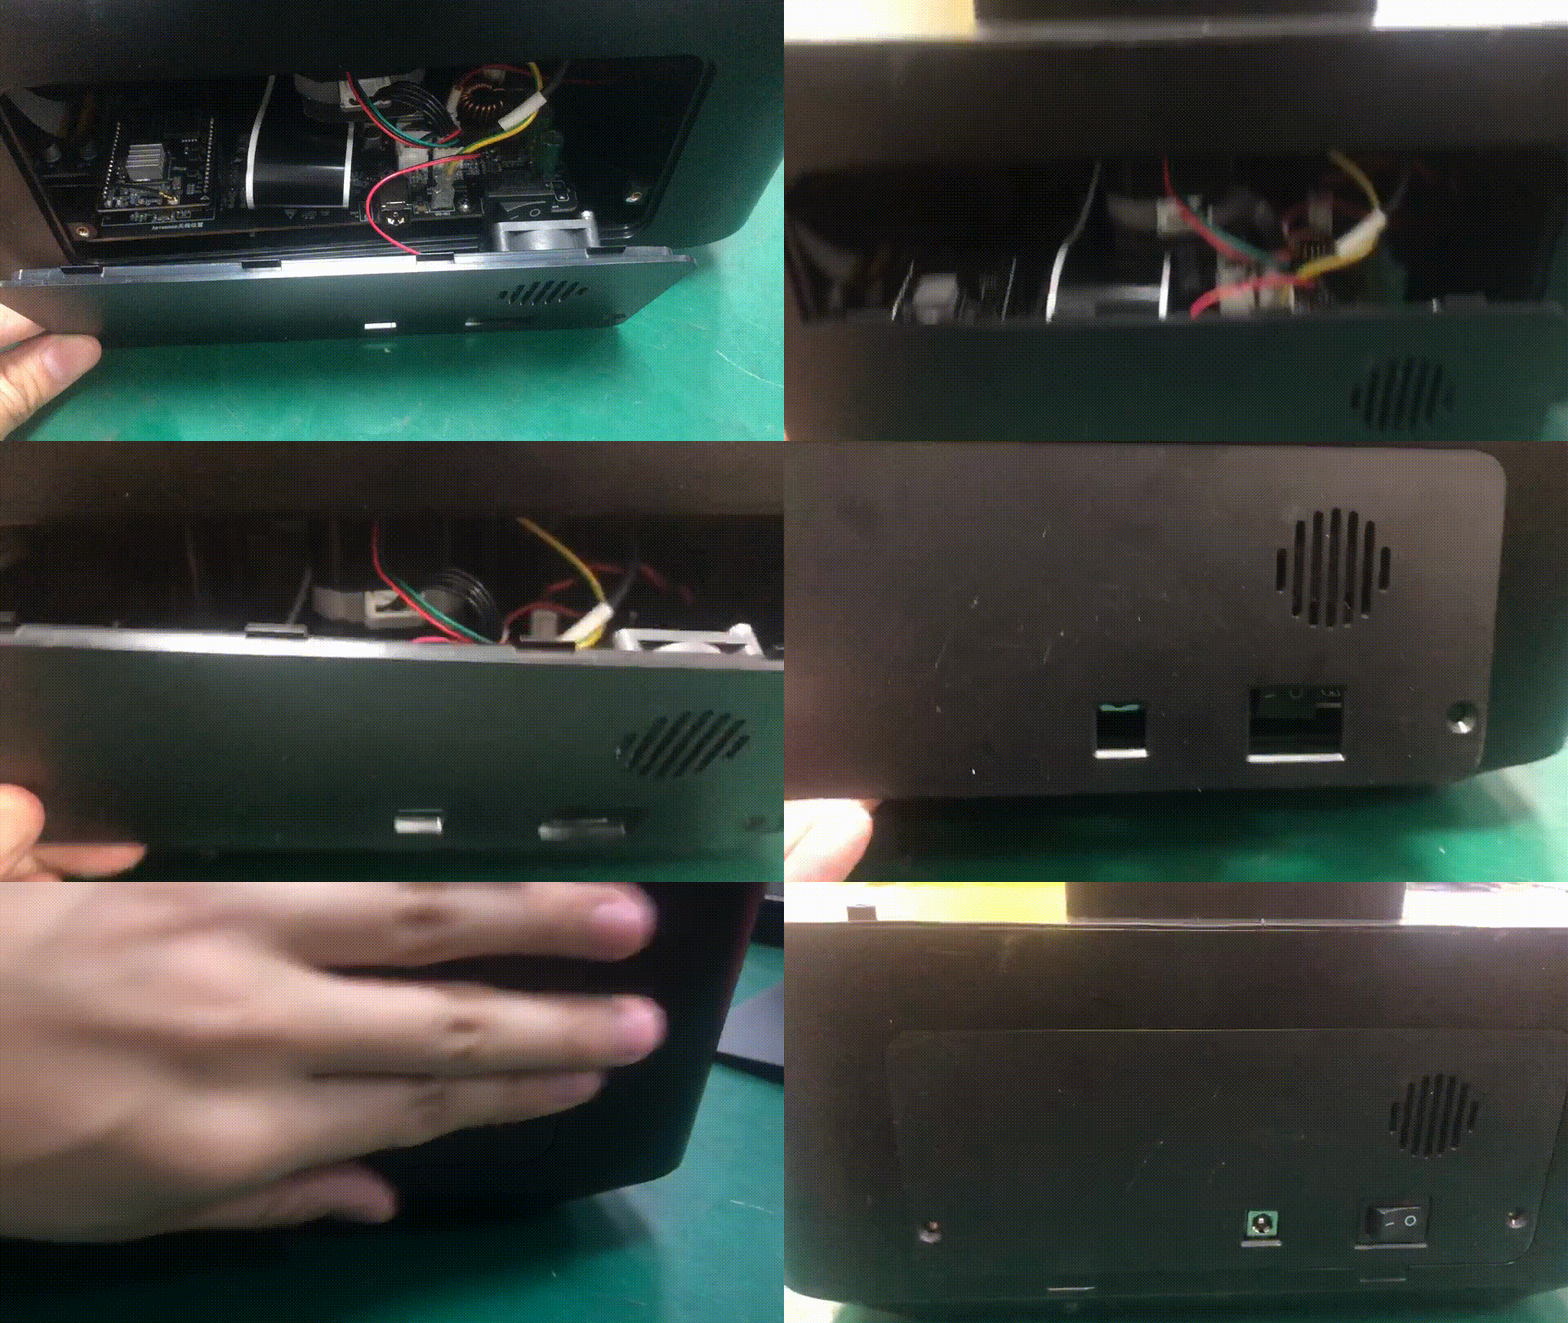
The screen connection status of the Photon Mono M5s can detect whether the model is connected or disconnected. If you encounter this prompt, you can refer to the following steps for inspection.
¶ 1) Disassembly steps
¶ Step 1: Turn off the printer
Before re-plugging and unplugging the cables, make sure to turn off the printer and disconnect the power to ensure safe operation.
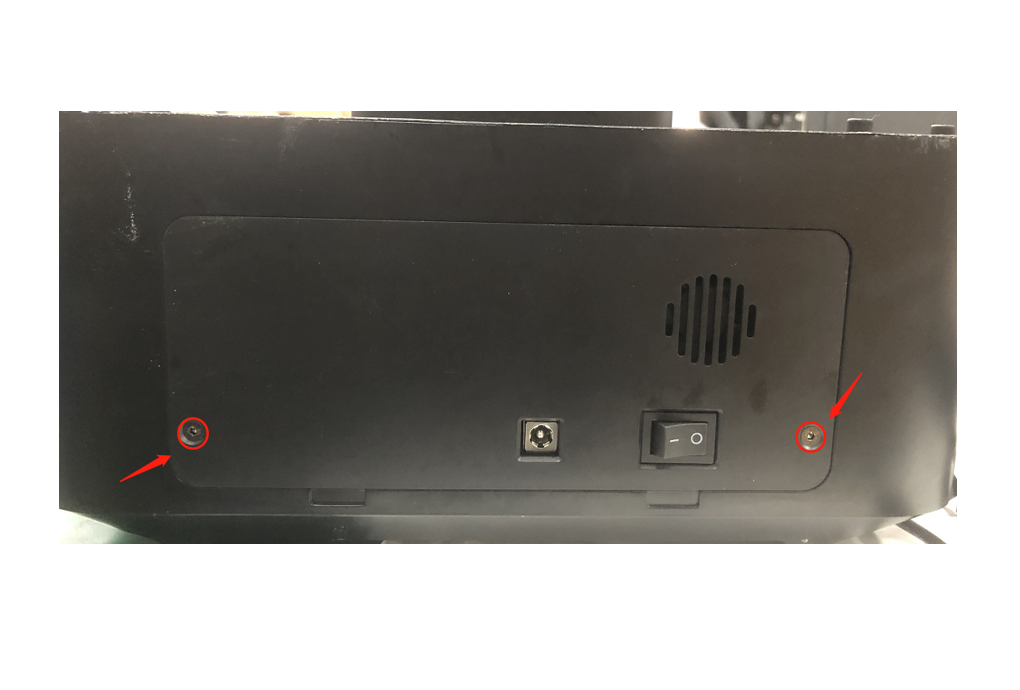
¶ Step 2: Remove the printer back cover
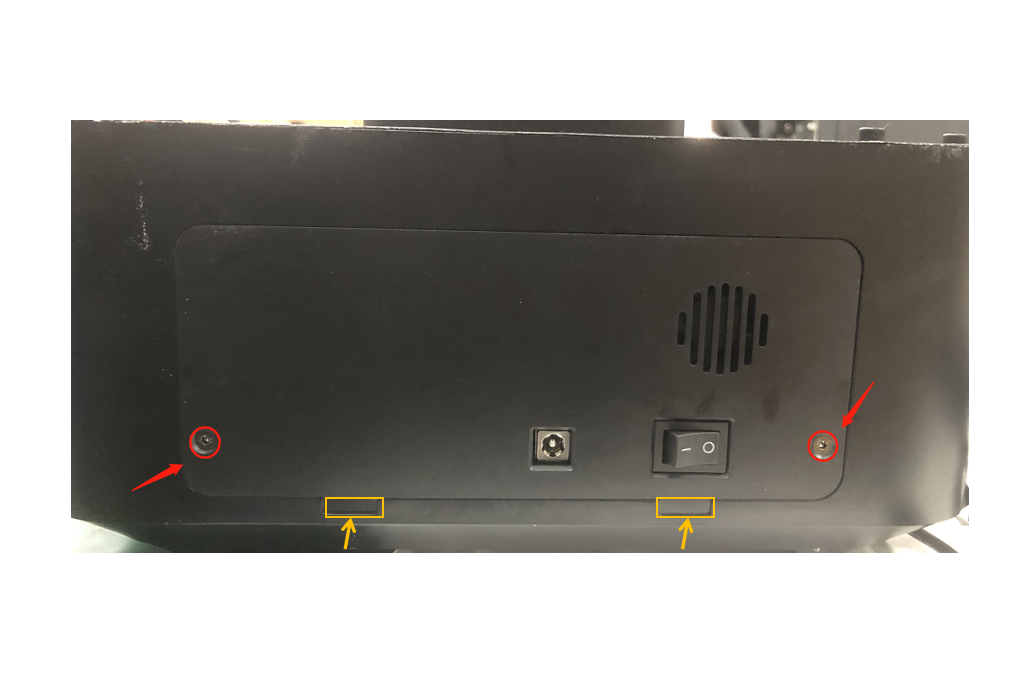
Use an M2.0 hexagonal wrench to unscrew the two screws securing the back cover, then manually remove the section marked in yellow in the diagram to remove the printer back cover.
¶ Step 3: Disconnect the cables
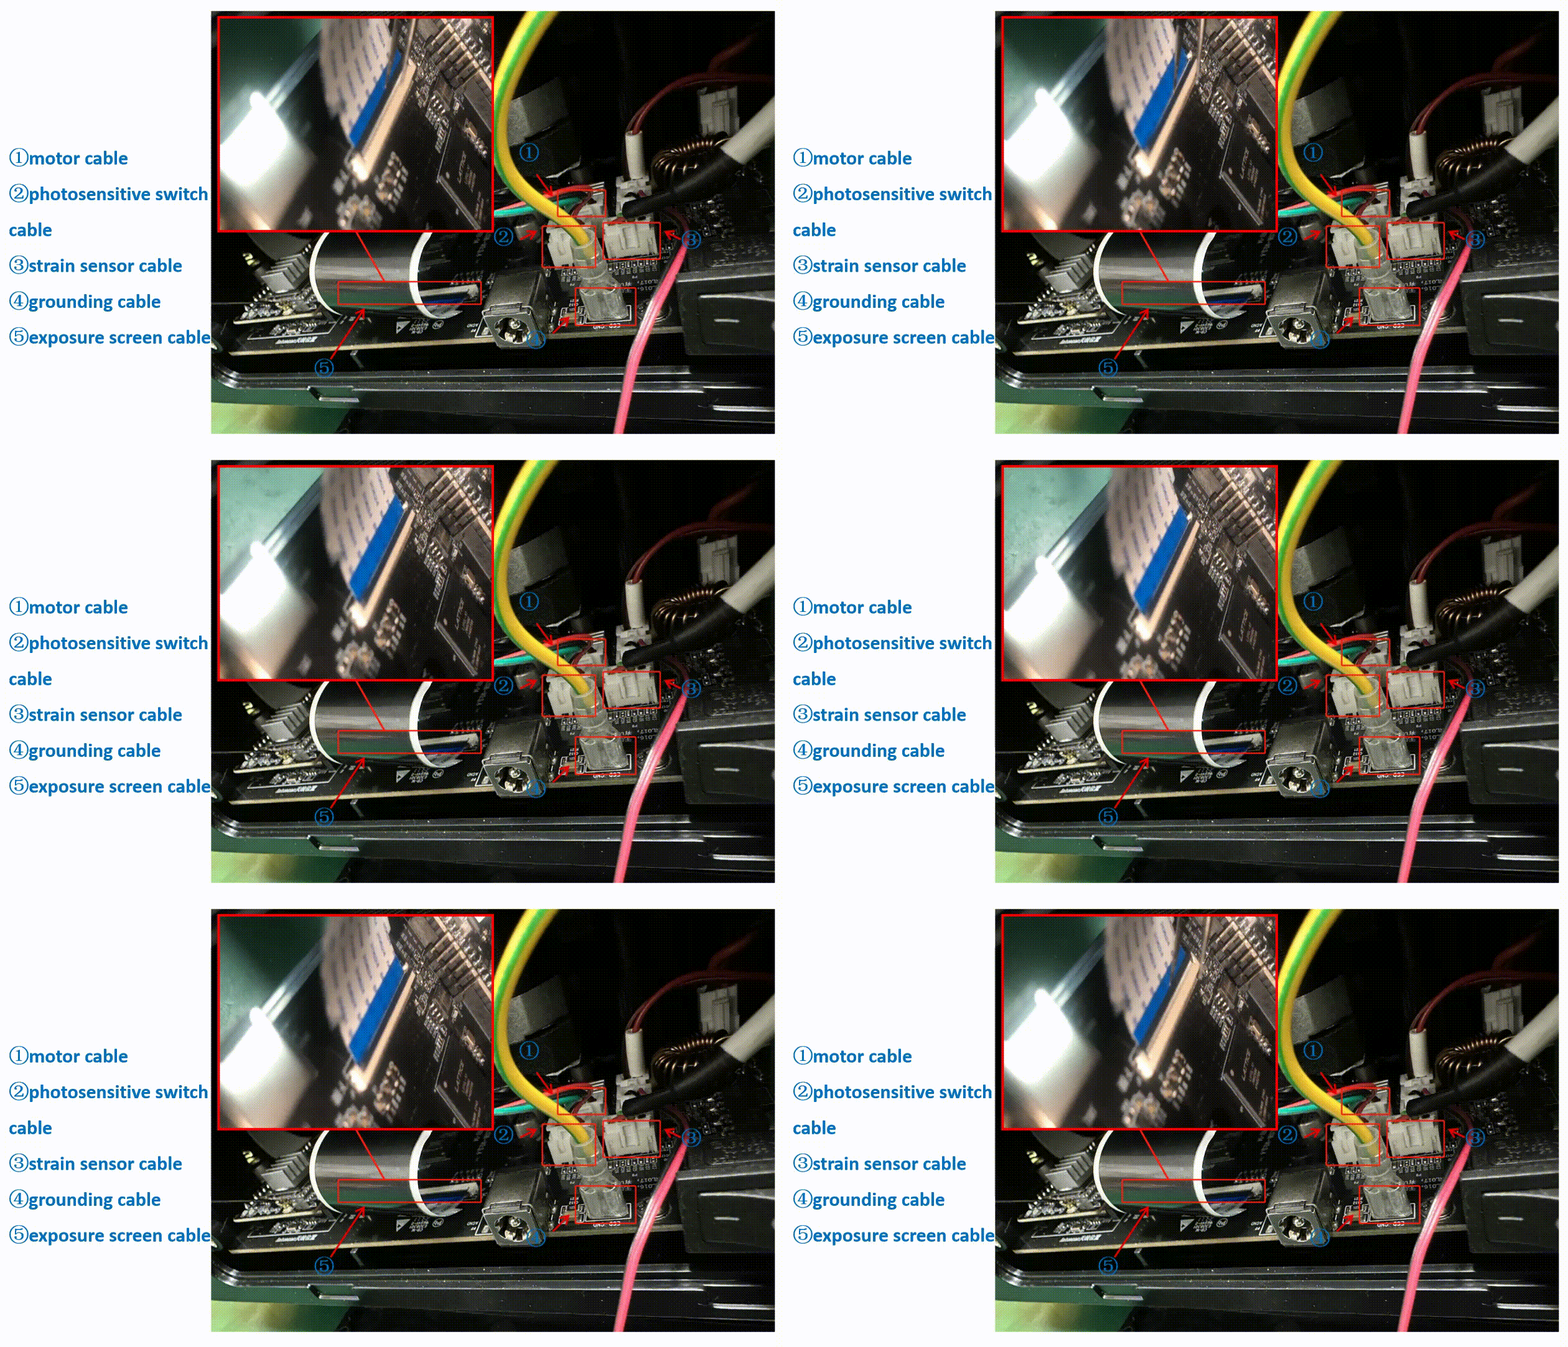
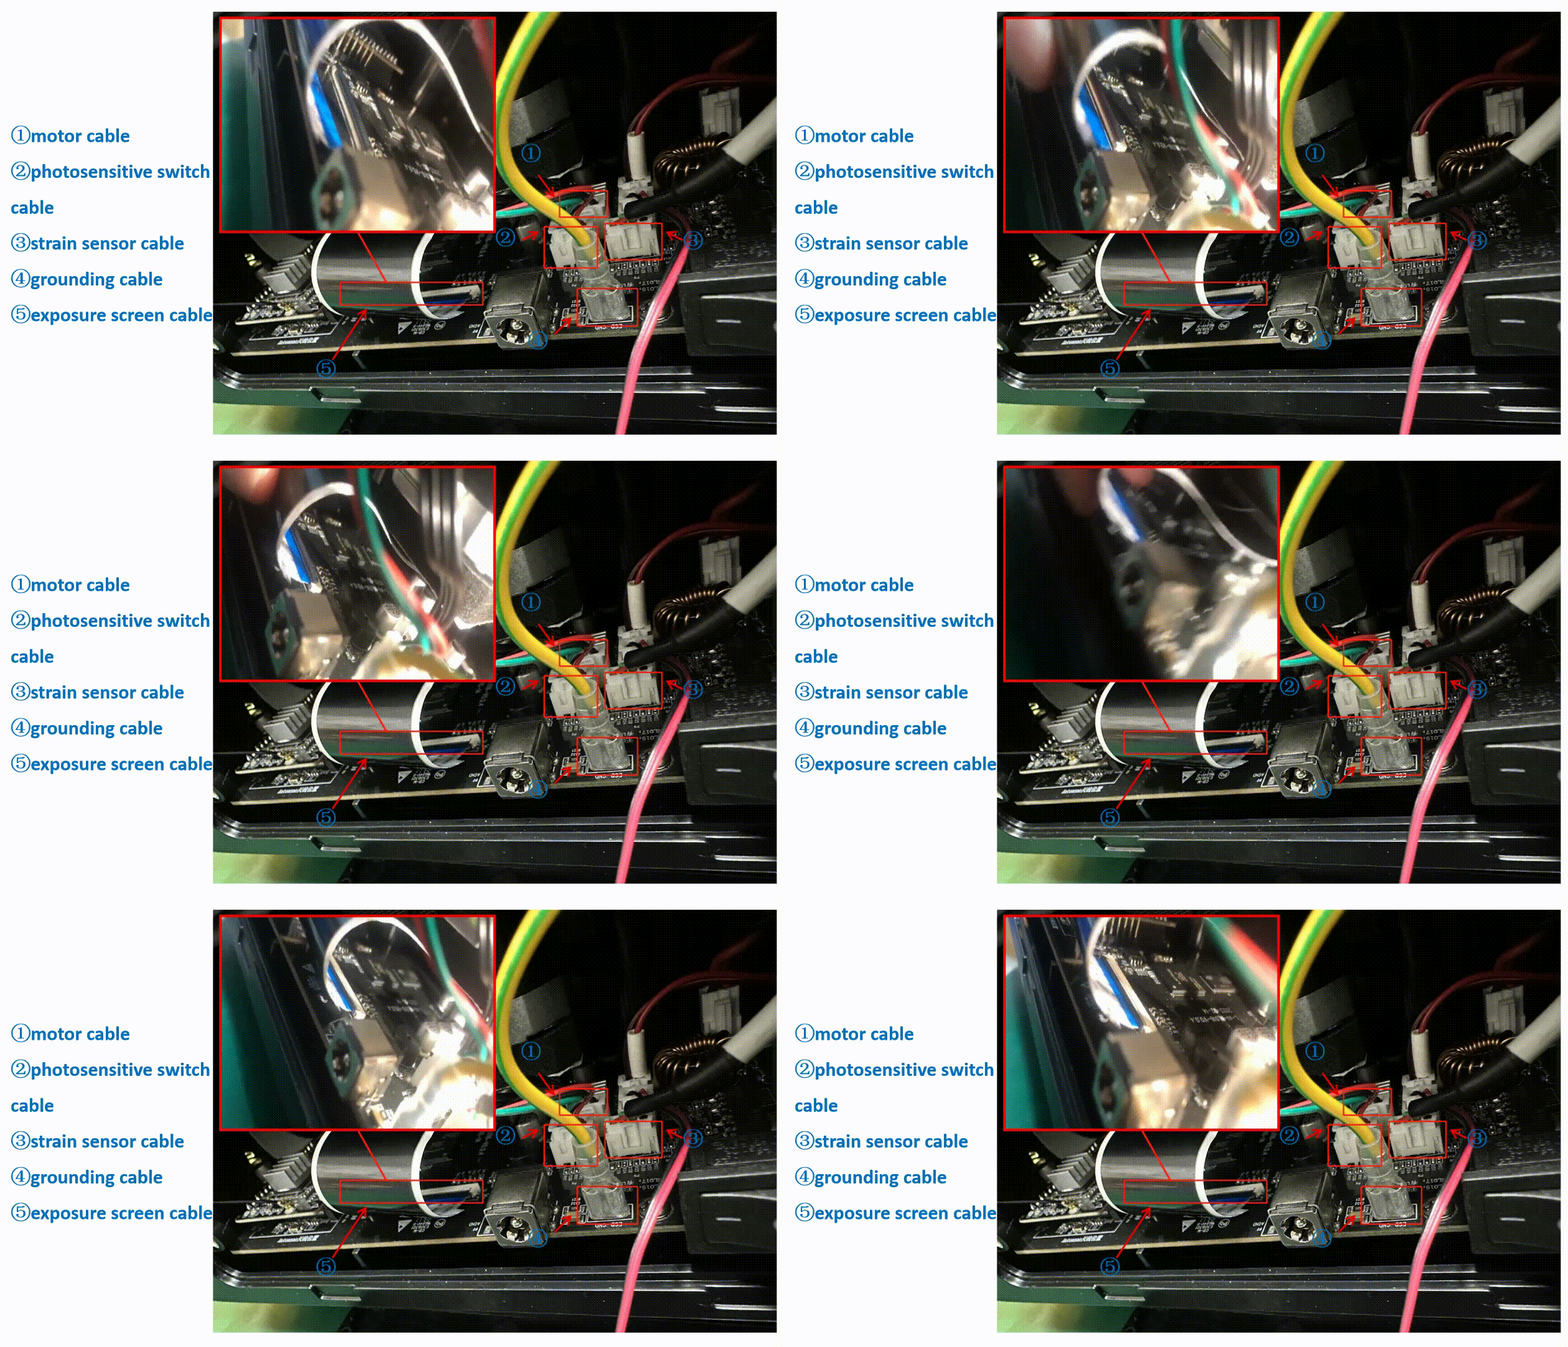
Disconnect the motor cable, exposure screen cable (use tweezers to lift the connector cover before unplugging), photosensitive switch cable, strain sensor cable, and grounding cable from the motherboard.
¶ Step 4: Remove the upper baseplate
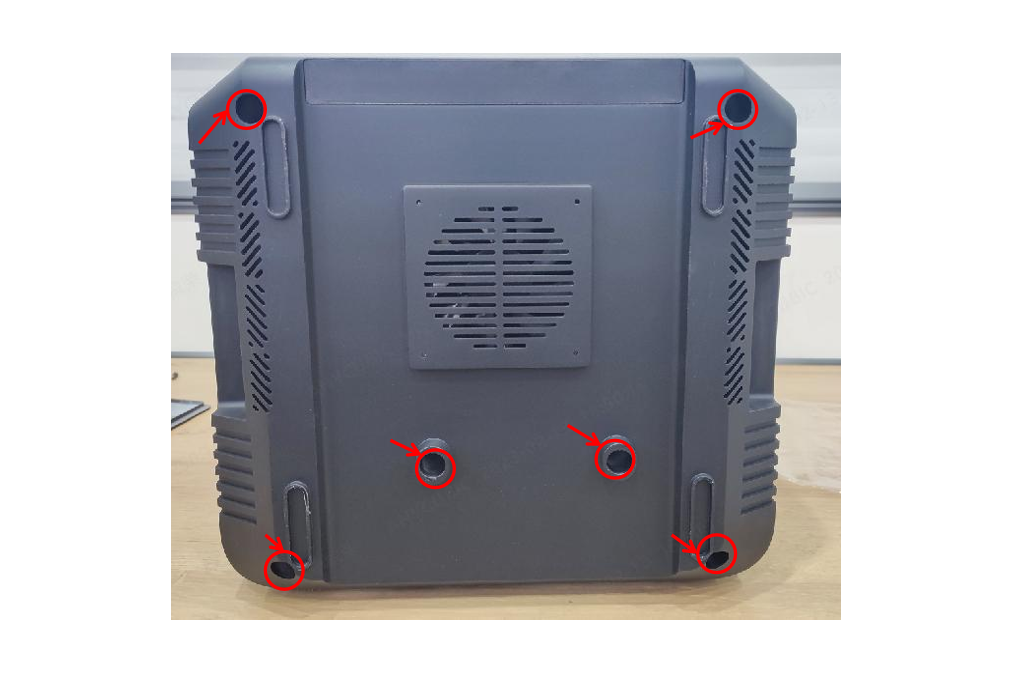
Place the printer upside down, use an M3.0 hexagonal wrench to unscrew the six screws securing the upper baseplate, slightly pry open the edge of the upper baseplate sticker, and finally remove the upper baseplate.
¶ Step 5: Check the exposure screen cable
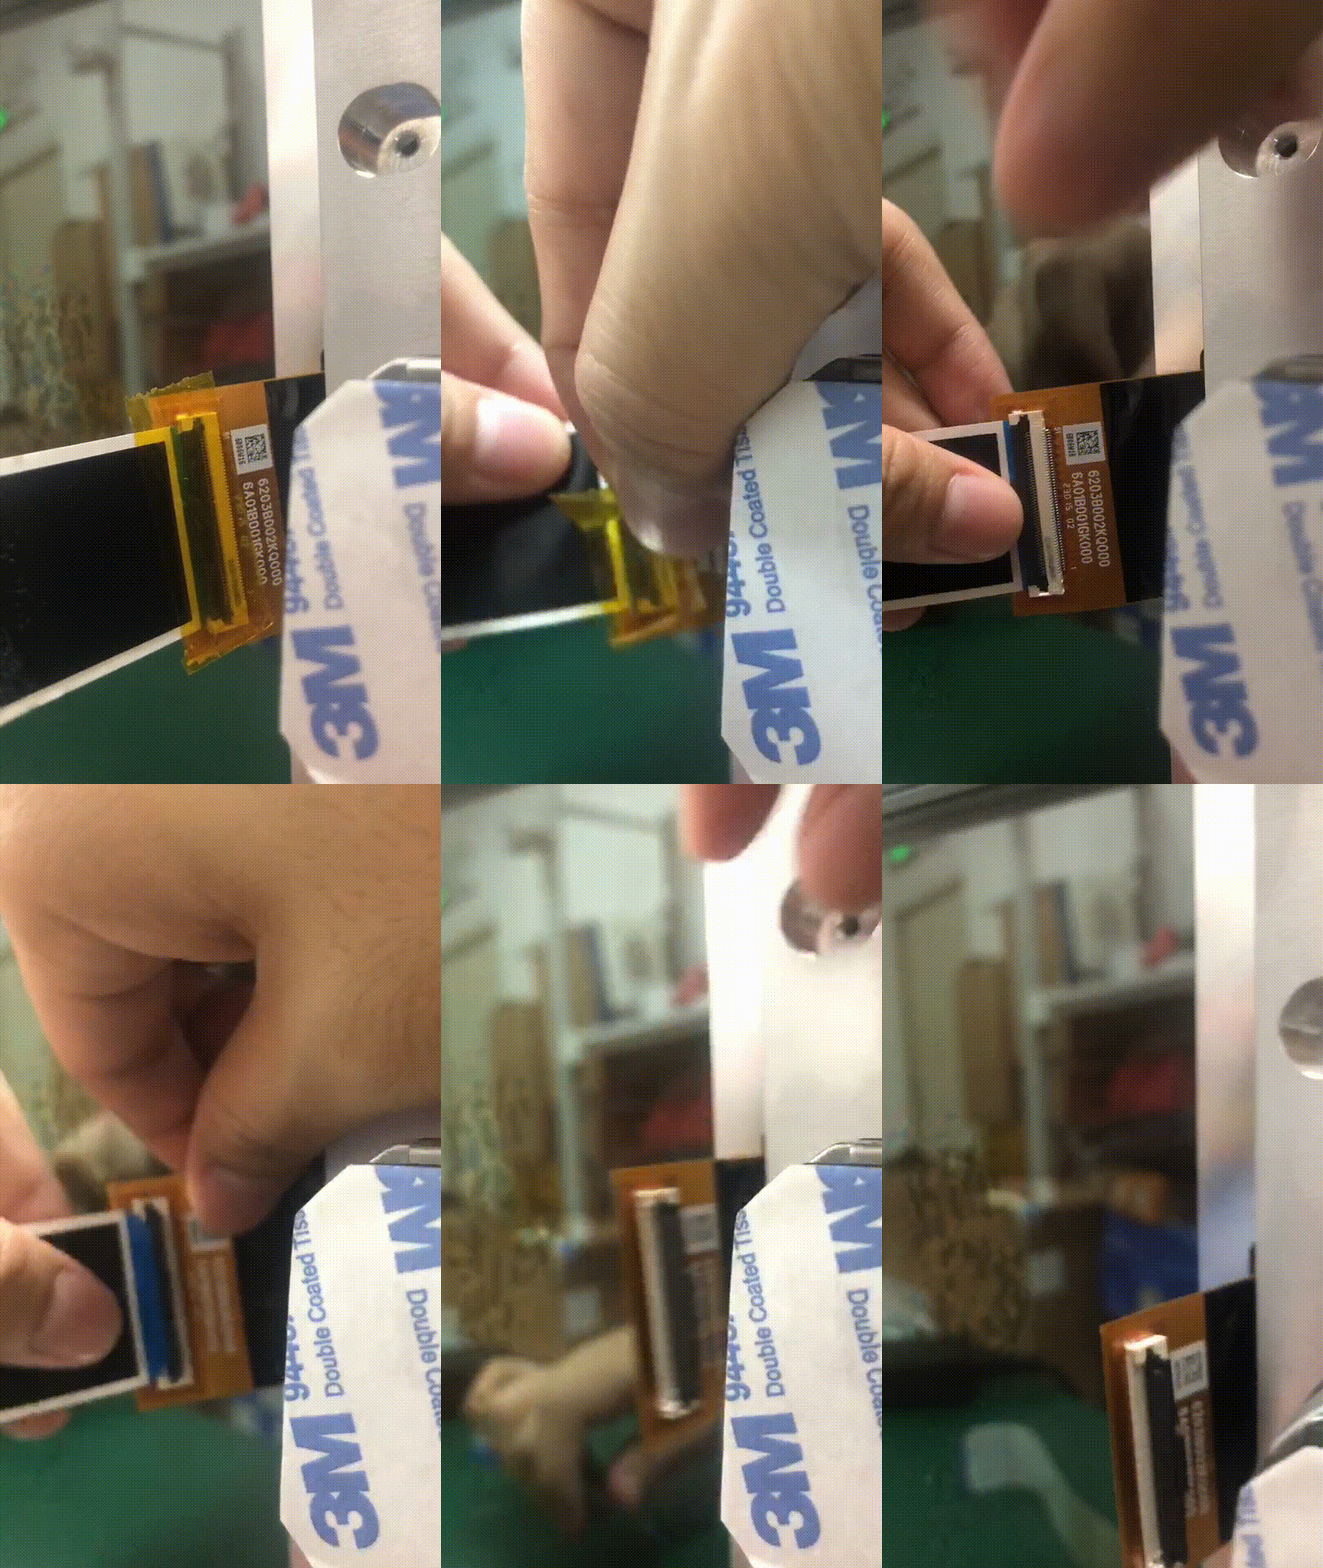
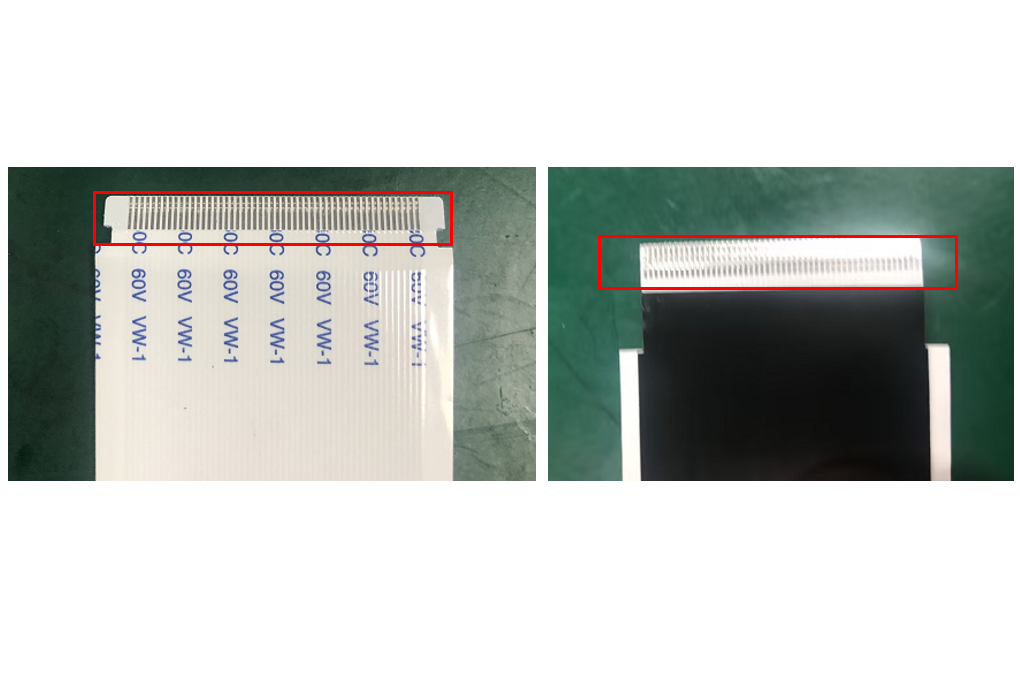
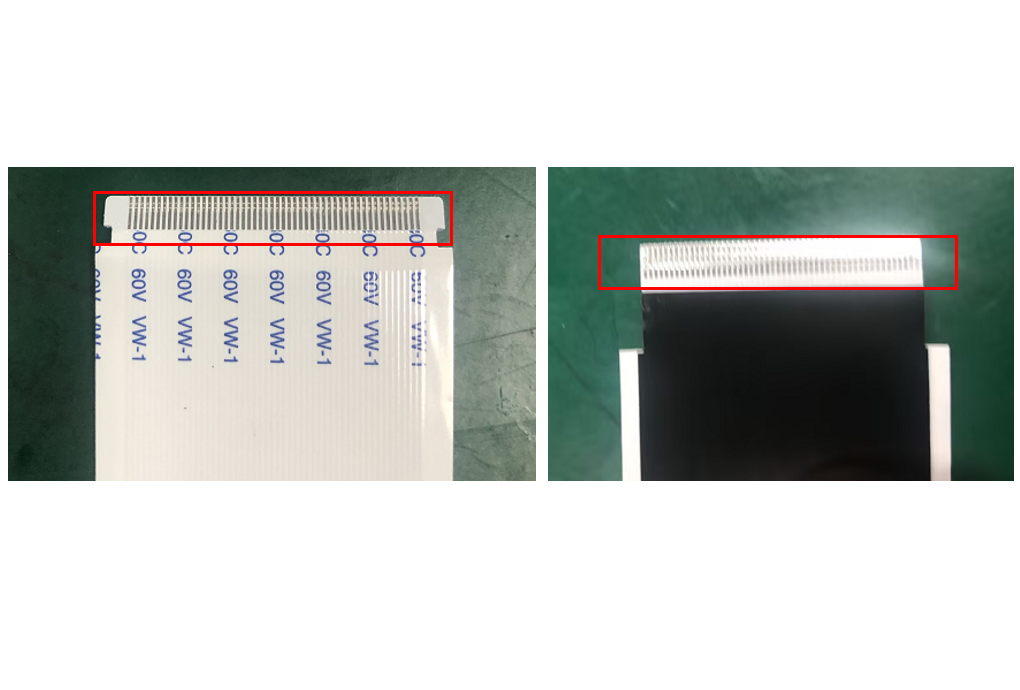
From the removed upper baseplate, unplug the exposure screen cable from the connector, remove the high-temperature adhesive tape (can be reused later), open the connector cover, and observe if the surface of the cable is damaged and if the pin connections are normal. If the cable surface or pins are damaged, please replace it promptly.
¶ 2) Installation steps
¶ Step 1: Install the exposure screen cable
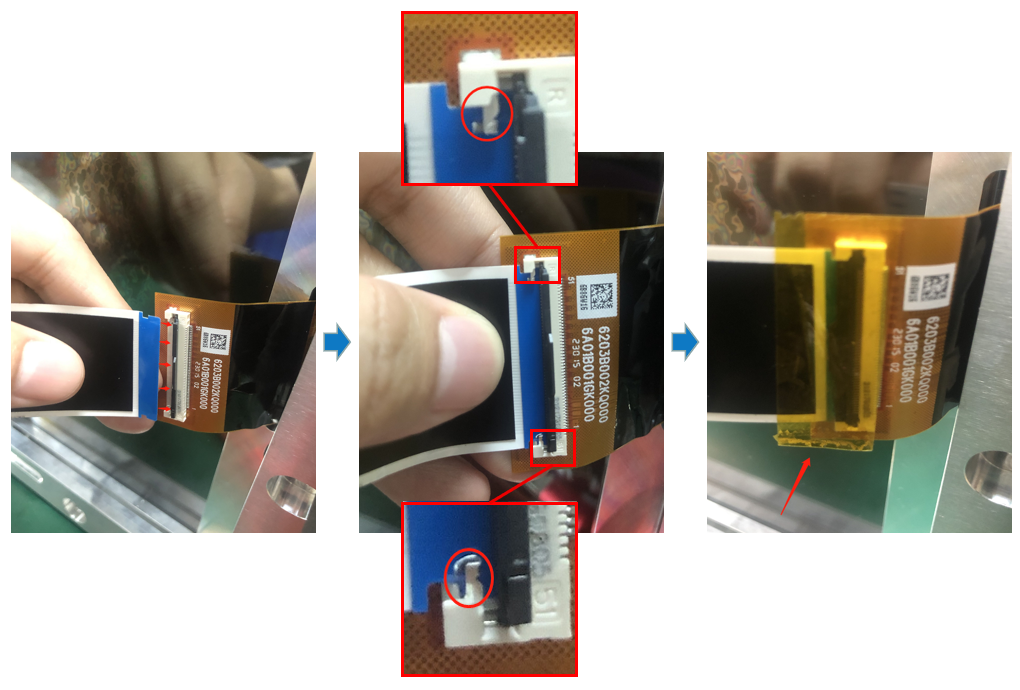
First, install the cable at the exposure screen location on the upper baseplate, and finally place the previously removed high-temperature adhesive tape at the connection point .(note: the end with the notch on the cable should be installed at this location, and when installing, make sure the blue side aligns with the connector cover)
¶ Step 2: Install the upper baseplate and connect the cables
You can temporarily skip securing the screws. Start by installing the motor cable, exposure screen cable (pay attention to align the blue side with the connector cover, and arrange the exposure screen cable to avoid interference with the UV light exposure, which may cause foreign objects to obstruct the screen display), photosensitive switch cable, strain sensor cable, and grounding cable back into their original positions. You can then plug in the power, turn on the printer, and observe if the problem still persists during the self-check.
¶ Step 3: Install the screws for the upper baseplate
Close the printer and disconnect the power. Place the printer upside down, use an M3.0 hexagonal wrench to tighten the six screws securing the upper baseplate.
¶ Step 4: Install the printer back cover
During installation, make sure to first fit the upper part of the back cover into place before securing the lower part. Finally, use an M2.0 hexagonal wrench to tighten the two screws securing the printer back cover.
