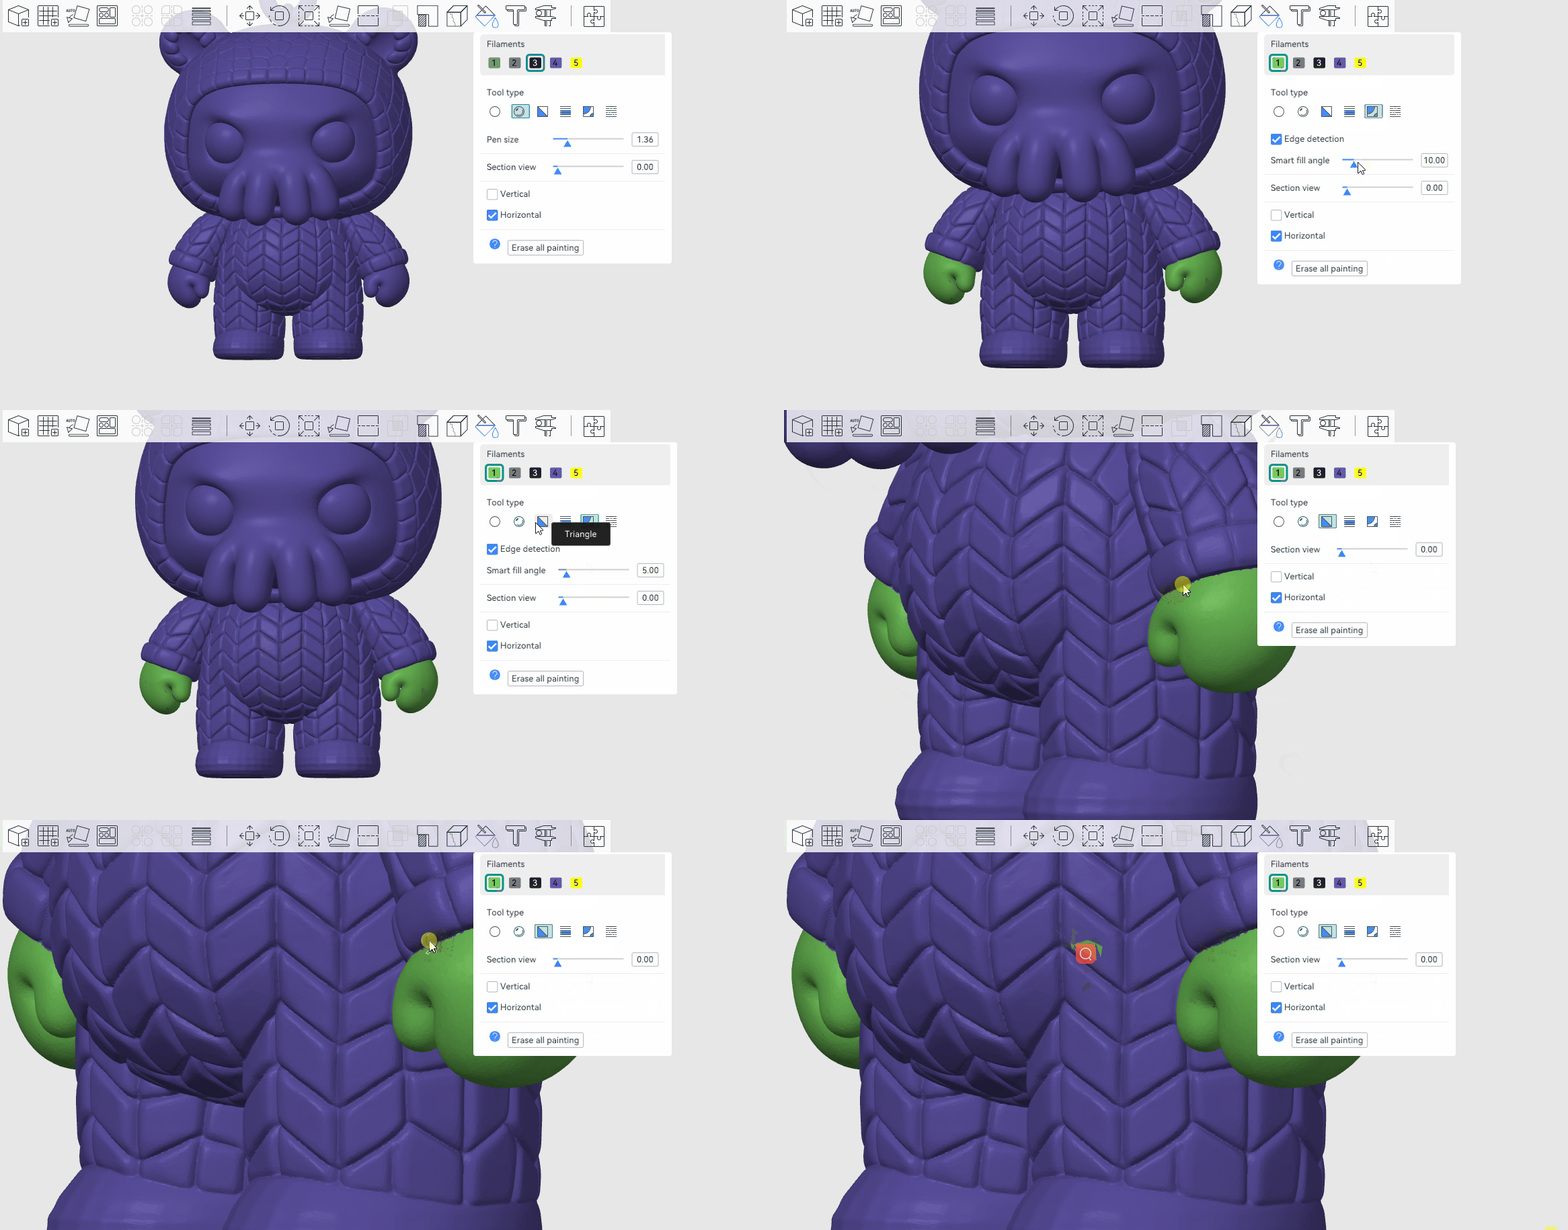
¶ Function Introduction:
The coloring tool of Anycubic Slicer Next is a powerful fine-tuning control function, especially suitable for users who need to locally adjust supports, print parameters or structural strength. Manually marking key areas can significantly enhance the printing success rate, surface quality or functional performance.
¶ Operation interface:
Please find the color painting tool in the top toolbar of the slicing software and then color the model.
¶ Filaments
It lists all available failments in the current project in the form of color boxes. You can select the color of the painting by simply clicking on the color box or using the keyboard shortcuts 1 to 9.
¶ Tool type
The slicing software offers the following six drawing tools:
Circle
The circle tool is a circular coloring tool used to draw any curve on the surface of the model.
Selecting the vertical or horizontal direction allows the coloring tool to remain in a vertical or horizontal position.
Sphere
The sphere tool is similar to the circle, but it will color all the surfaces inside the sphere, not just the visible ones.
Triangle
The triangle tool can color the triangular surface pointed by the mouse pointer. Click to color a single triangular face, and drag to continuously select a series of triangular faces for coloring.
Fill
The Fill tool will color the connected surfaces that propagate starting from the surface pointed by the mouse pointer. When reaching surfaces of different colors, the propagation will stop. If the "Edge detection" function is enabled, propagation will also stop when an Angle sharper than the threshold is reached. You can achieve a large-area rapid coloring effect by adjusting the Smart fill angle.

Height Range
The height range tool colors all surfaces within a given height range, even if they may be located in disjoint areas.
Gap Fill
Using the above-mentioned tools for painting usually results in gap areas. They may look ugly and increase the frequency of filament replacement. The blank fill tool will detect small blanks and automatically fill them with the colors of adjacent faces.