¶ Feature Introduction:
The "Lay on Face" feature in Anycubic Slicer Next allows users to manually specify the contact surface between the model and the print platform, providing precise control over print orientation. It compensates for the limitations of automatic orientation algorithms and is particularly indispensable in the following scenarios:
● When protecting critical aesthetic surfaces (e.g., display faces, text).
● When functional parts require high precision on the bottom surface (e.g., assembly interfaces).
● When automatic rotation results do not match design intent (e.g., inverted placement, unstable center of gravity).
¶ Usage Instructions:
¶ 1. Import the Model:
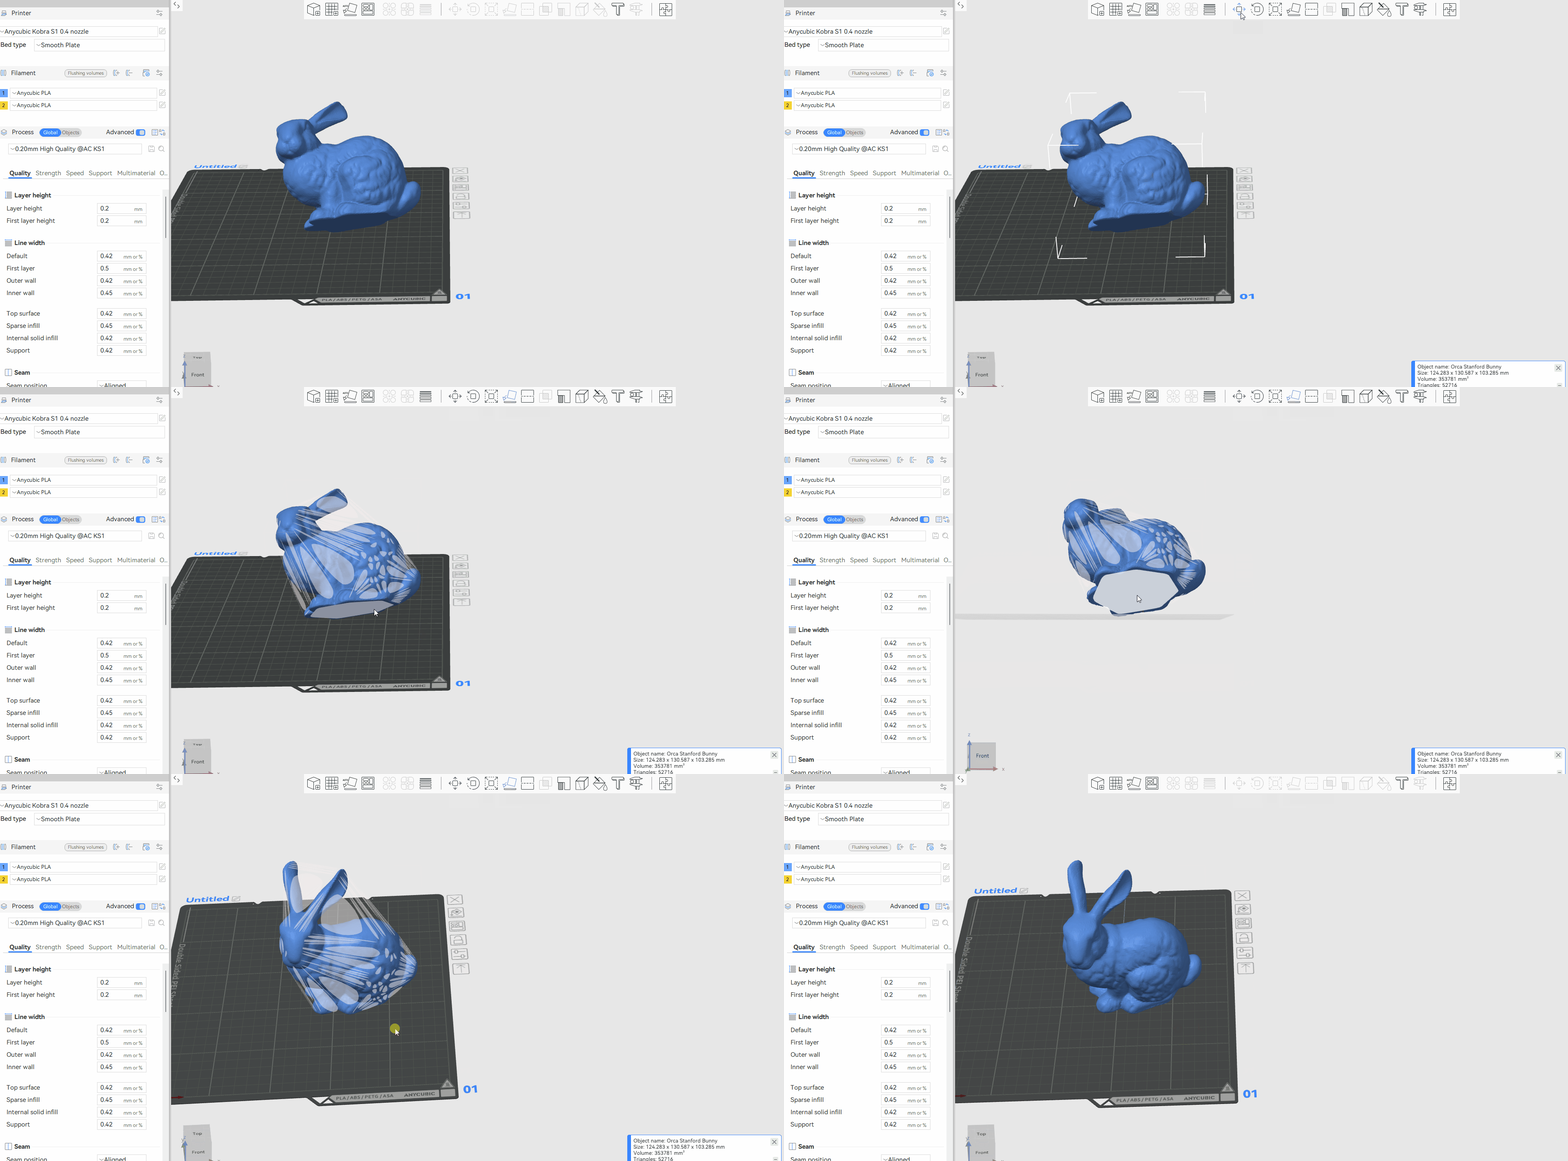
Import the model into the workspace of Anycubic Slicer Next, then click to select the model you want to adjust in the platform view or the object list on the left.
¶ 2. Select the Bottom Surface:
Click the "Lay on Face" icon in the top toolbar, and multiple white planes will appear on the model. Select the face you want as the bottom surface, and the model will immediately rotate to align that face downward against the platform.

¶ 3. Slice and Preview:
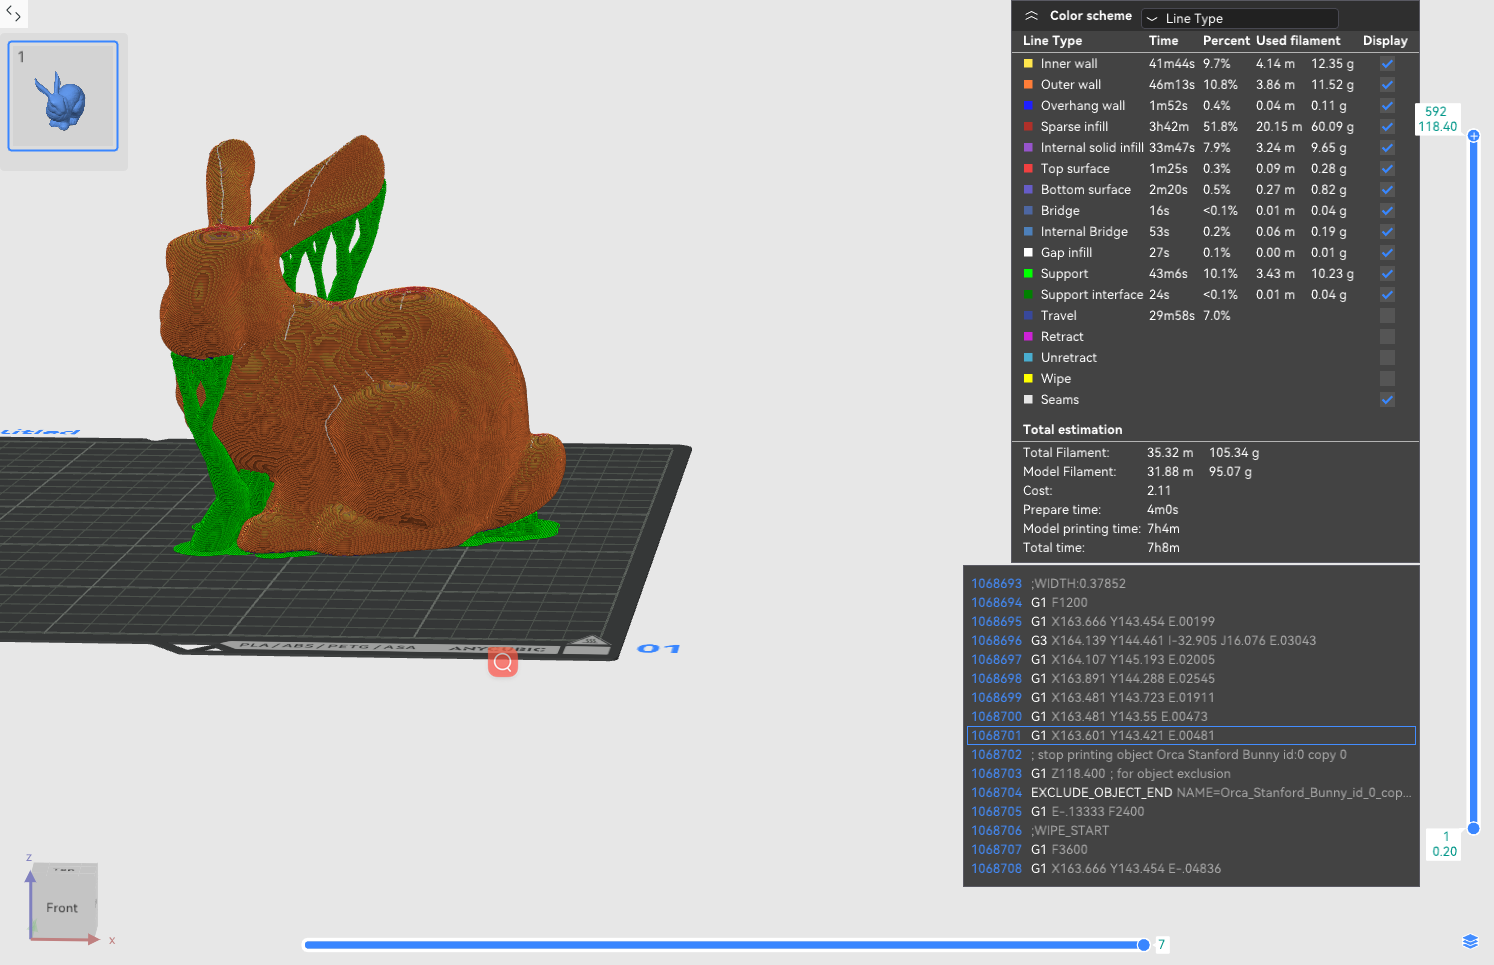
Confirm that the bottom surface is accurately placed against the platform, then click "Slice" and enter "Preview" mode to verify if the desired effect is achieved.

¶ Usage Tips:
¶ 1. Prioritize Large, Flat Surfaces
When printing a statue with a base, manually selecting the base's bottom surface (rather than the statue's feet) significantly improves stability.
¶ 2. Protect Critical Aesthetic Surfaces
If the model has fine engravings or text, avoid orienting them downward as support contact surfaces, as residual supports may affect detail quality.
¶ 3. Functional Assembly Requirements
When printing parts that need to interface with other components, ensure the mating surface faces downward for higher dimensional accuracy.
¶ 4. Remedying Auto-Orientation Shortcomings
If automatic rotation places the model upside-down (e.g., a vase opening facing downward), manually select the vase's base as the bottom surface to restore the correct orientation.