Note: This article is written based on the 1.3.5 version of Anycubic slicer Next slicing software. There may be some discrepancies if the software version is inconsistent.
¶ Definition of layer height
During the printing process, the thickness of each printed layer in the vertical direction. Since the model is gradually formed by stacking materials layer by layer, the size of the layer height directly determines the resolution of the model in the Z-axis direction, also known as the "vertical resolution". Generally speaking, the smaller the layer height, the finer the surface of the printed model, the more accurate the details, and the higher the overall precision.
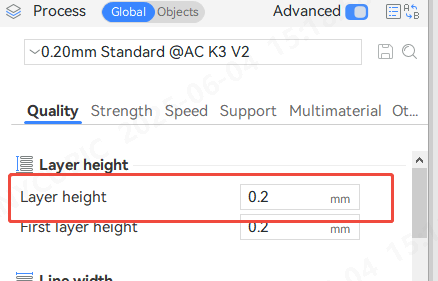
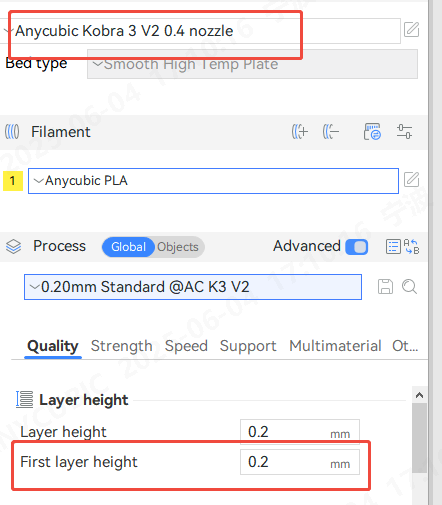
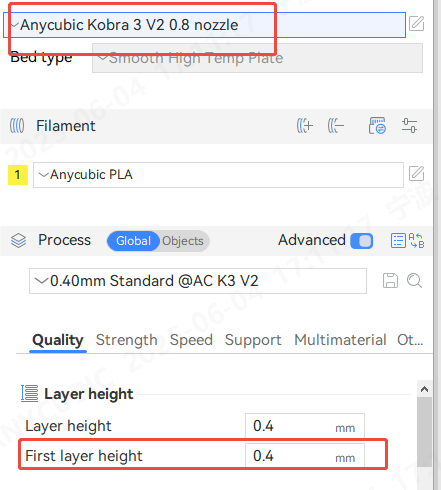
In the slicing software, set the layer height parameter in Process - Quality - Layer Height.
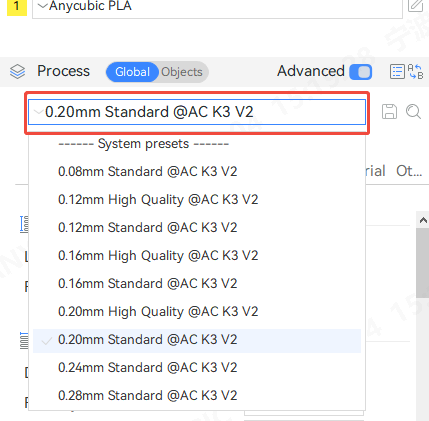
You can also select the required layer height in the process parameters. Different nozzle sizes correspond to different preset parameters. Select the appropriate parameters according to your needs.
First layer height: This is what we call the first layer of the printed model, which is the height between the nozzle and the hot bed.
The height of the initial layer is the default parameter. The initial layer height varies with different nozzle diameters. Slightly increasing the height of the initial layer can improve the adhesion of the printing platform. Each model uses the default 0.4mm nozzle, and the first layer height is 0.2

¶ Effect of layer height
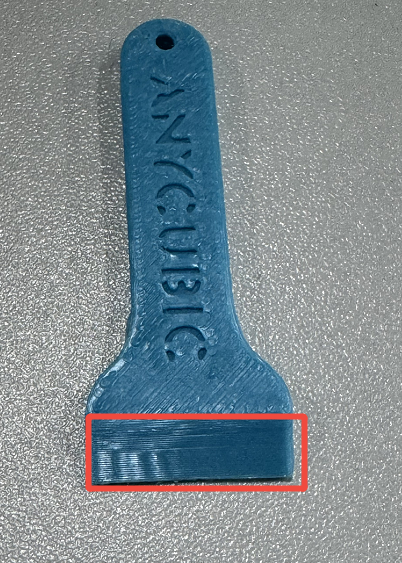
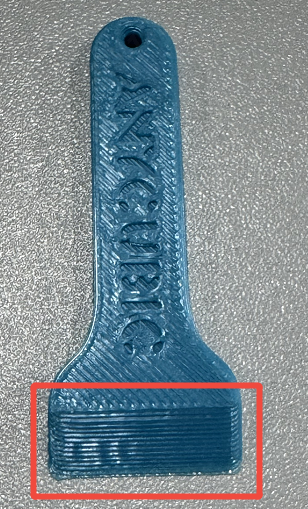
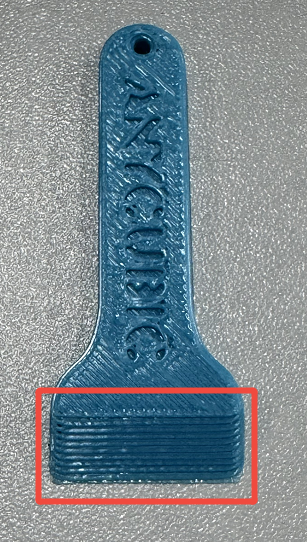
Layer height affects the surface precision of the model and the printing time. The height of each slice. The smaller the layer height, the higher the precision and the longer the printing time. The different layer heights of the example model and the printing time
|
0.08mm layer height Time 13min28s |
0.20mm layer height Time 8min37s |
0.28mm layer height Time 7min54s |
 |
 |
 |
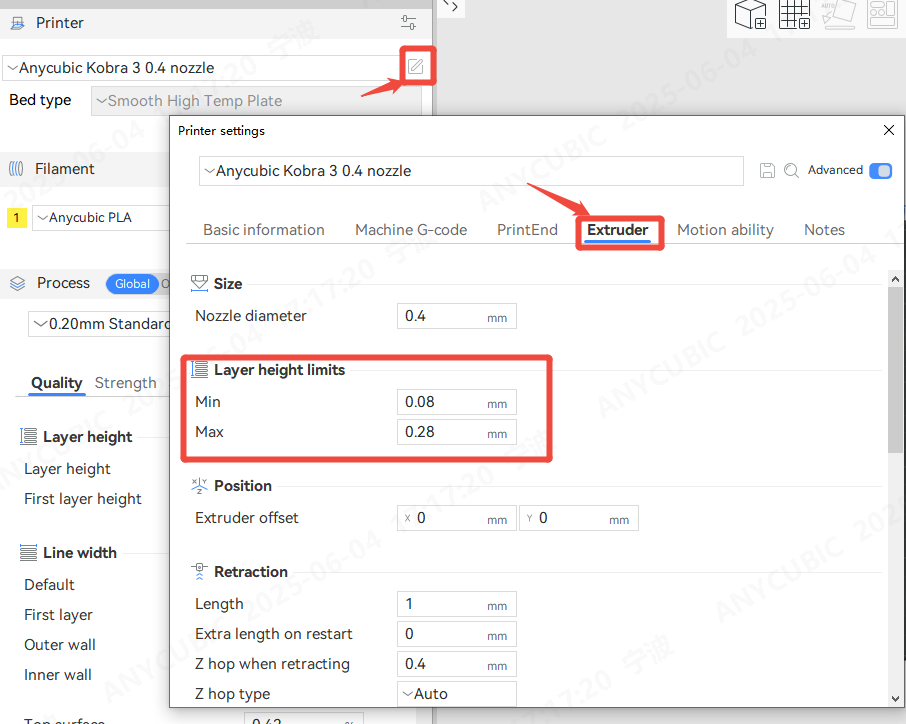
¶ Adjustable range of layer height
In order to obtain good printing quality, the layer height must be set within a reasonable range. If the layer height is set too high or too low, it may lead to poor printing results. Generally speaking, taking a 0.4mm diameter nozzle as an example, the recommended printing layer height range is 0.08mm to 0.28mm, which can achieve a good balance between quality and printing speed.
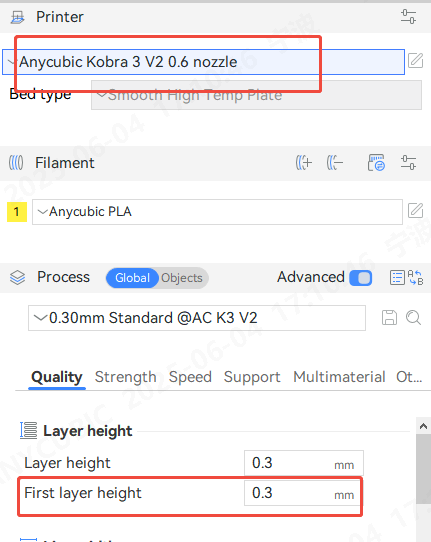
Different nozzle diameters will present different layer height ranges. You can check the range limit of layer height in Printer-Extruder
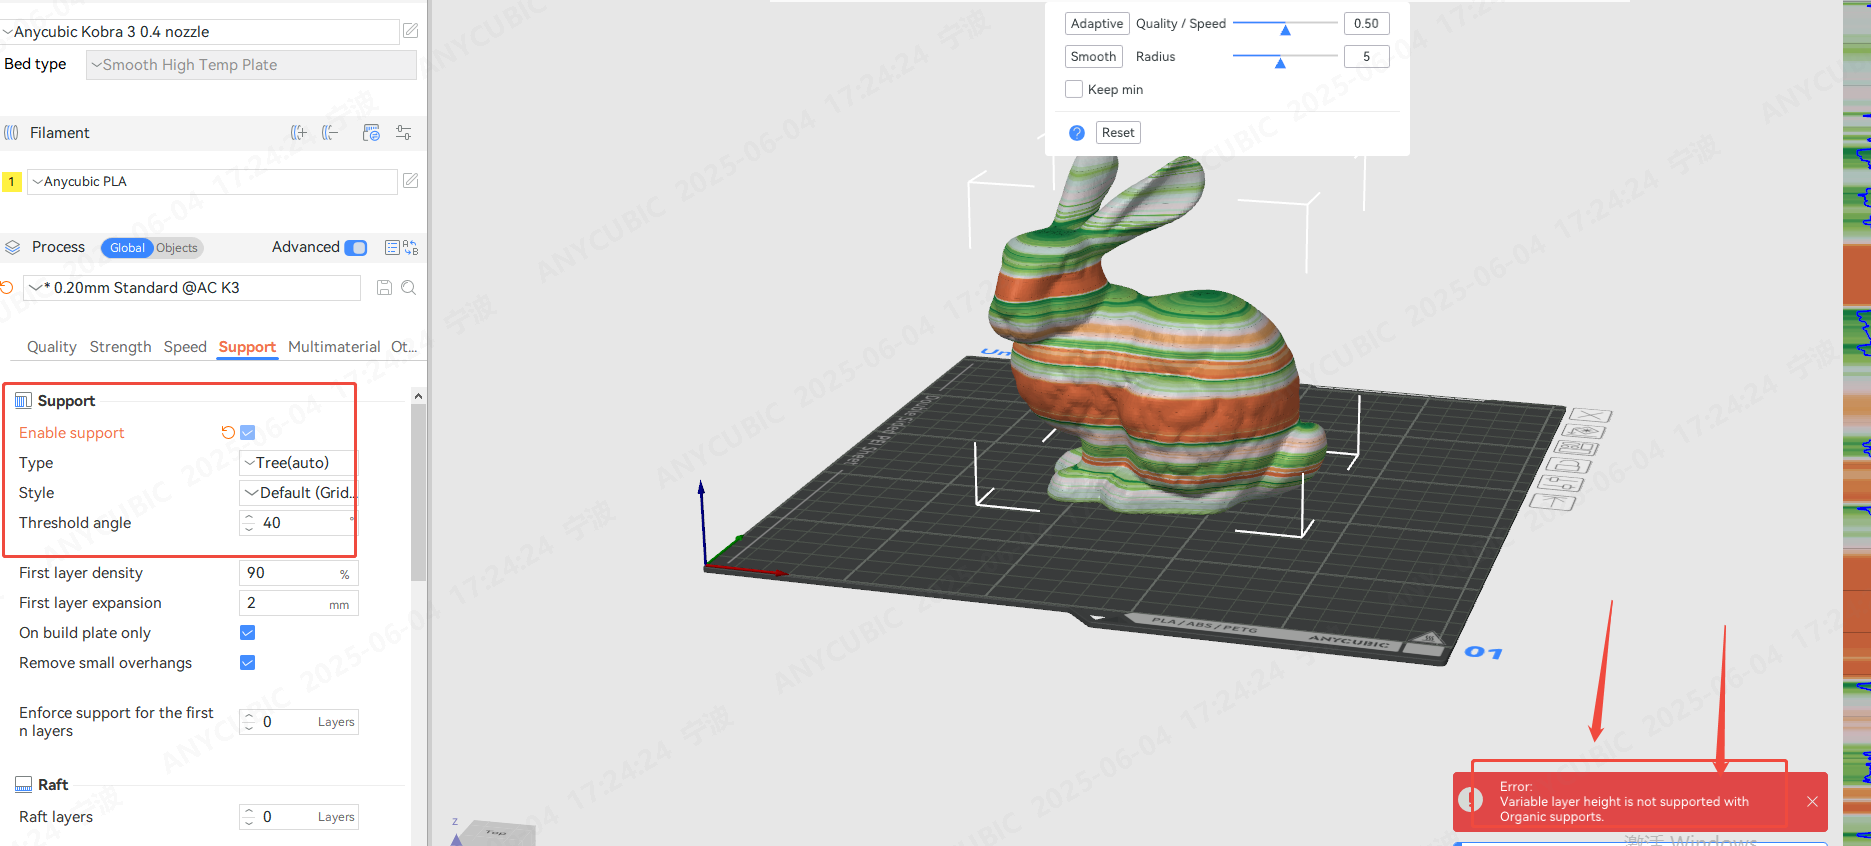
¶ Variable Layer Height
Printing with a lower layer height can make the model surface more delicate and smooth, but it will increase the time required for printing. For some specific models, we often only need to use a smaller layer height in the details, while other areas can maintain a higher printing efficiency. In this case, you can use the "Variable Layer Height" function to set different layer heights for different areas of the model, thereby improving the overall printing efficiency while ensuring quality.
Enable variable layer height
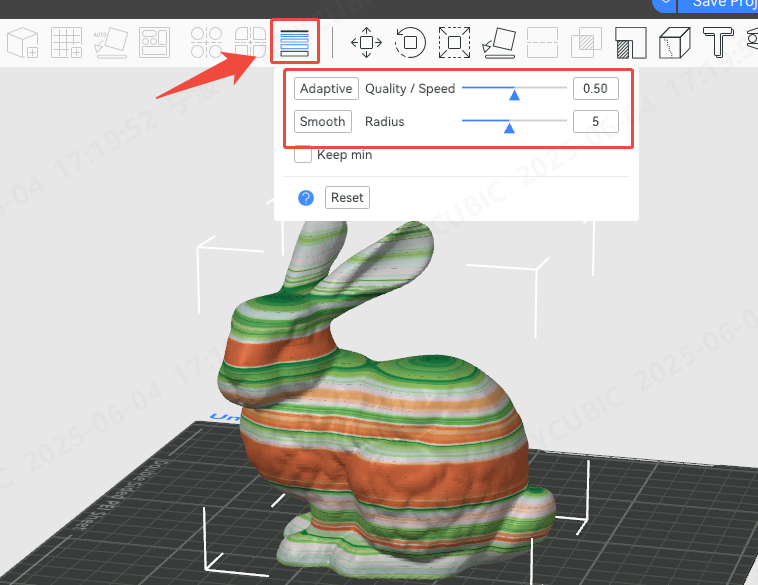
Detail/Speed: Click Adaptive, it will automatically adjust the layer height in different ranges according to your needs for printing details and speed. If you drag the small triangle close to "Detail", it means that the printed model is finer, and it will automatically set more parts of the model to lower layer height. If you drag the small triangle close to "Speed", it will tend to print faster, so it will automatically set more parts of the model to higher layer height
Smooth Mode: Click to make the transition between different layer heights smoother. The radius refers to the filter width of the Gaussian filter. A larger filter radius will make the curve smoother. You can click multiple times to get a smooth curve effect and a better transition between different layer heights
Keep Minimum: When using the smooth mode, the minimum layer height will not be changed, that is, the minimum layer height will remain the original value when smoothing the curve.
Model Example Comparison
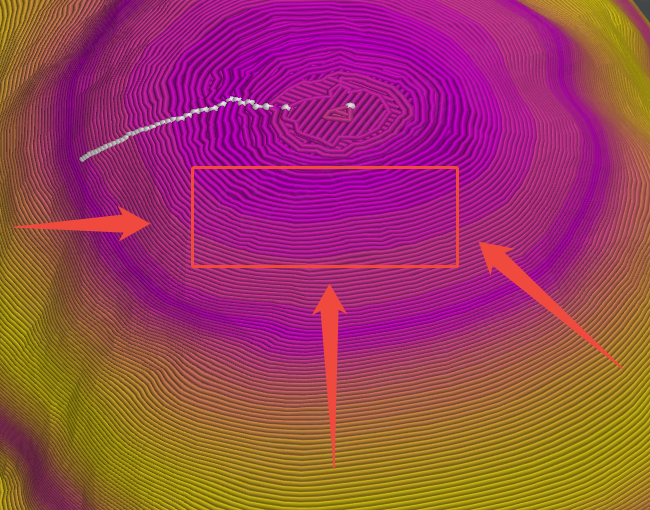
Enable variable layer height
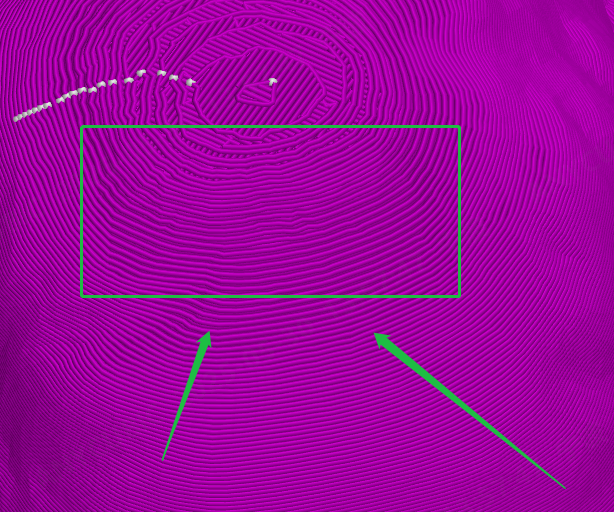
Variable layer height is not enabled
tip:
Variable layer height is also not supported with organic tree supports.
For detailed parameter settings of the support, you can refer to —— Support Settings