¶ 1. Tools:
S3.0 Allen key
S2.0 Allen key
¶ 2.Disassembly Steps:
¶ Step 1: Turn off the Device
Before replacing the mainboard, make sure to turn off the device and disconnect the power for safe operation.
¶ Step 2: Remove Accessories
Remove the cover, washing bucket, curing platform, gooseneck lamp, etc., from the device to facilitate disassembly.
¶ Step 3: Disassemble the Device Bottom Cover
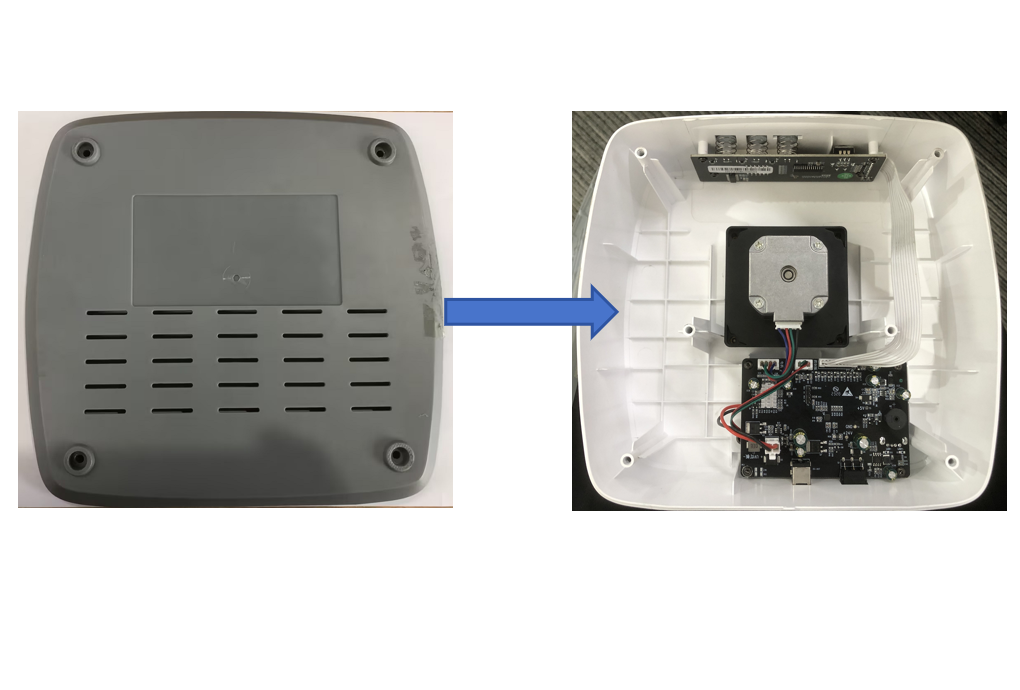
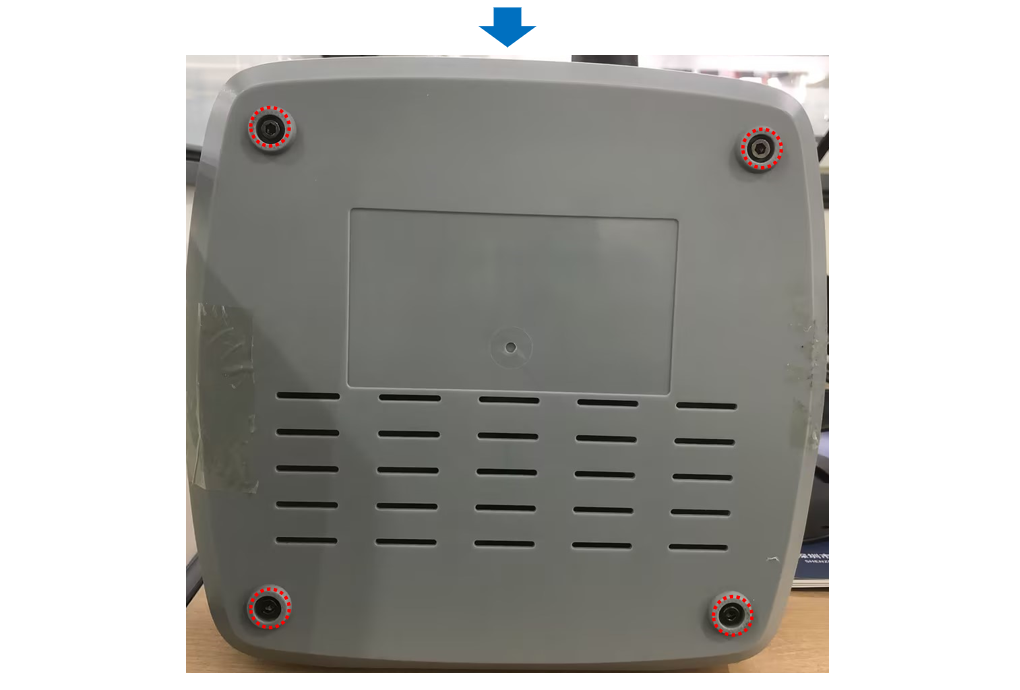
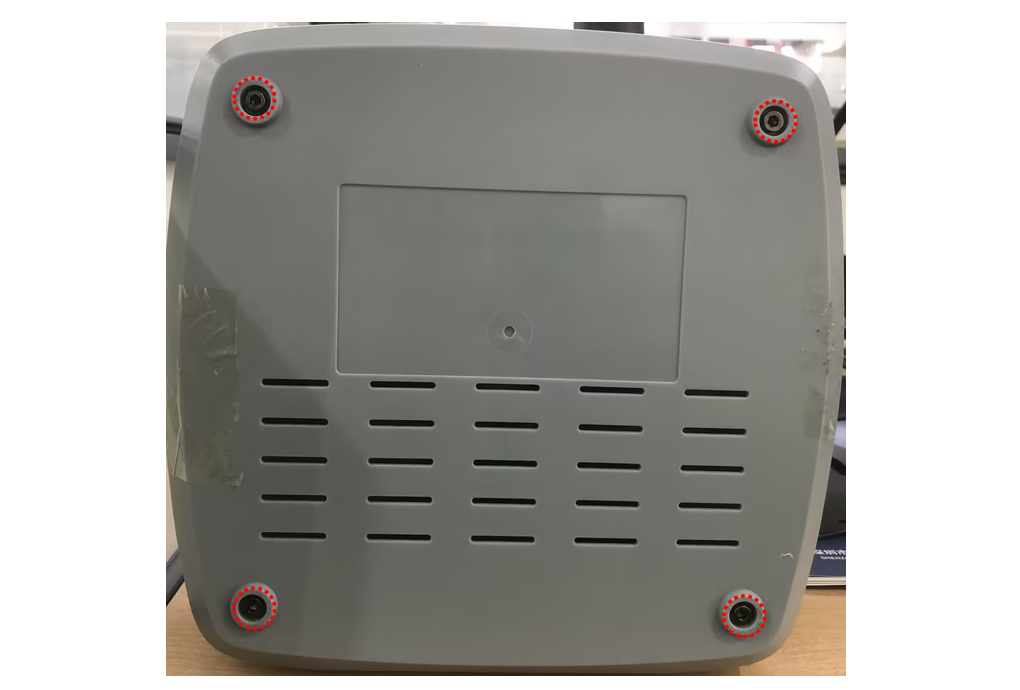
Lay the machine down with the bottom facing you. Use the S3.0 Allen key to remove the 4 self-tapping screws securing the bottom cover. Place the removed cover aside for later installation.
¶ Step 4: Disconnect Cables
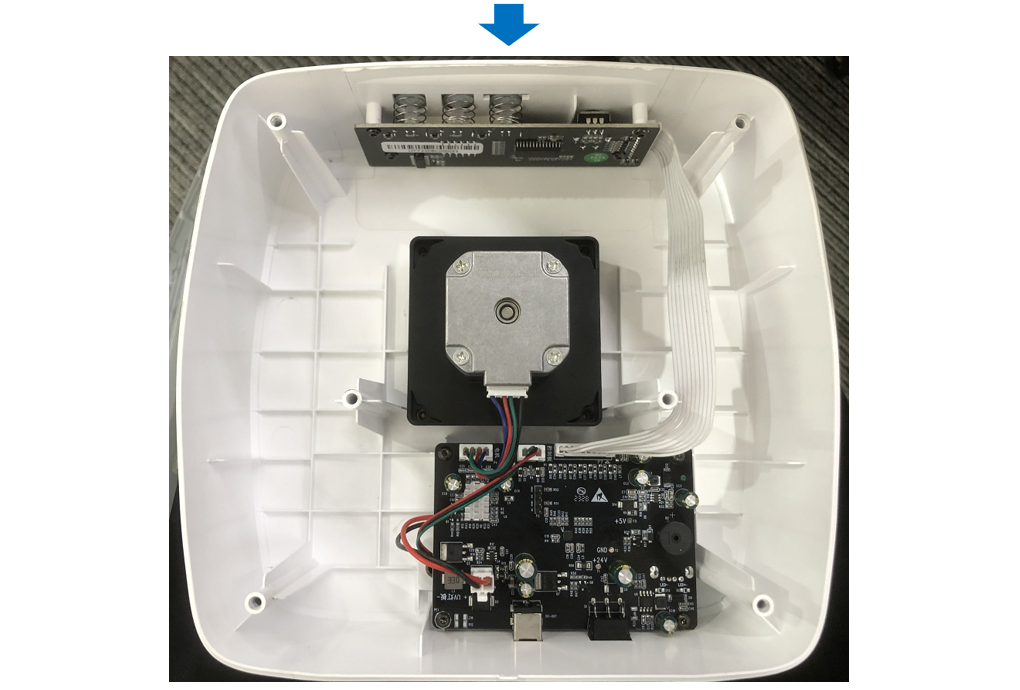
Please unplug all the cables from the mainboard. Note that if there is adhesive or hot melt glue securing the cables in their sockets, you should remove it before unplugging the cables.
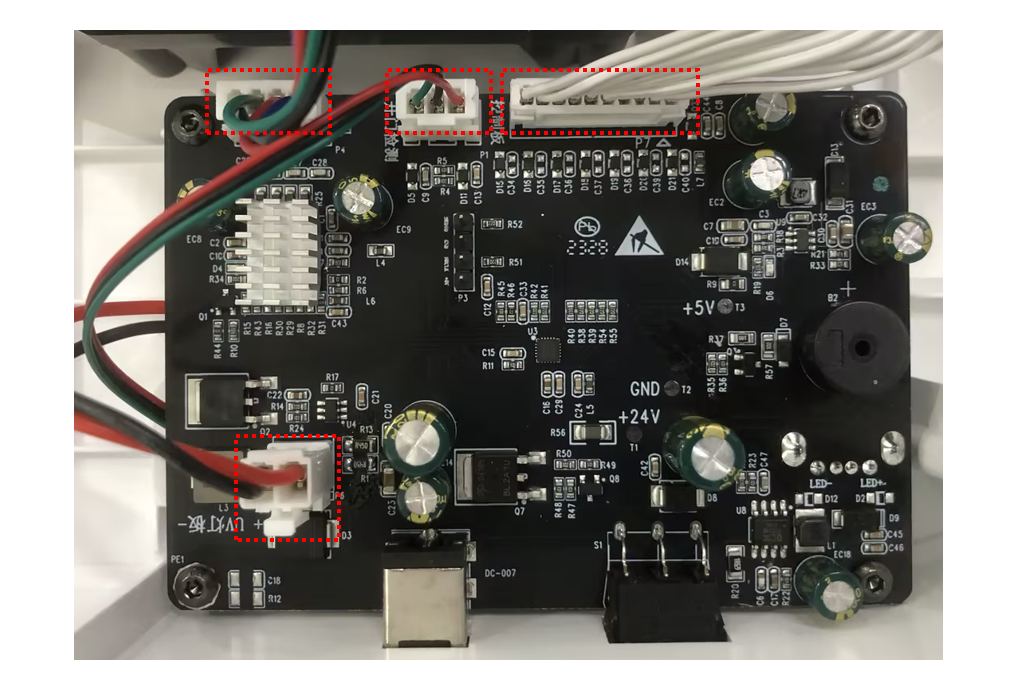
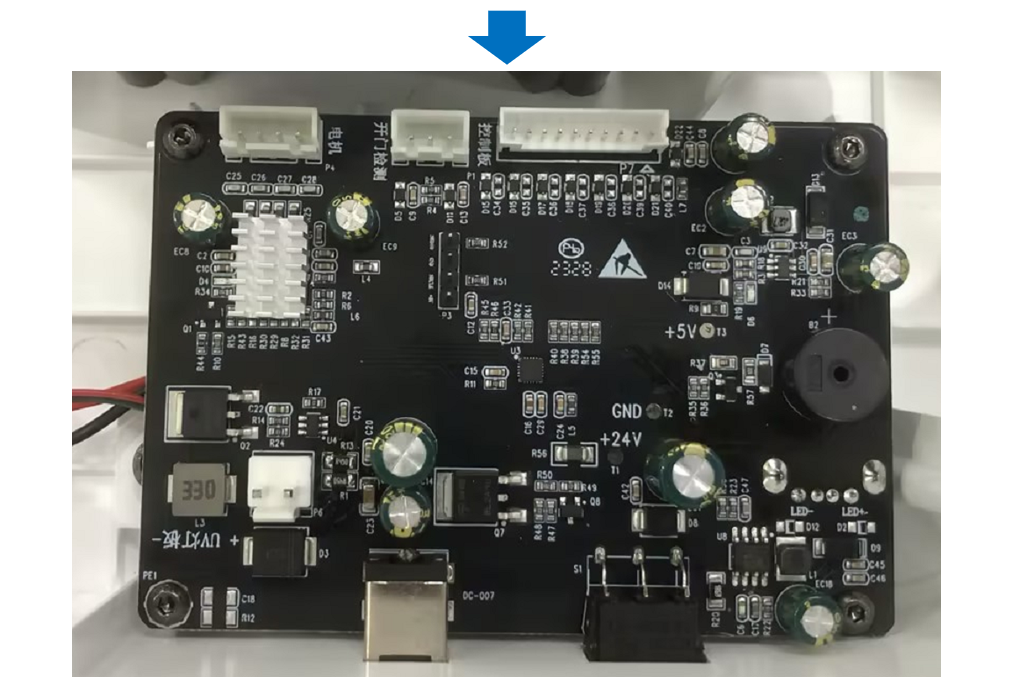
¶ Step 5: Remove the Mainboard
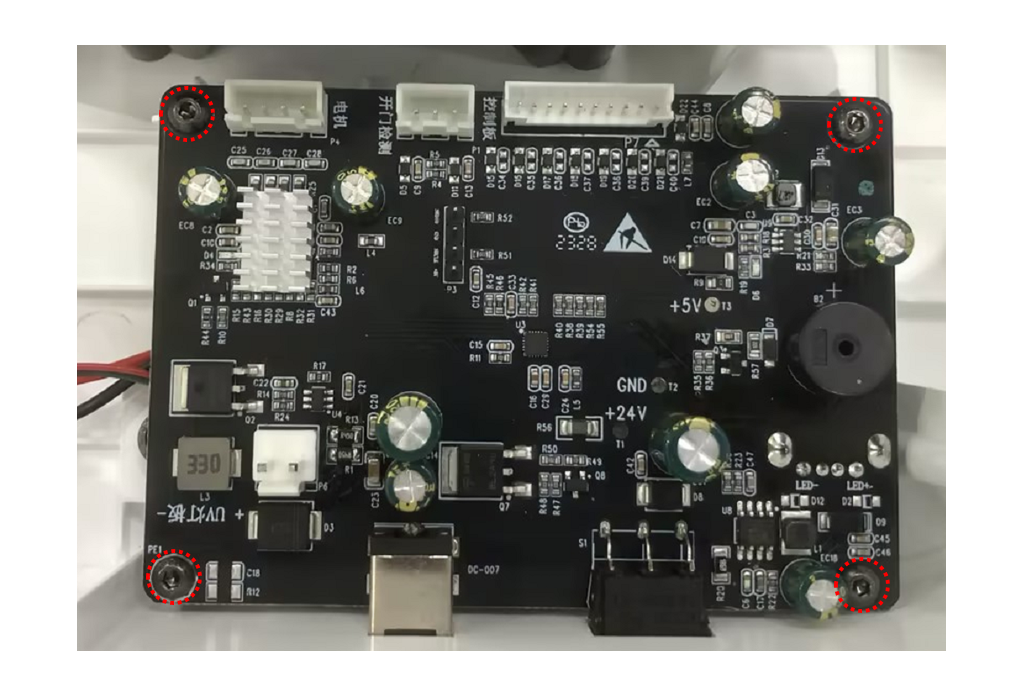
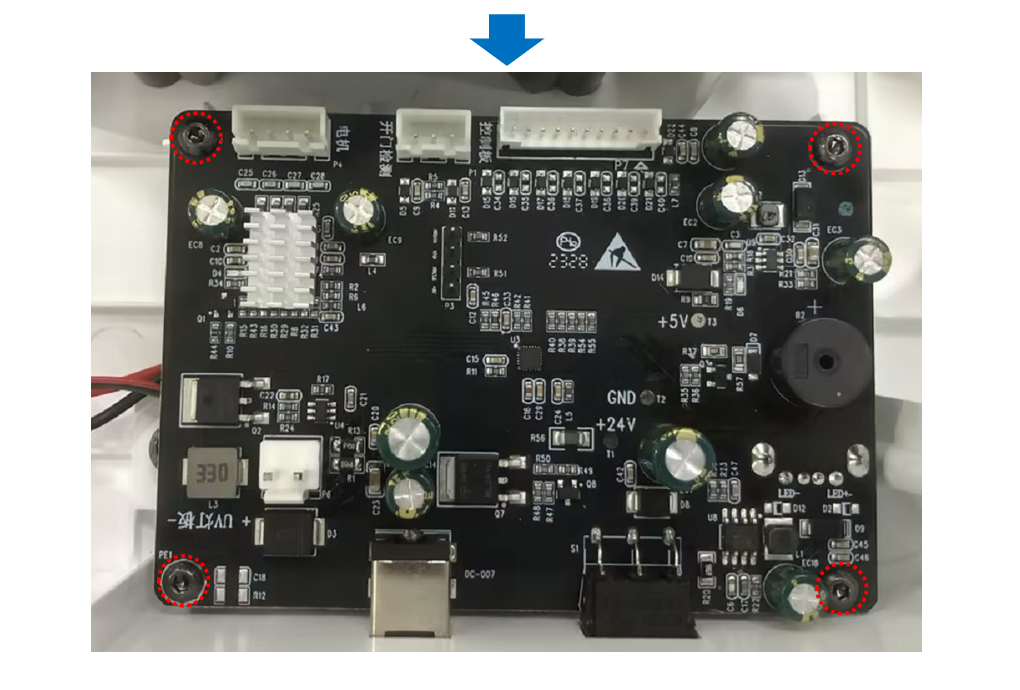
Use an M2.0 Allen key to remove the 4 self-tapping screws that secure the mainboard. Take out the mainboard. If you encounter any resistance when removing it, you could adjust the angle and try again.
¶ 3. Installation Steps:
¶ Step 1: Install the New Mainboard
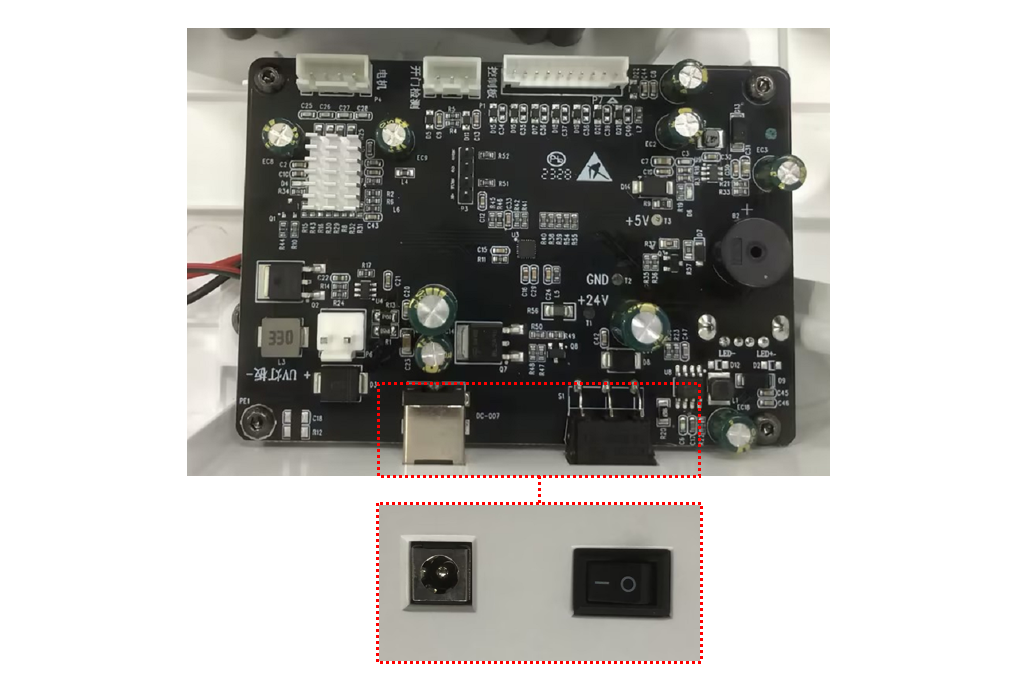
Take the new mainboard and align it with the screw holes while ensuring the power button is properly positioned. Use an M2.0 Allen key to tighten the 4 self-tapping screws to secure the mainboard in place.
¶ Step 2: Connect Cables
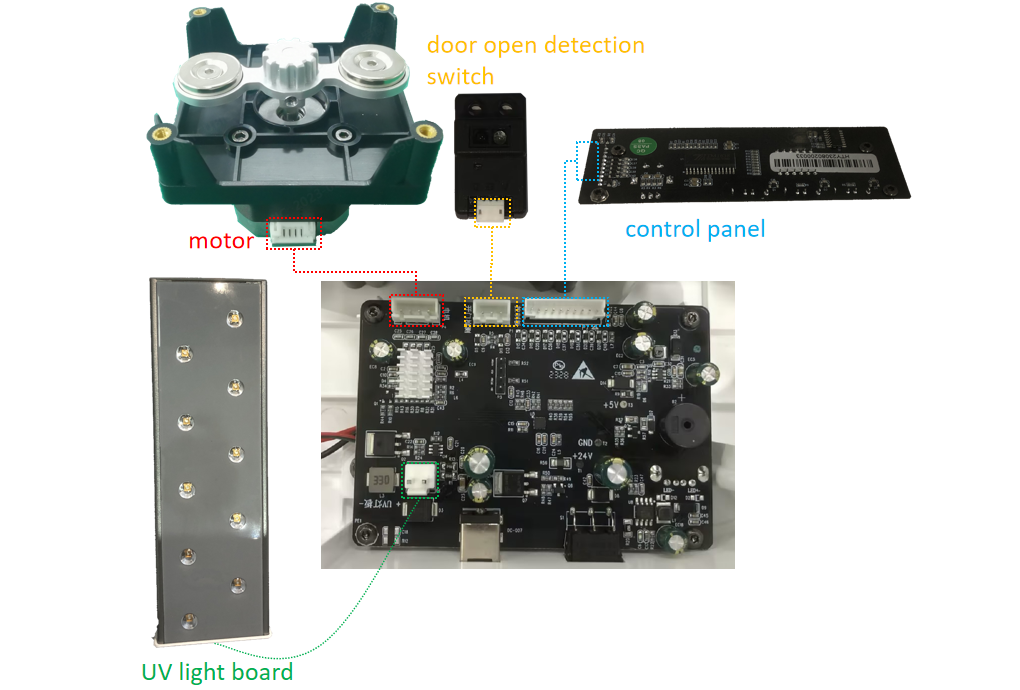
Refer to the diagram and plug in the motor cables, door open detection switch cable, control panel cable, and UV light board cable into their respective connectors.
¶ Step 3: Test the Functions
Connect the device to the power source and turn it on. Install the machine's curing table, then close the cover and test if the cleaning, curing, and gooseneck light functions are working properly.
If there are no issues, turn off the device and disconnect the power source for safety.
¶ Step 4: Install the Device Bottom Cover
Take the previously removed bottom cover and align it with the screw holes on the device, ensuring that the cover's cooling holes align with the mainboard's position. Use an M3.0 Allen key to tighten the 4 self-tapping screws to secure the bottom cover.
