¶ Step 1: Install the printer
When you receive your printer, please install the printer according to the unboxing video below, and then refer to the manual below to use the printer.
Photon Mono 4 Ultra-Unboxing Video
Photon Mono 4 Ultra-User Manual
¶ Step 2: Preparation before printing
Please check whether the ACF film is damaged or leaking resin. If so, you need to replace the ACF film in time to avoid damaging the machine. Then slowly pour the resin into the resin vat, and the resin cannot exceed the maximum scale line of the resin vat, and finally cover the transparent cover.
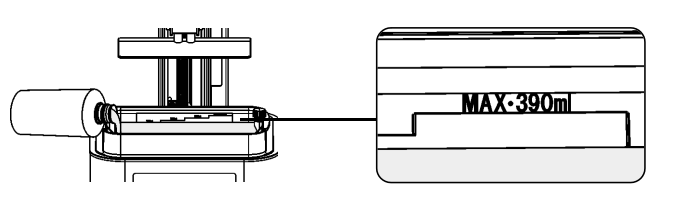
Note: Please place the printer on a stable workbench and use it in a light-proof and well-ventilated environment wearing gloves and masks. Please avoid environments containing ultraviolet light sources, such as fluorescent lamps, ultraviolet disinfection lamps, etc., to avoid abnormal curing affecting the printing effect.
¶ Step 3: Model slicing
First, please get the installation package of Anycubic Photon Workshop software from the USB flash drive or the page below and download it to the computer, then upload the model from the slicing software, and perform operations such as repairing, evacuating, punching and adding supports. For specific operations, please refer to the manual on the page.
Anycubic Photon Workshop software download and use
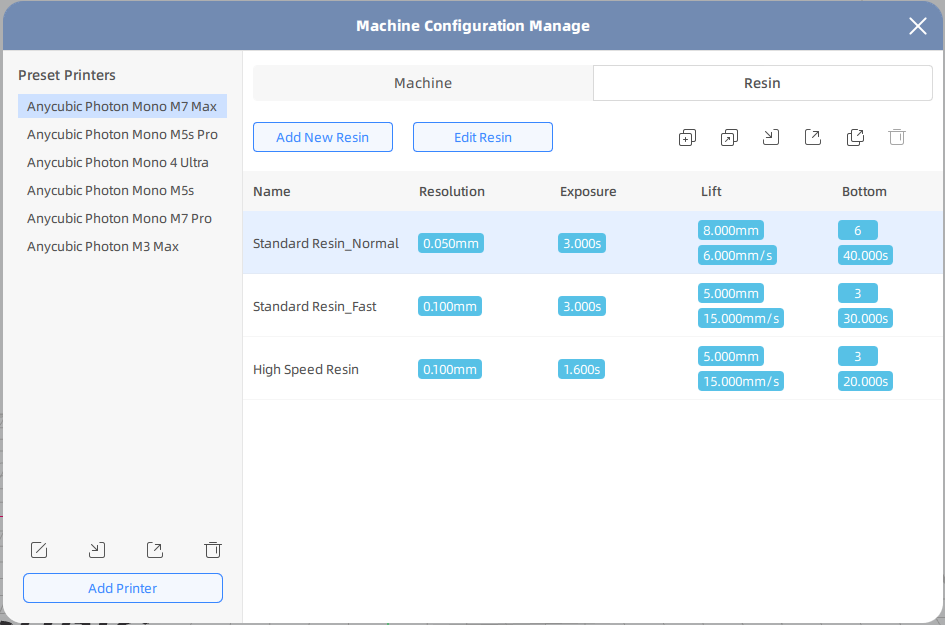
When setting parameters in the slicing software, this model provides three sets of parameters by default. You can select the parameter group that meets your needs in the resin options. After completing the settings, slice and save the slice file.
¶ Step 4: First Printing
¶ 1. Initiate printing from the 3D printer:
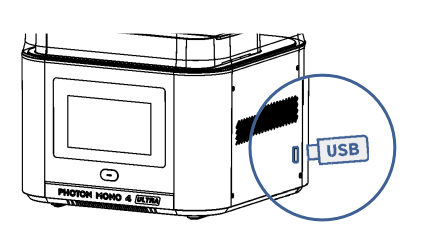
Please copy the slice file to the root directory of the USB flash drive to avoid abnormal file reading, and then insert it into the USB port on the right side of the printer.
Note: Please use the USB flash drive that comes with the machine. If you use other USB flash drives, you need to ensure that the capacity of the USB flash drive is within 64G and the format supports FAT/FAT32.
Please select the model file to be printed on the USB flash drive on the printer touch screen and enter the details page. Then set the print function, and return to the details page to start printing after the settings are completed.

¶ 2. Initiate printing from the slicing software:
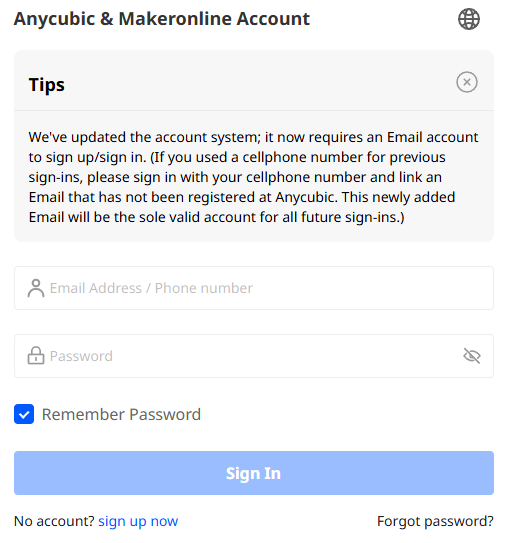
Log in to the account and bind the printer when opening the slicing software. After slicing the model from the slicing software, you can directly initiate printing from the slicing software.
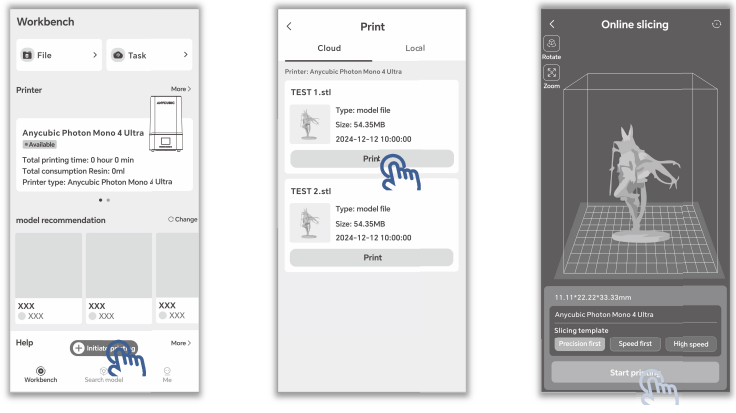
¶ 3. Start printing from the Anycubic APP:
Download the Anycubic APP and bind the printer according to the following document, and then start printing from the cloud of the Anycubic APP.
¶ Step 5: Printing Problems
¶ 1. Unable to recognize the USB flash drive:
If the USB flash drive does not show the label on the display screen after being inserted into the printer, it means that the printer has not recognized the USB flash drive. Please refer to the following document to check the USB flash drive.
Photon Mono 4 Ultra- The USB flash drive cannot be recognized
¶ 2. Model non-stick printing platform:
If the model solidifies onto the release film during printing and does not stick to the printing platform, please check the machine's exposure, slice parameters and ambient temperature according to the following document, level it and then print the local test model.
Photon Mono 4 Ultra- Model non-stick printing Platform
¶ 3. The device fails to connect to the network:
If your printer keeps failing to connect to WiFi, please try changing your phone's hotspot. If the mobile phone hotspot can be connected, please check the network according to the following document.
Photon Mono 4 Ultra- The device is unable to connect to the network
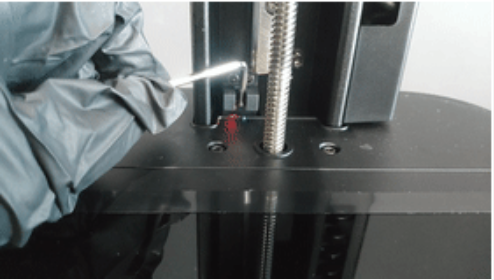
¶ 4. The Z-axis limit switch fails to work:
If the printer fails to stop when the Z-axis descends, it is because the limit switch is not functioning properly. Please refer to the following document to check the Z-axis limit switch.
Photon Mono 4 Ultra-The Z-axis limit switch does not work
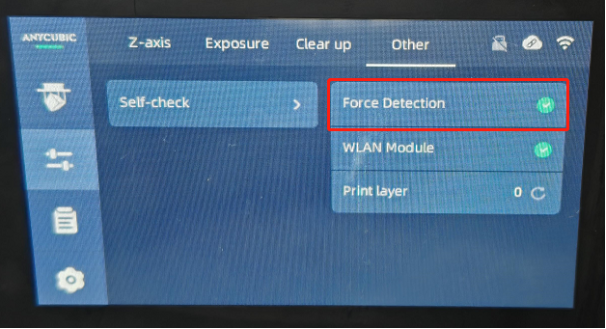
¶ 5. Handling methods for abnormal pop-ups:
When the remaining resin in the resin vat is insufficient, please replenish the resin or the release force is zero. If multiple error prompts have not been resolved, please refer to the following document to perform mechanical calibration.
Photon Mono 4 Ultra- Mechanical Calibration Guide